Fluffy, chewy, sourdough bagels, this recipe is the perfect base for any seeds or flavors you want to add or any sandwich you want to make!
How do I make sourdough starter?
Ok there are a bunch of different methods for making starter but I follow the Tartine Bakery method which is 1 part starter, 1 part water, 1 part flour (but a 50/50 split of whole wheat flour and bread or all purpose flour). Of course on the first day it will just be flour and water but after that, save about 40 g starter, feed with 40 g room temperature water, and 20 g whole wheat flour, 20 g bread flour. To get a strong starter, you need to feed it once a day everyday for at least 2 weeks.
Why do you boil bagels?
Bagels are boiled to give them their traditional chewy texture and golden brown skin. Traditionally they’re boiled in water and barley malt syrup but I didn’t have any so I just used honey and they still worked wonderfully!
Sourdough bagels vs regular bagels
Ever since Apollo Bagel opened in nyc I’ve been a sourdough bagel convert. Not only is sourdough better for your gut, I also just love the slight tang and flavor that goes along with any sourdough.
Sourdough Bagel timeline:
- Day before: Mid morning, feed starter as normal, but make a bit more, 50 g starter, 50 g water, 50 g total flour. Evening, prep the dough before bed, start an hour before you go to bed.
- Day of: The dough should be nice and jiggly in the morning, if not, wait a bit until it is. Then shape, rest, boil and bake.
Additional Recipes to try:
Tips for making Sourdough Bagels
- Sourdough is all about visual clues so know that it may take some practice and don’t be too hard on yourself.
- Be patient and know that if your room is warm the process will go faster and if it’s cold it will go slower but create more flavor.
- The dough will be stiff when kneading, don’t be tempted to add more water, just knead until it’s all mixed together. Trust the process.
- Wait until the dough is big and jiggly to divide and shape.
- Using a mix of rice flour and all purpose flour to dip the bottom of the bagels in before leaving them to proof will keep them from sticking.
- Be gentle but smooth when boiling the bagels. The flour mixture will keep them from sticking so just lift and lower the bagels into the boiling water.
- Make sure the oven is HOT before baking. This will give the bagels their golden brown color without drying them out.
- Bagels are best fresh out of the oven but a day or too old they’re still yummy, I just recommend baking them!
Ingredients
- Bread Flour: I use King Arthur’s bread flour and find it works great for sourdough starter and these bagels so I always have a bag on hand.
- Whole Wheat Flour: Whole wheat flour gives the bagels a bit more flavor and creates a delicious texture.
- Honey: Honey is added into both the dough of the bagels and the boiling water. You can also use barley malt syrup in the boiling water if you have it.
- Sourdough Starter: You do need a well established sourdough starter for this recipe. A lot of people have one going so if you don’t have your own you can often buy it from friends or local bakeries!
- Fine Sea Salt: A little fine sea salt enhances the flavors of the bagels.
- Water: Water is the liquid in the bagel dough and used to boil the bagels.
- Seeds: I love sesame seeds on these bagels but of course poppyseeds work great too!

How to make Sourdough Bagels
Morning Before
- Feed your starter with 50 grams of starter, 50 grams room temperature water, 25 grams bread flour, and 25 grams whole wheat flour.
- Lightly cover, not airtight and leave to sit until the evening, it should get big and bubbly.
Night Before
- Into a big mixing bowl add in 100 grams of the bubbly starter, 270 grams room temperature water, and 30 grams of honey. Stir to combine.
- Add in 400 grams bread flour and 100 grams whole wheat flour plus 7 grams fine sea salt.
- Use your hand to stir and knead the dough until all of the flour has been hydrated aka no dry bits remain.
- Cover the bowl with plastic or a lid and leave it to sit for 20 minutes.
- After 20 minutes, uncover and knead again for 5 minutes until relatively smooth. Place the dough back in the bowl and recover. Leave to sit out on the counter overnight.
Morning of – Shaping
- Check the dough, it should have grown in size and do a little wobble when you wiggle the bowl. It’s not going to look huge and puffy like a yeasted dough but should be domed on top. If not, wait until it is.
- Line a baking sheet with a sheet of parchment paper. On a plate mix together 50 grams of all purpose or bread flour and 50 grams rice flour (if you have it, if not just use all regular flour).
- Once ready, divide the dough into 6 portions. I like to use a bench scraper to divide it. You can measure the portions or just eye ball it. Don’t add too much if any extra flour when shaping.
- Working with one portion of dough at a time, flatten the dough into a round disk. Going in a clockwise direction, bring the edges of the disk into the center of the dough until you have a little ball.
- Flip the disk over and place your dominant hand over the ball. Use the heal of your hand and your fingers as a claw to rotate the dough on the counter to seal the bottom. The heal of your hand will create a bit of pressure to create tension and your fingers will help rotate the dough.
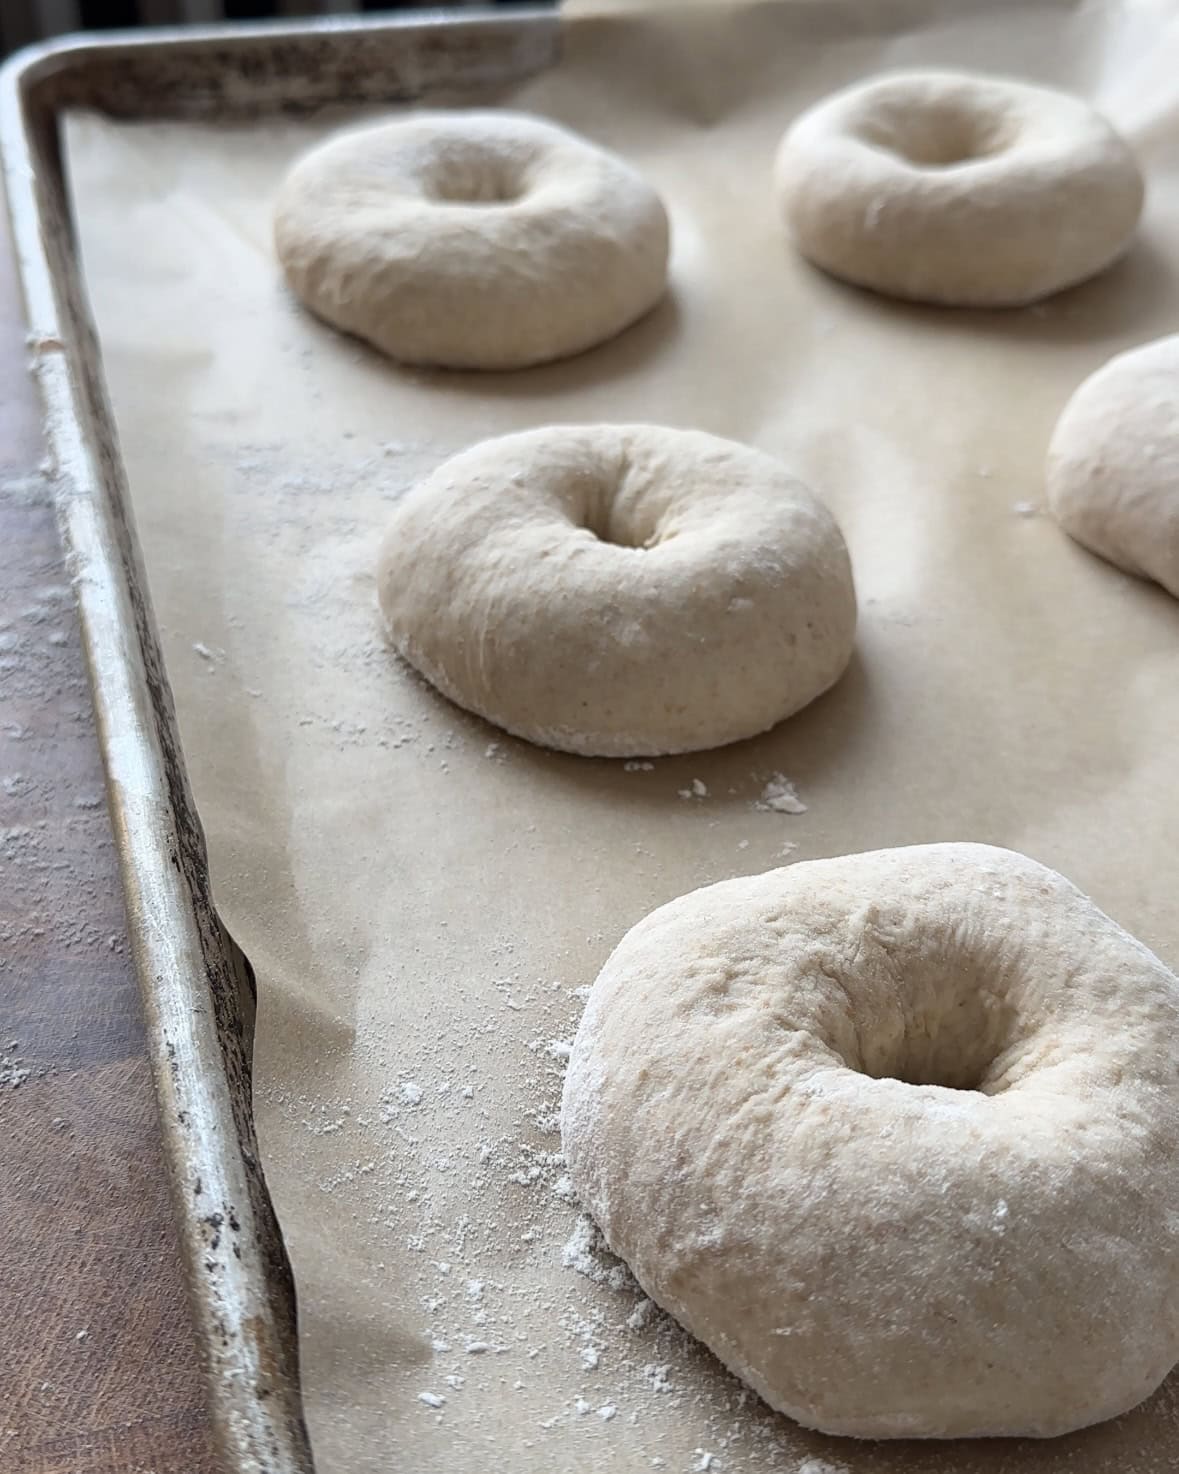
- Once all the dough portions have become balls, go back to the first one. Poke a hole into the center of the ball – press your thumb through the ball from the top through to the bottom. Gently spread the opening with your fingers with the dough between the palm of your hand and fingers. Make the whole slightly bigger than you think it should be.
- Lay the bagel onto the plate with flour from before and then transfer to the lined baking sheet. Continue with the dough portions until all are shaped.
- Lightly cover the bagels with plastic wrap so they don’t dry out.
Morning of – Boil and Bake
- Leave the bagels to get puffy, they won’t double in size but they should have a nice puff to them.
- Place a rack in the center of the oven and preheat to 425 F.
- Fill a large pot or dutch oven 2/3 of the way with water and a couple tablespoons of honey. Once the bagels are puffy and the oven is hot, bring the water to a boil.
- I do one bagel at a time but you can do 2 if you feel comfortable. Turn the water down to a strong simmer and gently lower the bagel in. Boil for 30 seconds then use a fork or metal spider to flip the bagel and boil for another 30 seconds.
- Use the metal spider to lift the bagel out of the water and place it back on the parchment lined baking sheet.
- Continue boiling the rest of the bagels.
- If you want to seed the bagels, now is the time to roll or sprinkle them with seeds or salt. If fully coating with seeds be careful to only touch the center hole of the bagel otherwise your hands will wipe off the seeds.
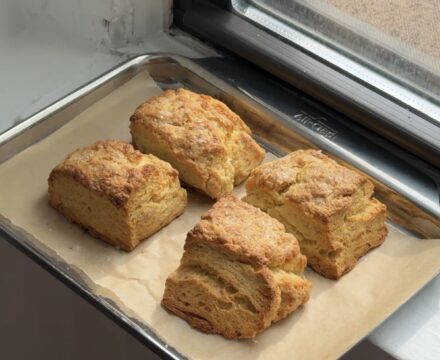
- Once boiled and seeded, place the sheet pan of bagels into the hot oven. Bake for 15 minutes then rotate 180 degrees and bake for another 10 minutes until lightly golden brown.
- Leave to cool for 10 minutes, then slice and enjoy!


Sourdough Bagels
Ingredients
Sourdough Starter Feed
- 50 grams sourdough starter
- 50 grams water
- 25 grams bread flour
- 25 grams whole wheat flour
Bagel Dough
- 100 grams sourdough starter
- 270 grams water
- 30 grams honey
- 400 grams bread flour
- 100 grams whole wheat flour
- 7 grams fine sea salt
Boil
- 6 cups water
- 2 tabelspoons honey
Instructions
Morning Before
- Feed your starter with 50 grams of starter, 50 grams room temperature water, 25 grams bread flour, and 25 grams whole wheat flour.
- Lightly cover, not airtight and leave to sit until the evening, it should get big and bubbly.
Night Before
- Into a big mixing bowl add in 100 grams of the bubbly starter, 270 grams room temperature water, and 30 grams of honey. Stir to combine.
- Add in 400 grams bread flour and 100 grams whole wheat flour plus 7 grams fine sea salt.
- Use your hand to stir and knead the dough until all of the flour has been hydrated aka no dry bits remain.
- Cover the bowl with plastic or a lid and leave it to sit for 20 minutes.
- After 20 minutes, uncover and knead again for 5 minutes until relatively smooth. Place the dough back in the bowl and recover. Leave to sit out on the counter overnight.
Morning Of – Shaping
- Check the dough, it should have grown in size and do a little wobble when you wiggle the bowl. It's not going to look huge and puffy like a yeasted dough but should be domed on top. If not, wait until it is.
- Line a baking sheet with a sheet of parchment paper. On a plate mix together 50 grams of all purpose or bread flour and 50 grams rice flour (if you have it, if not just use all regular flour).
- Once ready, divide the dough into 6 portions. I like to use a bench scraper to divide it. You can measure the portions or just eye ball it. Don't add too much if any extra flour when shaping.
- Working with one portion of dough at a time, flatten the dough into a round disk. Going in a clockwise direction, bring the edges of the disk into the center of the dough until you have a little ball.
- Flip the disk over and place your dominant hand over the ball. Use the heal of your hand and your fingers as a claw to rotate the dough on the counter to seal the bottom. The heal of your hand will create a bit of pressure to create tension and your fingers will help rotate the dough.
- Once all the dough portions have become balls, go back to the first one. Poke a hole into the center of the ball – press your thumb through the ball from the top through to the bottom. Gently spread the opening with your fingers with the dough between the palm of your hand and fingers. Make the whole slightly bigger than you think it should be.
- Lay the bagel onto the plate with flour from before and then transfer to the lined baking sheet. Continue with the dough portions until all are shaped.
- Lightly cover the bagels with plastic wrap so they don't dry out.
Morning Of – Boil and Bake
- Leave the bagels to get puffy, they won't double in size but they should have a nice puff to them.
- Place a rack in the center of the oven and preheat to 425 F.
- Fill a large pot or dutch oven 2/3 of the way with water and a couple tablespoons of honey. Once the bagels are puffy and the oven is hot, bring the water to a boil.
- I do one bagel at a time but you can do 2 if you feel comfortable. Turn the water down to a strong simmer and gently lower the bagel in. Boil for 30 seconds then use a fork or metal spider to flip the bagel and boil for another 30 seconds.
- Use the metal spider to lift the bagel out of the water and place it back on the parchment lined baking sheet.
- Continue boiling the rest of the bagels.
- If you want to seed the bagels, now is the time to roll or sprinkle them with seeds or salt. If fully coating with seeds be careful to only touch the center hole of the bagel otherwise your hands will wipe off the seeds.
- Once boiled and seeded, place the sheet pan of bagels into the hot oven. Bake for 15 minutes then rotate 180 degrees and bake for another 10 minutes until lightly golden brown.
- Leave to cool for 10 minutes, then slice and enjoy!
Notes
- Sourdough is all about visual clues so know that it may take some practice and don’t be too hard on yourself.
- Be patient and know that if your room is warm the process will go faster and if it’s cold it will go slower but create more flavor.
- The dough will be stiff when kneading, don’t be tempted to add more water, just knead until it’s all mixed together. Trust the process.
- Wait until the dough is big and jiggly to divide and shape.
- Using a mix of rice flour and all purpose flour to dip the bottom of the bagels in before leaving them to proof will keep them from sticking.
- Be gentle but smooth when boiling the bagels. The flour mixture will keep them from sticking so just lift and lower the bagels into the boiling water.
- Make sure the oven is HOT before baking. This will give the bagels their golden brown color without drying them out.
- Bagels are best fresh out of the oven but a day or too old they’re still yummy, I just recommend baking them!
Nutrition
This page may contain affiliate links. This means that if you click on one of the product links above and complete a purchase, I’ll receive a small commission at no extra cost to you. I will never place a link nor make a recommendation on a product or service that I don’t love or use personally. Read our privacy policy here. Thank you for supporting Red Currant Bakery.


Is it possible to freeze them after baking?
Yes!
Audrey has a knack for writing out perfect instructions and making baking fun again. Haven’t tried a recipe of hers that didn’t absolutely hit, including these bagels.
Just took the bagels out of the oven and this is the best bagel recipe I’ve ever made!!
Thank you!!!