Inspired by a traditional Swedish cream bun, this Raspberry Semla Cake is essentially a giant semla filled with raspberry jam and vanilla pastry cream, and it is the perfect non-traditional February birthday cake.

Can this cake be made in advance?
This cake is best served the day it is stacked. Brioche tends to dry out and become stale if it is refrigerated therefore I recommend baking the brioche morning of or the night before and then simply leave it at room temperature until ready to stack. That being said the fillings can all be prepped the day before and stored in the fridge.
Is brioche a cake?
Yes! The last time I made a brioche cake there was a lot of controversy over whether or not it was a “cake”. I understand most of us think of a cake as something that has been leavened with baking soda, baking powder or the lift of whipped egg whites. However, especially in Europe there are quite a few cakes that use yeast including a tarte tropézienne, bienenstich, and gugelhupf.
How to get a super fluffy, soft, brioche?
To create a brioche soft enough to use as a cake, you want it to include egg, butter, and milk and give it time to get nice and puffy before baking. I also recommend baking a little hotter and shorter than normal which allows the brioche to puff nicely!
What is a Semla?
A semla is a traditional Swedish cream bun made from a cardamom spiced brioche usually filled with an almond paste, whipped cream, and finished off with a dusting of powdered sugar.
You may also like…
Tips for making a Brioche Cake
- After making this cake and writing the recipe, I have so many more ideas but one I would highly recommend is also adding in a traditional almond paste that is in Semlas along with the raspberry jam and cream. Alternatively a lemon curd instead of the raspberry jam would be delicious.
- Make sure the egg and butter for the dough are both at room temperature and the salt doesn’t directly touch the yeast.
- The brioche can be made the night before but is best made day of. That being said the fillings can be prepped the day before and stored in the fridge.
- Adding the butter in after the dough comes together may seem counter intuitive but it allows the dough to create a bit of extra strength!
- When making yeasted dough, ensure that you allow your mixer to fully knead the dough, until it forms a smooth ball and the sides of the bowl are cleaned. This will happen twice while kneading the dough, once before the butter is added and once after.
- Take your time to shape this bun, because however you shape it is how it will look in the end. That being said you can totally get creative with this, you could make a wreath of 8 or 12 smaller buns and let them proof next to one another!
- Make sure to bake until fully golden brown on top.
- For the raspberry jam and fresh raspberries you can absolutely swap them out for another fruit like blueberries! I also think a combo of raspberry jam and the traditional almond paste would be so delicious but I wanted to keep it nut free.
- If you like a more traditional layered cake, this is last year’s February birthday cake.
Ingredients
- Orange zest: Orange zest is used in the dough and adds so much flavor so don’t skip it!
- All Purpose Flour: Any all purpose flour will work for this! I have not yet tried any other flours with this recipe.
- Sugar: This recipe uses granulated sugar in the dough, the jam, and the pastry cream. There is also a dusting of powdered sugar on top of the cake.
- Yeast: In this recipe, instant yeast is used. If you are using active dry, simply whisk it in with the warm milk and let it sit for 10 minutes first and then add in the remaining ingredients.
- Salt: Fine sea salt is used to balance out the sweetness and enhance the flavors of the dough and the cream filling.
- Milk: Whole milk is used for the dough and the pastry cream. I believe non-dairy milks will work too but I haven’t tested it.
- Eggs: I use standard large eggs from the store. There is one whole egg in the dough as well as egg yolks in the pastry cream.
- Butter: Butter is used in the dough to add moisture and richness into the brioche. I recommend Kerrygold salted butter for this.
- Vanilla: A little vanilla bean paste is used in the dough and the pastry cream but just vanilla extract will work too!
- Raspberries: Frozen raspberries are used for the jam layer in this cake and fresh raspberries are folded into the whipped pastry cream. Fresh raspberries can also be used for the jam layer.
- Heavy Cream: Heavy cream is whipped into the pastry cream and whipped to create the whipped cream layer.

How to make a Raspberry Semla Cake
Orange Vanilla Brioche
- In the bowl of a stand mixer, add in the sugar and the zest of an orange. Rub the zest into the sugar with your fingers until combined and fragrant.
- Add in the flour and yeast, and whisk to combine.
- Sprinkle in the salt. Then add in the egg, warm milk, and vanilla bean paste.
- Use a dough hook to knead everything together on medium low speed for 15 minutes until the dough has smooth edges and the bowl is clean.
- Add half of the butter in and knead again until incorporated (about 5 minutes). Add in the second half of the butter and knead once more until smooth. The dough should pass the window pane test *see notes section for more info.
- Shape the dough into a ball and place it back in the mixing bowl. Cover with a lid or plastic wrap and set somewhere warm to double in size (30-45 minutes).
- Preheat the oven to 375 F and place a rack just below the center in the oven.
Shape and bake the brioche
- Once the dough is puffy, knock the air out and pat it into a round disk. Working in a clockwise circle, bring the edges of the dough into the center to create a round ball. Do not use any extra flour when doing this.
- Flip the dough ball over so the seam is on the counter top. Use the outer edges of your hands to cup around the base of the ball. Gently pull and turn the ball of dough towards yourself, keeping the seam side on the counter, until the surface of the dough is taught.
- Using the same edges of your hands, rotate the dough in a clockwise circle on the work surface to twist and seal the open seam of the dough.
- Line a baking sheet with a piece of parchment paper and place the dough, seam side down onto the parchment. Place a large mixing bowl, upside down over the dough and set somewhere to rise for 30-40 minutes until quite puffy and jiggly.
- The dough should not spring back if poked, if it does, leave it to proof a bit longer.
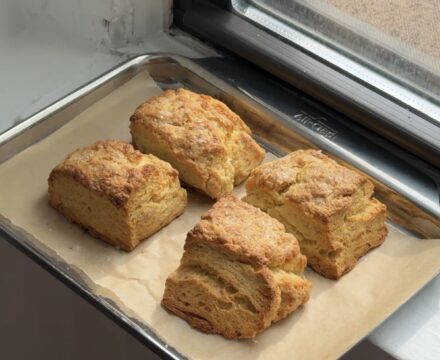
- Once the dough is puffy and the oven is hot, bake the brioche for 15 minutes. Then rotate 180 degrees and bake for another 10-12 minutes until golden brown.
- Once baked, remove the pan from the oven. Leave to cool on a wire rack for at least 30 minutes.
- Remove the cake from the pan and allow it to cool completely.
Vanilla Bean Pastry Cream
- In a large pot, whisk together the corn starch, salt, and sugar.
- Pour in the milk and 100 grams heavy cream and whisk to combine. Add in the egg yolks and vanilla bean paste, and whisk once more.
- Place the pot over medium low heat and whisk constantly scraping the bottom and edges of the pot. It will feel like it’s taking a while but all of a sudden it’ll get really thick so don’t stop whisking.
- Once thick, remove the pot from the heat and pour through a fine mesh sieve into a heat safe mixing bowl.
- Cover the surface with a layer of plastic wrap to prevent a skin from forming.
- To cool it down faster you can always spread it on a quarter sized baking sheet and cover the surface with plastic wrap.
- Once cooled to room temperature, transfer the cream to the fridge and let it chill completely – this one needs to be fridge cold!
Raspberry Jam
- Add the rinsed raspberries, sugar, vanilla, and salt into a small pot.
- Place over medium low heat and cook until the mixture begins to bubble. Stir the raspberries and let them continue to cook over medium low heat until they’ve reduced and thickened slightly.
- Remove the pot from the heat and pour the jam into a shallow heat safe dish to cool off.
Whipped Cream
- Once all of the elements have cooled off and you’re ready to assemble, make the whipped cream.
- Pour the cold heavy cream into a large mixing bowl. Whip on medium high speed until stiff peaks form. Be careful not to over whip the cream as you’ll end up making butter.
- If you aren’t sure if you should keep whipping, set it aside while you assemble the rest of the cake and you can always whip more later.
Assemble
- Once all of the elements have cooled, it’s time to assemble. I recommend doing this about 45 minutes to an hour before you plan to serve.
- Use a serrated knife to cut a small circle off the top of the brioche.
- Scoop out most of the brioche, leave about an inch of thickness at the bottom and about the same on the sides.
- Spoon the raspberry jam into the bottom of the brioche and spread it into an even layer.
- Whip the chilled pastry cream until smooth. Pour in the remaining 150 grams of heavy cream and whip again until stiff. Fold in the rinsed fresh raspberries.
- Scoop the cream filling over top of the raspberry jam, press down as needed to fit it all in the brioche.
- Pipe or scoop the cream around the edge of the opening. I used a large basket weave piping tip to pipe two layers of ruffles around the opening and covering the top of the pastry cream.
- Place the top layer of brioche back over the whipped cream. Dust the top with powdered sugar.
- Allow the cake to set for about 30 minutes to allow everything to settle. Because of the cream in this cake it technically shouldn’t sit out for more than two hours. However, it also won’t collapse if it does.
- Leftovers should be stored in an airtight container in the fridge.


Raspberry Semla Cake
Ingredients
Vanilla Orange Brioche
- 50 grams granulated sugar
- 1 orange zested
- 350 grams all purpose flour
- 10 grams instant yeast
- 40 grams salted butter soft
- 1 egg large, room temperature
- 180 grams whole milk lukewarm
- 1/2 teaspoon fine sea salt
- 1 teaspoon vanilla bean paste
Vanilla Bean Pastry Cream
- 100 grams granulated sugar
- 45 grams corn starch
- 1/2 teaspoon fine sea salt
- 400 grams whole milk
- 250 grams heavy cream *divided
- 3 egg yolks
- 1 teaspoon vanilla bean paste
- 340 grams fresh raspberries
Raspberry Jam
- 400 grams frozen raspberries fresh work too!
- 50 grams granulated sugar
- 1/4 teaspoon fine sea salt
- 1 teaspoon vanilla extract
Whipped Cream
- 250 grams heavy whipping cream cold
Instructions
Orange Vanilla Brioche
- In the bowl of a stand mixer, add in the sugar and the zest of an orange. Rub the zest into the sugar with your fingers until combined and fragrant.
- Add in the flour and yeast, and whisk to combine.
- Sprinkle in the salt. Then add in the egg, warm milk, and vanilla bean paste.
- Use a dough hook to knead everything together on medium low speed for 15 minutes until the dough has smooth edges and the bowl is clean.
- Add half of the butter in and knead again until incorporated (about 5 minutes). Add in the second half of the butter and knead once more until smooth. The dough should pass the window pane test *see notes section for more info.
- Shape the dough into a ball and place it back in the mixing bowl. Cover with a lid or plastic wrap and set somewhere warm to double in size (30-45 minutes).
- Preheat the oven to 375 F and place a rack just below the center in the oven.
Shape and Bake the Brioche
- Once the dough is puffy, knock the air out and pat it into a round disk. Working in a clockwise circle, bring the edges of the dough into the center to create a round ball. Do not use any extra flour when doing this.
- Flip the dough ball over so the seam is on the counter top. Use the outer edges of your hands to cup around the base of the ball. Gently pull and turn the ball of dough towards yourself, keeping the seam side on the counter, until the surface of the dough is taught.
- Using the same edges of your hands, rotate the dough in a clockwise circle on the work surface to twist and seal the open seam of the dough.
- Line a baking sheet with a piece of parchment paper and place the dough, seam side down onto the parchment. Place a large mixing bowl, upside down over the dough and set somewhere to rise for 30-40 minutes until quite puffy and jiggly.
- The dough should not spring back if poked, if it does, leave it to proof a bit longer.
- Once the dough is puffy and the oven is hot, bake the brioche for 15 minutes. Then rotate 180 degrees and bake for another 10-12 minutes until golden brown.
- Once baked, remove the pan from the oven. Leave to cool on a wire rack for at least 30 minutes.
- Remove the cake from the pan and allow it to cool completely.
Vanilla Bean Pastry Cream
- In a large pot, whisk together the corn starch, salt, and sugar.
- Pour in the milk and 100 grams of heavy cream and whisk to combine. Add in the egg yolks and vanilla bean paste, and whisk once more.
- Place the pot over medium low heat and whisk constantly scraping the bottom and edges of the pot. It will feel like it’s taking a while but all of a sudden it’ll get really thick so don’t stop whisking.
- Once thick, remove the pot from the heat and pour through a fine mesh sieve into a heat safe mixing bowl.
- Cover the surface with a layer of plastic wrap to prevent a skin from forming.
- To cool it down faster you can always spread it on a quarter sized baking sheet and cover the surface with plastic wrap.
- Once cooled to room temperature, transfer the cream to the fridge and let it chill completely – this one needs to be fridge cold!
Raspberry Jam
- Add the rinsed raspberries, sugar, vanilla, and salt into a small pot.
- Place over medium low heat and cook until the mixture begins to bubble. Stir the raspberries and let them continue to cook over medium low heat until they’ve reduced and thickened slightly.
- Remove the pot from the heat and pour the jam into a shallow heat safe dish to cool off.
Whipped Cream
- Once all of the elements have cooled off and you're ready to assemble, make the whipped cream.
- Pour the cold heavy cream into a large mixing bowl. Whip on medium high speed until stiff peaks form. Be careful not to over whip the cream as you'll end up making butter.
- If you aren't sure if you should keep whipping, set it aside while you assemble the rest of the cake and you can always whip more later.
Assemble
- Once all of the elements have cooled, it's time to assemble. I recommend doing this about 45 minutes to an hour before you plan to serve.
- Use a serrated knife to cut a small circle off the top of the brioche.
- Scoop out most of the brioche, leave about an inch of thickness at the bottom and about the same on the sides.
- Spoon the raspberry jam into the bottom of the brioche and spread it into an even layer.
- Whip the chilled pastry cream until smooth. Pour in the remaining 150 grams of heavy cream and whip again until stiff. Fold in the rinsed fresh raspberries.
- Scoop the cream filling over top of the raspberry jam, press down as needed to fit it all in the brioche.
- Pipe or scoop the cream around the edge of the opening. I used a large basket weave piping tip to pipe two layers of ruffles around the opening and covering the top of the pastry cream.
- Place the top layer of brioche back over the whipped cream. Dust the top with powdered sugar.
- Allow the cake to set for about 30 minutes to allow everything to settle. Because of the cream in this cake it technically shouldn't sit out for more than two hours. However, it also won't collapse if it does.
- Leftovers should be stored in an airtight container in the fridge.
Notes
- After making this cake and writing the recipe, I have so many more ideas but one I would highly recommend is also adding in a traditional almond paste that is in Semlas along with the raspberry jam and cream. Alternatively a lemon curd instead of the raspberry jam would be delicious.
- Make sure the egg and butter for the dough are both at room temperature and the salt doesn’t directly touch the yeast.
- The brioche can be made the night before but is best made day of. That being said the fillings can be prepped the day before and stored in the fridge.
- Adding the butter in after the dough comes together may seem counter intuitive but it allows the dough to create a bit of extra strength!
- When making yeasted dough, ensure that you allow your mixer to fully knead the dough, until it forms a smooth ball and the sides of the bowl are cleaned. This will happen twice while kneading the dough, once before the butter is added and once after.
- Take your time to shape this bun, because however you shape it is how it will look in the end. That being said you can totally get creative with this, you could make a wreath of 8 or 12 smaller buns and let them proof next to one another!
- Make sure to bake until fully golden brown on top.
- For the raspberry jam and fresh raspberries you can absolutely swap them out for another fruit like blueberries! I also think a combo of raspberry jam and the traditional almond paste would be so delicious but I wanted to keep it nut free.
- If you like a more traditional layered cake, this is last year’s February birthday cake.
Nutrition
This page may contain affiliate links. This means that if you click on one of the product links above and complete a purchase, I’ll receive a small commission at no extra cost to you. I will never place a link nor make a recommendation on a product or service that I don’t love or use personally. Read our privacy policy here. Thank you for supporting Red Currant Bakery.


overall, this cake is lovely. I baked it yesterday and assembled it about two hours before serving. I followed the tips and added a layer of marzipan on the bottom, which was a great touch. The brioche was a bit denser than I’m used to, and I felt the cake could benefit from resting in the fridge overnight to let the flavors come together.
I tried some leftovers today (about 24 hours after assembly), and the marzipan had soaked into the brioche beautifully, with the outer layer softening nicely. My only suggestion would be to refrigerate it overnight, covered so it doesn’t dry out, for an even more cohesive flavor—especially if all the components are chilled before assembly.