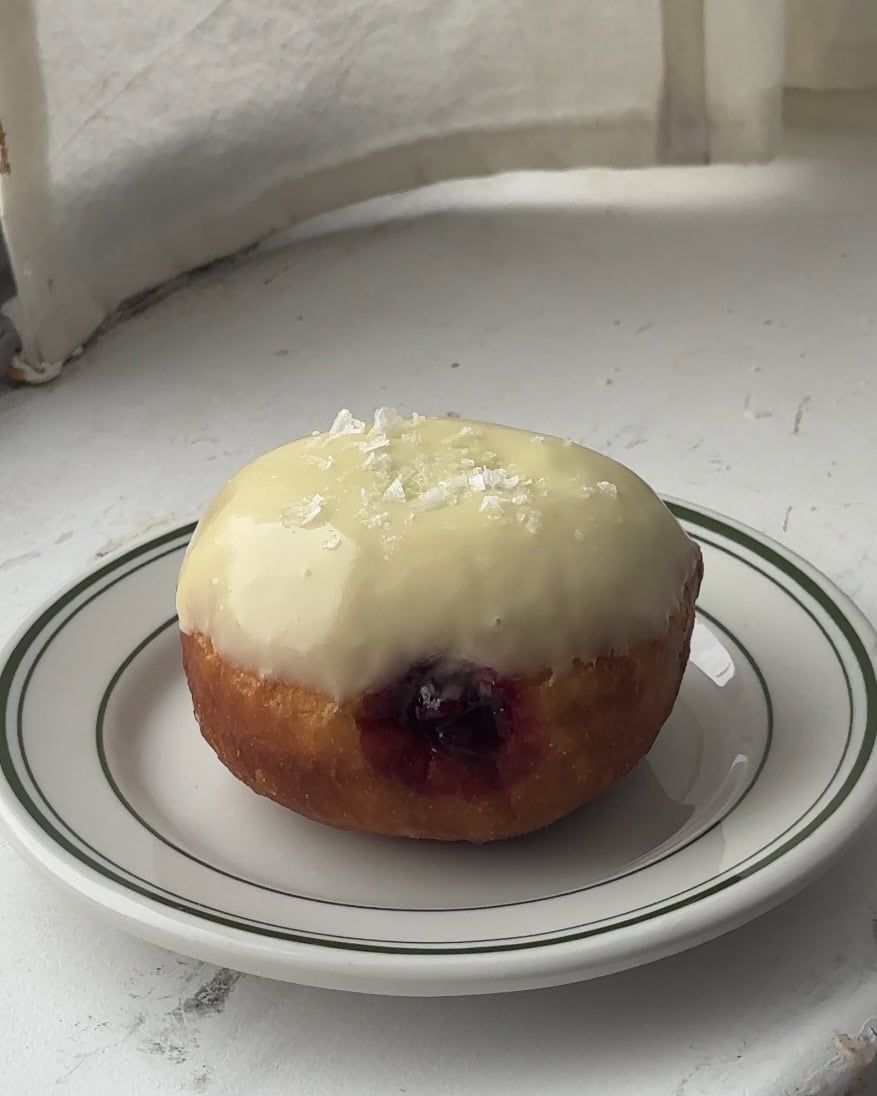
Fluffy brioche donuts, filled with a cranberry raspberry jam, coated with an olive oil glaze and a sprinkle of salt, these Olive Oil Sea Salt Jam Donuts are good anytime but especially at the holidays.
Instant Yeast vs. Active Dry Yeast?
I prefer using instant yeast because it tends to work more quickly. That being said, fresh or active dry yeast will work too! The amount of active dry yeast is the same as the instant but the weight of fresh will need to be converted. I haven’t tried these with sourdough starter but I would recommend letting the dough rest in the fridge overnight if you use starter.
How do I know when the dough has been kneaded long enough?
The way to know if your doughnut dough has kneaded long enough is first to watch it, knead it until a smooth ball forms. Then pull off a small piece of dough and stretch it – it should stretch a bit, not snap and look shaggy. If it snaps or tears immediately, keep kneading.
Can these be made in advance?
I recommend frying them on the same day you plan to eat them. However, the dough can be made the night before, covered and stored in the fridge. Then proceed with shaping, proofing, and frying the doughnuts per the instructions.
Can I use store bought jam?
Yes of course you can use store bought jam instead of a homemade jam but I prefer to make it from scratch because you can use less sugar and keep a more tart fresh flavor. If using store bought jam I would use a raspberry or black currant jam for the best flavor!
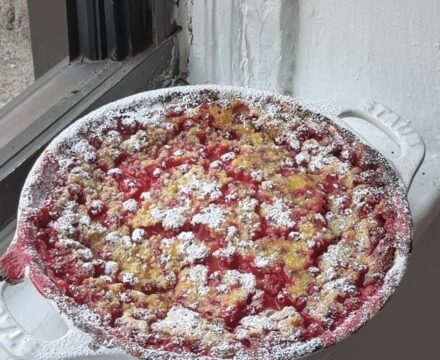
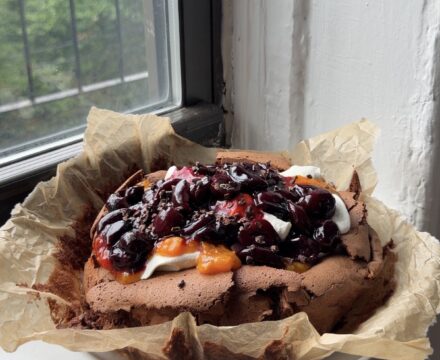
Additional Recipes to try:
Tips for making jam filled donuts
- Make sure all dough ingredients are at room temperature and knead the dough until a smooth ball forms. Then pull off a small piece of dough and stretch it – it should stretch a bit, not snap and look shaggy. If it snaps or tears immediately, keep kneading.
- The dough should get nice and puffy during the first proof but note that it will depend a lot on how warm your room is! In the summer it takes my dough 20-30 minutes to rise whereas in the winter it’s closer to an hour.
- I use a heavy cast iron dutch oven for frying because the dense material helps the oil heat evenly and the tall sides keep oil from splattering. A thermometer is also key when frying to make sure the oil is at the right temperature.
- For this recipe I fried the donuts in Graza’s Frizzle oil which is an olive oil with a high smoke point and neutral flavor. If not using this olive oil, be sure to use a different high heat neutral oil such as vegetable or canola.
- Once shaped, place the doughnuts on lightly floured squares of parchment paper. This makes it easy to handle them once they are soft and fluffy and allows them to be easily transferred into the fry oil.
- It is important to fry the donuts between 350 F and 360 F. 350 F is the best temperature that allows the center to be fully cooked without the outside burning. Be sure to keep a thermometer in the oil and I recommend heating it to 360 F. Then add in the donuts and the temperature will drop to around 350F.
- Allow the donuts to cool before filling them with jam, otherwise you’ll deflate the donuts.
- Be sure to fill and then glaze otherwise you’ll have a big mess.
- If you don’t have a piping bag with a tip, be sure to cut a little opening with a pairing knife first. Otherwise it will be difficult to get the jam all the way into the donut.
Ingredients
- Orange Zest: Any type of citrus will work, all you need is the zest to add flavor into the dough. Be sure to wash it first!
- All Purpose Flour: Any all purpose flour will work for these! I have not yet tried any other flours with this recipe.
- Eggs: I use standard large eggs from the store. This recipe uses one full egg and one egg yolk. The egg yolk adds extra richness to the rolls.
- Sugar: This recipe uses sugar in the dough as well as on the outside for texture and flavor. Plus sugar in the jam and powdered sugar in the glaze.
- Milk: The doughnuts use milk as the liquid in the dough; however, they will also work with non-dairy milks such as almond or light coconut milk.
- Butter: The butter adds moisture to the dough as well as makes it softer. It’s important that the butter is at room temperature, otherwise it will cool down the dough and be difficult to incorporate.
- Yeast: In this recipe, either active dry or instant yeast will work. If using active dry, be sure to bloom it first in the warm milk.
- Sea Salt: Fine sea salt enhances the flavors in the dough and flaky salt is used to top the glaze on the donuts.
- Olive Oil: This recipe uses Graza’s frizzle oil for frying which is a neutral high heat olive oil but if you don’t have it use vegetable or canola oil. The donuts are also glazed with an olive oil glaze which should be a delicious finishing oil.
- Cranberries & Raspberries: Cranberries and raspberries make the perfect jam in my opinion but you can also do blackberries and raspberries!

How to make Olive Oil Sea Salt Jam Doughnuts
Cranberry Raspberry Jam filling
- In a medium sauce pot add in the cranberries and raspberries along with the sugar. Cover the pot and put it over medium low heat. If you are using blackberries, cut the sugar down to 90 grams.
- Cook for 10 minutes until the juices begin to release. Remove the lid and stir occasionally to keep the jam from burning.
- Continue to cook until the liquid reduces and the bubbles go from being thin and watery to thick. About 10 minutes.
- Once cooked, remove the pot from the heat and pour the jam into a large shallow dish. Leave the jam to cool to room temperature, stirring occasionally. The jam can also be made in advance and stored in the fridge.
Make the dough
- In the bowl of a stand mixer, add in the sugar and orange zest. Rub the zest into the sugar with your fingers to release the oils.
- Pour in the flour and yeast and whisk it all together.
- Warm the milk until it is just warm to the touch – it should not exceed 100 degrees F.
- Add in the warmed milk, egg and egg yolk, salt, and vanilla extract. Knead the mixture with the dough hook on the stand mixer for 10-15 minutes on low speed until it is smooth and the bowl is clean. Add in the soft butter and knead again until smooth, the dough should stretch and not just snap.
- Remove the dough and shape it into a ball. Lightly grease the mixing bowl that you were just using and place the ball of dough back in. Then cover the bowl with a towel or plastic and place somewhere warm for 30-45 min. The dough should double in size.
- At this point, you could also cover the dough with plastic and place it in the fridge overnight.
Shape the Doughnuts
- Line a baking sheet or tray with a sheet of parchment paper and a generous sprinkling of flour.
- After the dough has doubled in size, dump it out onto a lightly floured counter or work surface. Sprinkle the top with flour and use flat hands or a rolling pin to gently press the air out.
- Divide the dough into 12 equal portions. You can weigh the dough first and then divide the total amount by 12 and that is how much each portion should weigh.
- Working one portion at a time, pat the dough into a flat disk – about 3″ in diameter. Going in a clockwise direction, bring the edges of the disk into the center of the disk and press down gently until all edges have been brought into the center.
- Flip the disk over so that the tuck seam side is face down on the counter – make sure the area is free of flour.
- Shape your hand into sort of a claw shape over the dough. Use the heel of your hand to roll the dough around in clockwise circle until the bottom is smooth and no longer looks like it has a seam.
- *If you want to make a classic flatter, round jam doughnut, roll the dough out to 1/2″ thick. Then use a round biscuit cutter that is between 4″-5″ to cut out the doughnuts.
- Place the dough balls onto the floured baking sheet, spacing them out evenly so they have space to grow.
- Repeat the shaping process with the remaining 11 portions of dough.
- While the dough rises, heat the oil.
- Start heating up 4-5 inches of oil in a large deep pot to 360 F about 10-15 minutes before the doughnuts are finished proofing. This way it will be at the correct temperature when they are ready. Heat the oil low and slow – this way it will keep it’s heat and not get too hot while you’re frying.
Fry
- Place 1 layer of paper towels on to a baking sheet with a wire rack on top. Fill a wide bowl with granulated sugar to roll the doughnuts in once fried.
- Once the rolls are proofed, use a slotted spoon or a spider to lower the proofed doughnuts into the hot oil. Don’t fry more than 2-3 at a time if using a large pot to avoid lowering the temperature more than 10 degrees.
- Fry them on each side for about 1-1:30 minutes – keep an eye on them as 60 seconds may be enough. Use the spoon to carefully flip them over by pressing down on one side. Then fry for another 60-90 seconds.
- Once they are golden brown, use the slotted spoon to remove them from the oil.
- Place the fried doughnuts onto the paper towel lined rack to drain off any excess oil. Allow the oil to reheat to 360 F before adding in another batch of doughnuts.
Assemble & Glaze
- Use a small knife to poke a hole in the side of each doughnut.
- Fill a piping bag or plastic sip top bag with the jam.
- Press the tip of the jam bag into the opening and pipe it in until each doughnut is full. To keep the jam from spilling out, rest the doughnuts on each other with the filling whole pointing up. After 5-10 minutes, the filling will stay in!
- To make the glaze, whisk together the powdered sugar and olive oil until smooth.
- Dip the top of each filled donut in the glaze, allow excess to drip off and then flip them over and set back on a wire rack.
- Sprinkle the top of each donut with flaky salt.
- Enjoy immediately!


Olive Oil Sea Salt Jam Donuts
Equipment
- Stand Mixer
Ingredients
Cranberry Raspberry Jam
- 400 grams cranberries fresh or frozen
- 300 grams raspberries fresh or frozen
- 120 grams granulated sugar
Dough
- 50 grams granulated sugar
- 1 orange zested
- 500 grams all purpose flour
- 15 grams instant yeast
- 1 egg large, room temperature
- 1 egg yolk large, room temperature
- 250 milliliters milk
- 60 grams salted butter soft
- 1/4 teaspoon fine sea salt
Frying and Glaze
- 1500 milliliters fry oil
- 100 grams powdered sugar
- 75 grams olive oil use a high quality olive oil that you like the taste of!
- flaky sea salt
Instructions
Cranberry Raspberry Jam
- In a medium sauce pot add in the cranberries and raspberries along with the sugar. Cover the pot and put it over medium low heat. If you are using blackberries, cut the sugar down to 90 grams.
- Cook for 10 minutes until the juices begin to release. Remove the lid and stir occasionally to keep the jam from burning.
- Continue to cook until the liquid reduces and the bubbles go from being thin and watery to thick. About 10 minutes.
- Once cooked, remove the pot from the heat and pour the jam into a large shallow dish. Leave the jam to cool to room temperature, stirring occasionally. The jam can also be made in advance and stored in the fridge.
Dough
- In the bowl of a stand mixer, add in the sugar and orange zest. Rub the zest into the sugar with your fingers to release the oils.
- Pour in the flour and yeast and whisk it all together.
- Warm the milk until it is just warm to the touch – it should not exceed 100 degrees F.
- Add in the warmed milk, egg and egg yolk, salt, and vanilla extract. Knead the mixture with the dough hook on the stand mixer for 10-15 minutes on low speed until it is smooth and the bowl is clean. Add in the soft butter and knead again until smooth, the dough should stretch and not just snap.
- Remove the dough and shape it into a ball. Lightly grease the mixing bowl that you were just using and place the ball of dough back in. Then cover the bowl with a towel or plastic and place somewhere warm for 30-45 min. The dough should double in size.
- At this point, you could also cover the dough with plastic and place it in the fridge overnight.
Shape
- Line a baking sheet or tray with a sheet of parchment paper and a generous sprinkling of flour.
- After the dough has doubled in size, dump it out onto a lightly floured counter or work surface. Sprinkle the top with flour and use flat hands or a rolling pin to gently press the air out.
- Divide the dough into 12 equal portions. You can weigh the dough first and then divide the total amount by 12 and that is how much each portion should weigh.
- Working one portion at a time, pat the dough into a flat disk – about 3" in diameter. Going in a clockwise direction, bring the edges of the disk into the center of the disk and press down gently until all edges have been brought into the center.
- Flip the disk over so that the tuck seam side is face down on the counter – make sure the area is free of flour.
- Shape your hand into sort of a claw shape over the dough. Use the heel of your hand to roll the dough around in clockwise circle until the bottom is smooth and no longer looks like it has a seam.
- *If you want to make a classic flatter, round jam doughnut, roll the dough out to 1/2" thick. Then use a round biscuit cutter that is between 4"-5" to cut out the doughnuts.
- Place the dough balls onto the floured baking sheet, spacing them out evenly so they have space to grow.
- Repeat the shaping process with the remaining 11 portions of dough.
- While the dough rises, heat the oil.
- Start heating up 4-5 inches of oil in a large deep pot to 360 F about 10-15 minutes before the doughnuts are finished proofing. This way it will be at the correct temperature when they are ready. Heat the oil low and slow – this way it will keep it's heat and not get too hot while you're frying.
Fry
- Place 1 layer of paper towels on to a baking sheet with a wire rack on top. Fill a wide bowl with granulated sugar to roll the doughnuts in once fried.
- Once the rolls are proofed, use a slotted spoon or a spider to lower the proofed doughnuts into the hot oil. Don't fry more than 2-3 at a time if using a large pot to avoid lowering the temperature more than 10 degrees.
- Fry them on each side for about 1-1:30 minutes – keep an eye on them as 60 seconds may be enough. Use the spoon to carefully flip them over by pressing down on one side. Then fry for another 60-90 seconds.
- Once they are golden brown, use the slotted spoon to remove them from the oil.
- Place the fried doughnuts onto the paper towel lined rack to drain off any excess oil. Allow the oil to reheat to 360 F before adding in another batch of doughnuts.
Assemble & Glaze
- Use a small knife to poke a hole in the side of each doughnut.
- Fill a piping bag or plastic sip top bag with the jam.
- Press the tip of the jam bag into the opening and pipe it in until each doughnut is full. To keep the jam from spilling out, rest the doughnuts on each other with the filling whole pointing up. After 5-10 minutes, the filling will stay in!
- To make the glaze, whisk together the powdered sugar and olive oil until smooth.
- Dip the top of each filled donut in the glaze, allow excess to drip off and then flip them over and set back on a wire rack.
- Sprinkle the top of each donut with flaky salt.
- Enjoy immediately!
Notes
- Make sure all dough ingredients are at room temperature and knead the dough until a smooth ball forms. Then pull off a small piece of dough and stretch it – it should stretch a bit, not snap and look shaggy. If it snaps or tears immediately, keep kneading.
- The dough should get nice and puffy during the first proof but note that it will depend a lot on how warm your room is! In the summer it takes my dough 20-30 minutes to rise whereas in the winter it’s closer to an hour.
- I use a heavy cast iron dutch oven for frying because the dense material helps the oil heat evenly and the tall sides keep oil from splattering. A thermometer is also key when frying to make sure the oil is at the right temperature.
- For this recipe I fried the donuts in Graza’s Frizzle oil which is an olive oil with a high smoke point and neutral flavor. If not using this olive oil, be sure to use a different high heat neutral oil such as vegetable or canola.
- Once shaped, place the doughnuts on lightly floured squares of parchment paper. This makes it easy to handle them once they are soft and fluffy and allows them to be easily transferred into the fry oil.
- It is important to fry the donuts between 350 F and 360 F. 350 F is the best temperature that allows the center to be fully cooked without the outside burning. Be sure to keep a thermometer in the oil and I recommend heating it to 360 F. Then add in the donuts and the temperature will drop to around 350F.
- Allow the donuts to cool before filling them with jam, otherwise you’ll deflate the donuts.
- Be sure to fill and then glaze otherwise you’ll have a big mess.
- If you don’t have a piping bag with a tip, be sure to cut a little opening with a pairing knife first. Otherwise it will be difficult to get the jam all the way into the donut.
Nutrition
This page may contain affiliate links. This means that if you click on one of the product links above and complete a purchase, I’ll receive a small commission at no extra cost to you. I will never place a link nor make a recommendation on a product or service that I don’t love or use personally. Read our privacy policy here. Thank you for supporting Red Currant Bakery.