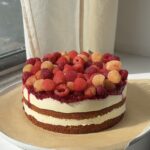
Two layers of cake, two layers of bavarian cream, topped with a layer of raspberry jam and fresh raspberries, this Raspberries & Cream Cake is light and creamy and perfect in summer.

What is Bavarian Cream?
Bavarian cream is traditionally a custard that has been folded with whipped cream and a bit of gelatin to help it set and be a stable filling. It is light and fluffy but with more flavor and stability than just a basic whipped cream.
What do you need to stack this cake?
I love this cake ring from ikea but any ring or even a springform pan will work to create the stability to stack the cake. For crisp edges you’ll also want to use a sheet of acetate, this is more optional but it will give you a cleaner finish.
What can you use instead of raspberries?
Honestly anything! Any berry will work, any jam although I do recommend using a more tart jam or a homemade one with minimal sugar. You could also go the chocolate route and pour a chocolate ganache over top of the set bavarian cream.
Tips for making a Raspberries and Cream Cake
- If you want to make a full 9″ cake, multiply all the cake ingredients by 2 aka instead of 1 egg, use 2. You can also multiply the ingredients for the bavarian cream by 1.5.
- Triple check that your pan is the correct size and that your baking soda and baking powder haven’t expired!
- This cake is a great base for so many flavors so don’t be afraid to play around with the jam and berries that you’re topping it with!
- Use a baking spray with flour in it to spray the bottom of your cake pan, try not to spray the sides as it can make the cake rise oddly. Alternatively, grease the pan with soft butter and line the bottom with a round sheet of parchment paper.
- The cake should be at room temperature before slicing, but do not store the cake in the fridge until it has been assembled. Storing the freshly baked cake in the fridge will dry it out.
- If you don’t have buttermilk, replace it with 45 grams of full fat greek yogurt and 30 grams of milk.
- Bavarian cream can be a little finicky so just keep calm and don’t try to multitask while you’re making it!
- To assemble this cake you’ll need a sheet of acetate and a cake collar. I love this cake ring from ikea but any ring or even a springform pan will work to create the stability to stack the cake. For crisp edges you’ll also want to use a sheet of acetate, this is more optional but it will give you a cleaner finish.
- This cake is best if you let it set up in the fridge overnight. For transporting, make sure it stays cold and I recommend leaving an acetate collar on it until you reach your destination.
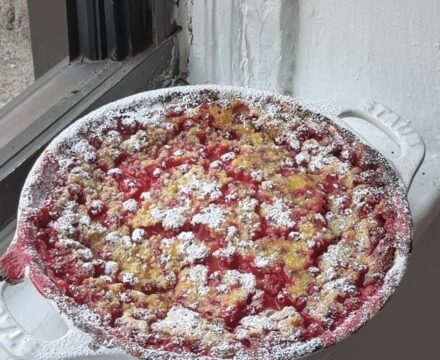
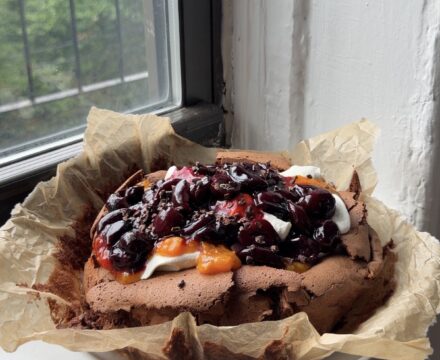
Additional Cake Recipes to try!
Raspberries & Cream Cake Ingredients
- All Purpose Flour: Any all purpose flour will work for this cake! I have not yet tried any other flours with this recipe.
- Baking Soda & Baking Powder: These both help make the cake rise – make sure to check the expiration date! If they are expired, they won’t be very effective.
- Salt: A little bit of salt enhances the flavors and balances out the sweetness.
- Vanilla Extract: Vanilla adds flavor to the cake and vanilla bean paste is used in the bavarian cream.
- Eggs: I use one standard large egg from the store for the cake and egg yolks for the bavarian cream.
- Sugar: This cake uses granulated sugar in the cake batter, bavarian cream, and jam.
- Buttermilk: Buttermilk is used in this cake instead of greek yogurt and milk. That being said if you don’t have access to whole milk buttermilk, see the tips for replacing with yogurt and milk.
- Oil: Oil adds moisture to this cake and keeps it from drying out. I use a subtle olive oil and don’t notice an after taste but you could also use a neutral oil.
- Heavy Cream: Heavy whipping cream is used for the bavarian cream. It makes it nice and fluffy, just make sure it’s cold.
- Milk: Whole milk is the base of the custard for the bavarian cream.
- Gelatin: One packet (about 7 grams) of powdered gelatin is used to stabilize the custard cream filling.
- Raspberries: I like to use frozen raspberries for the jam layer and fresh raspberries on top but you could absolutely use fresh for everything.

How to make a Raspberries & Cream Cake?
- Preheat the oven to 350 F and place a rack in the middle of the oven.
Vanilla cake batter
- In a medium bowl, whisk together the egg, sugar, salt, buttermilk, and vanilla extract until smooth.
- Pour in the oil and whisk again.
- Lastly, pour in the flour, baking soda and baking powder.
- Whisk once more until combined and smooth.
- Scrape the sides and bottom of the bowl.
- Spray the cake pan with your baking spray and then pour in the vanilla batter.
- Smooth out the cake with a rubber spatula.
Bake
- Bake the cake in the preheated oven for 15 minutes. After 15 minutes, rotate the cake 180 degrees and bake for another 10 minutes.
- When the cake is finished baking, check it by sticking a toothpick into the center of the cake. If the toothpick comes out clean, the cake is fully baked.
- Remove the cake from the oven and leave it to cool for 10 minutes before removing the spring form.
- After 10 minutes, remove the springform.
- Allow the cake to cool completely before assembling.
Raspberry Jam
- In a small sauce pot, add in the raspberries and sugar. If using fresh raspberries add a couple tablespoons of water to keep the raspberries from burning.
- Cook over low heat until it has started bubbling. Stir occasionally to keep the jam from burning.
- Cook until the bubbles look thick – you’ll be able to see the difference from the original airy light bubbles in the beginning.
- Turn the heat off and pour the jam onto a 1/4 sized baking sheet to let it cool down.
- Prep the fresh raspberries by adding them into a large bowl with cold water. Swirl them around a few times then pour through a fine mesh sieve to strain off the water.
- Pour the rinsed raspberries onto a kitchen towel or a couple sheets of paper towel to dry off. If using a kitchen towel, note that they may stain it a bit but it’ll usually come out in the wash!
Bavarian Cream Filling
- In a medium heat safe bowl, add in 50 grams of the whole milk and sprinkle on the packet of gelatin. Stir to combine and set aside.
- In another heat safe mixing bowl, add in the egg yolks, sugar, and the salt, and whisk until smooth.
- Pour the remaining 150 grams of milk into a small sauce pot. Place over medium low heat to heat the milk until it is steaming.
- While the milk heats, place the bowl with egg yolks on a damp rag to keep it from spinning on your counter.
- Once the milk is steaming, turn off the heat and while whisking the egg yolks, slowly pour in the hot milk.
- Pour the custard mixture back into the pot and place back over low heat. Use a rubber spatula to stir the custard constantly while it cooks. It will take a little bit but the moment the little bubbles disappear and the mixture begins to thicken, turn the heat off.
- Place a fine mesh sieve over the bowl with the bloomed gelatin and pour the cooked custard through the sieve. Remove the sieve and whisk to combine. Set aside to let it cool and prep the cake for assembly. Occasionally whisk the custard to make sure it cools evenly while you set up the cake.
Assembly Prep
- Slice the cooled vanilla cake into 2 layers with a serrated knife.
- Lay a sheet of parchment paper on a large flat plate or tray that the cake will fit on.
- Place the bottom layer of cake onto the parchment paper, cut side up.
- Loosely set the metal cake ring around it. Cut a piece of acetate that is the length of one full circumference of the cake plus another half the cake. Wrap the bottom layer of cake with the acetate inside of the metal ring, allowing the acetate to overlap.
- Tighten the metal cake ring so that the acetate and cake ring are snug around the cake.
Assemble
- Once the custard has cooled to room temperature, you can move on to the whipped cream and assembling the cake. The custard doesn’t need to be cold because then it will be too firm – just not warm.
- In a large mixing bowl, whip the cold heavy cream to medium stiff peaks. Lines should be visible but you won’t be able to flip the bowl over.
- Pour half of the custard into the whipped cream and use a whisk to actually fold the custard into the cream. Then pour in the second half of the custard and switch to a flat rubber spatula to fold the custard into the cream. If it seems super soupy you can place the bowl in the fridge for 5 minutes but no longer!
- Use a ladle or just pull straight from the bowl to pour half of the cream over the bottom layer of cake. Carefully place the second layer of cake over the cream and then pour the remaining cream over the top layer of cake.
- Let it sit for 5-10 minutes and then carefully spoon the raspberry jam over top of the cream layer.
- Finally top the jam with a pile of raspberries.
- Place the cake in the fridge to set overnight.
- To transport, leave the acetate wrapped around the cake. Just before serving, unwrap the acetate and replace any raspberries that may have taken a tumble.
- Store leftovers in a container in the fridge to keep the cake from drying out.

Raspberries and Cream Cake
Ingredients
Vanilla Cake
- 1 egg standard large
- 80 grams granulated sugar
- 1/4 teaspoon fine sea salt
- 1 teaspoon vanilla extract
- 45 grams olive oil try to use a subtle olive oil
- 75 grams whole milk buttermilk
- 75 grams all purpose flour
- 1/4 teaspoon baking soda
- 1/4 teaspoon baking powder
Raspberry jam
- 175 grams raspberries I use frozen but if using fresh add a couple tablespoons of water
- 30 grams granulated sugar more to taste
- 500 grams fresh raspberries
Bavarian Cream
- 200 grams whole milk divided
- 1 packet powdered gelatin approximately 7 grams
- 3 egg yolks standard large
- 50 grams granulated sugar
- 1/4 teaspoon fine sea salt
- 1 teaspoon vanilla bean paste
- 200 grams heavy cream cold
Instructions
- Preheat the oven to 350 F and place a rack in the middle of the oven.
Vanilla Cake Batter
- In a medium bowl, whisk together the egg, sugar, salt, buttermilk, and vanilla extract until smooth.
- Pour in the oil and whisk again.
- Lastly, pour in the flour, baking soda and baking powder.Whisk once more until combined and smooth.
- Scrape the sides and bottom of the bowl.
- Spray the cake pan with your baking spray and then pour in the vanilla batter.
- Smooth out the cake with a rubber spatula.
Bake
- Bake the cake in the preheated oven for 15 minutes. After 15 minutes, rotate the cake 180 degrees and bake for another 10 minutes.
- When the cake is finished baking, check it by sticking a toothpick into the center of the cake. If the toothpick comes out clean, the cake is fully baked.
- Remove the cake from the oven and leave it to cool for 10 minutes before removing the spring form.
- After 10 minutes, remove the springform.
- Allow the cake to cool completely before assembling.
Raspberry Jam
- In a small sauce pot, add in the raspberries and sugar. If using fresh raspberries add a couple tablespoons of water to keep the raspberries from burning.
- Cook over low heat until it has started bubbling. Stir occasionally to keep the jam from burning.
- Cook until the bubbles look thick – you'll be able to see the difference from the original airy light bubbles in the beginning.
- Turn the heat off and pour the jam onto a 1/4 sized baking sheet to let it cool down.
- Prep the fresh raspberries by adding them into a large bowl with cold water. Swirl them around a few times then pour through a fine mesh sieve to strain off the water.
- Pour the rinsed raspberries onto a kitchen towel or a couple sheets of paper towel to dry off. If using a kitchen towel, note that they may stain it a bit but it'll usually come out in the wash!
Bavarian Cream Filling
- In a medium heat safe bowl, add in 50 grams of the whole milk and sprinkle on the packet of gelatin. Stir to combine and set aside.In another heat safe mixing bowl, add in the egg yolks, sugar, and the salt, and whisk until smooth.
- Pour the remaining 150 grams of milk into a small sauce pot. Place over medium low heat to heat the milk until it is steaming.
- While the milk heats, place the bowl with egg yolks on a damp rag to keep it from spinning on your counter.
- Once the milk is steaming, turn off the heat and while whisking the egg yolks, slowly pour in the hot milk.
- Pour the custard mixture back into the pot and place back over low heat. Use a rubber spatula to stir the custard constantly while it cooks. It will take a little bit but the moment the little bubbles disappear and the mixture begins to thicken, turn the heat off.
- Place a fine mesh sieve over the bowl with the bloomed gelatin and pour the cooked custard through the sieve. Remove the sieve and whisk to combine. Set aside to let it cool and prep the cake for assembly. Occasionally whisk the custard to make sure it cools evenly while you set up the cake.
Assembly Prep
- Slice the cooled vanilla cake into 2 layers with a serrated knife.
- Lay a sheet of parchment paper on a large flat plate or tray that the cake will fit on.
- Place the bottom layer of cake onto the parchment paper, cut side up.
- Loosely set the metal cake ring around it. Cut a piece of acetate that is the length of one full circumference of the cake plus another half the cake. Wrap the bottom layer of cake with the acetate inside of the metal ring, allowing the acetate to overlap.
- Tighten the metal cake ring so that the acetate and cake ring are snug around the cake.
Assemble
- Once the custard has cooled to room temperature, you can move on to the whipped cream and assembling the cake. The custard doesn't need to be cold because then it will be too firm – just not warm.
- In a large mixing bowl, whip the cold heavy cream to medium stiff peaks. Lines should be visible but you won't be able to flip the bowl over.
- Pour half of the custard into the whipped cream and use a whisk to actually fold the custard into the cream. Then pour in the second half of the custard and switch to a flat rubber spatula to fold the custard into the cream. If it seems super soupy you can place the bowl in the fridge for 5 minutes but no longer!
- Use a ladle or just pull straight from the bowl to pour half of the cream over the bottom layer of cake. Carefully place the second layer of cake over the cream and then pour the remaining cream over the top layer of cake.
- Let it sit for 5-10 minutes and then carefully spoon the raspberry jam over top of the cream layer.
- Finally top the jam with a pile of raspberries.
- Place the cake in the fridge to set overnight.
- To transport, leave the acetate wrapped around the cake. Just before serving, unwrap the acetate and replace any raspberries that may have taken a tumble.
- Store leftovers in a container in the fridge to keep the cake from drying out.
Notes
- If you want to make a full 9″ cake, multiply all the cake ingredients by 2 aka instead of 1 egg, use 2. You can also multiply the ingredients for the bavarian cream by 1.5.
- Triple check that your pan is the correct size and that your baking soda and baking powder haven’t expired!
- This cake is a great base for so many flavors so don’t be afraid to play around with the jam and berries that you’re topping it with!
- Use a baking spray with flour in it to spray the bottom of your cake pan, try not to spray the sides as it can make the cake rise oddly. Alternatively, grease the pan with soft butter and line the bottom with a round sheet of parchment paper.
- The cake should be at room temperature before slicing, but do not store the cake in the fridge until it has been assembled. Storing the freshly baked cake in the fridge will dry it out.
- If you don’t have buttermilk, replace it with 45 grams of full fat greek yogurt and 30 grams of milk.
- Bavarian cream can be a little finicky so just keep calm and don’t try to multitask while you’re making it!
- To assemble this cake you’ll need a sheet of acetate and a cake collar. I love this cake ring from ikea but any ring or even a springform pan will work to create the stability to stack the cake. For crisp edges you’ll also want to use a sheet of acetate, this is more optional but it will give you a cleaner finish.
- This cake is best if you let it set up in the fridge overnight. For transporting, make sure it stays cold and I recommend leaving an acetate collar on it until you reach your destination.
Nutrition
This page may contain affiliate links. This means that if you click on one of the product links above and complete a purchase, I’ll receive a small commission at no extra cost to you. I will never place a link nor make a recommendation on a product or service that I don’t love or use personally. Read our privacy policy here. Thank you for supporting Red Currant Bakery.