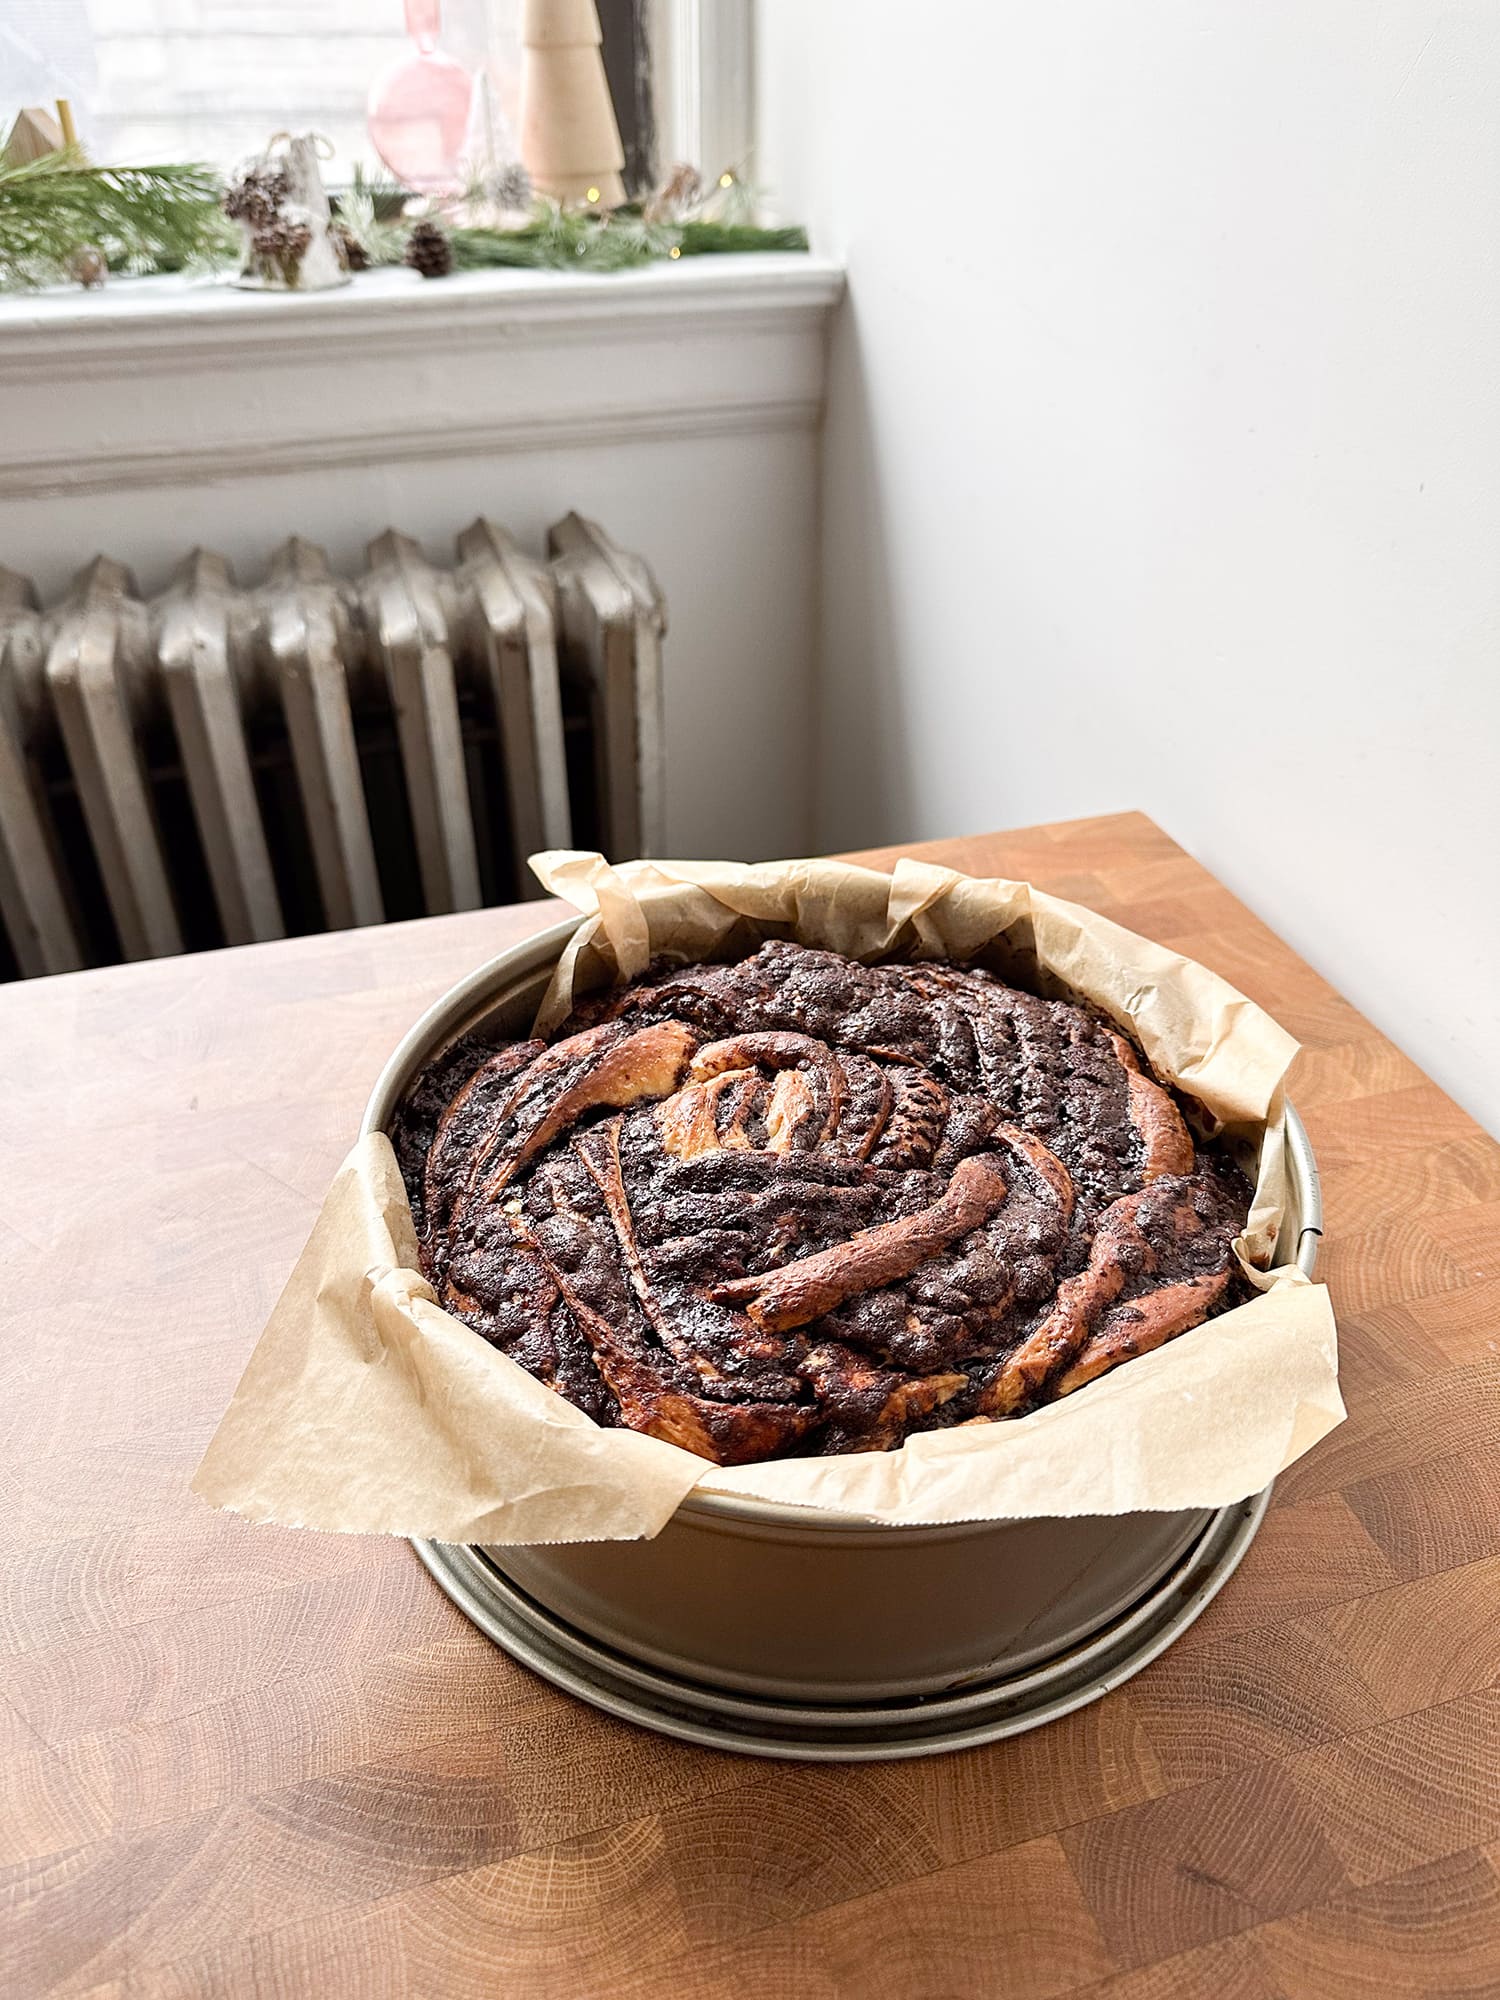
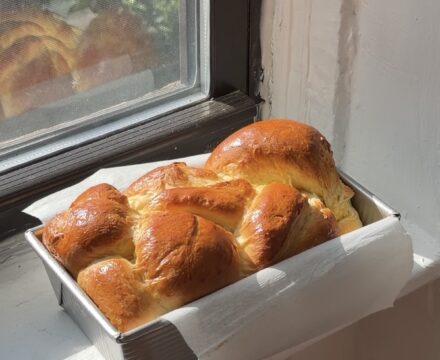
Soft and fluffy brioche layered with a dark chocolate filling, twisted and rolled into a giant cinnamon roll shape and topped with a cinnamon roll icing – this chocolate cinnamon roll is the perfect brunch item.

Can this be made in advance?
If you want to make this for breakfast, I recommend making and assembling it the night before. Then cover the pan with plastic and place in the fridge overnight. In the morning, take it out, then preheat the oven and then pour on the heavy cream before baking.
What can I use instead of a springform pan?
If you don’t have a springform pan, you can also use a 9″ or 10″ cake pan! Just be sure to use a metal pan, because glass or ceramic won’t bake as well.
How do I know when the dough is finished kneading?
This dough is somewhat soft; however, the sides of the bowl should be clean and the dough should be smooth.
Can I omit the nesquik?
Definitely! I love the addition of nesquik because it makes the filling a little extra creamy (ps it also makes delicious hot chocolate so would recommend either way <3). But you can always just leave it out and you don’t need to replace it with anything.
You may also like…
Tips for making a Chocolate Cinnamon Roll
- When making yeasted dough, ensure that you allow your mixer to fully knead the dough, until it forms a smooth ball and the sides of the bowl are cleaned.
- The butter for the filling should be very soft but not melted. If it is too firm, microwave it on 5 second intervals – stirring in between.
- When rolling out the dough, try to make it as rectangular as possible. This will help when it comes shaping and cutting the roll.
- The icing is made from powdered sugar, milk, and melted butter. However, if you ad cold milk to the melted butter, it will clump so be sure to warm the milk before whisking it in. I usually melt the butter and milk together to make this easier.
- It’s winter as I’m writing this and it’s important to note that when it’s cold, dough takes MUCH longer to rise. To help it along, make sure your eggs, milk, and butter are room temperature (or a little warmer!) the milk should be actually warm just not hot. Additionally, I like to put the dough in a thicker bowl and heat it up first so I usually microwave a big glass mixing bowl and then put the dough in there. Finally, place it somewhere warm, like on your stove as you’re preheating the oven, by your radiator, or on top of your dryer!
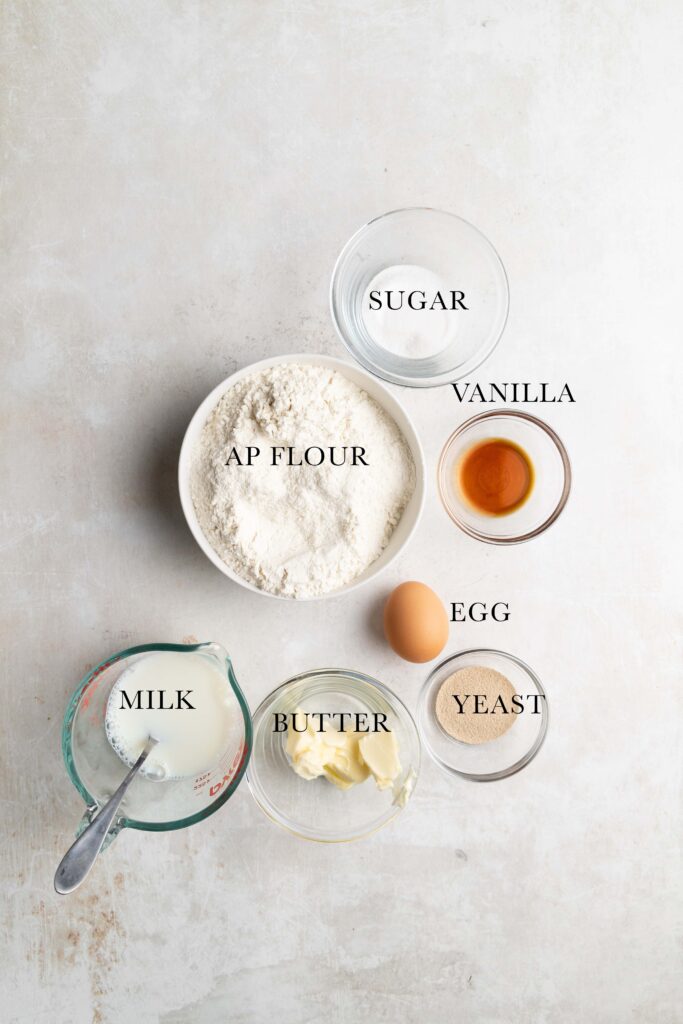

Ingredients
Yeasted Dough
- All Purpose Flour: Any all purpose flour will work for this! I have not yet tried any other flours with this recipe.
- Sugar: This recipe uses granulated sugar in the dough and the cinnamon sugar filling.
- Salt: A little sprinkle of fine sea salt in the dough is important for flavor and texture.
- Milk: The Chocolate Cinnamon use milk as the liquid in the dough; however, it will also work with non-dairy milks such as almond or light coconut milk.
- Butter: The butter adds richness to the dough!
- Eggs: I use standard large eggs from the store. There is one whole egg in the dough.
- Yeast: In this recipe, instant yeast is used, simply whisk it in with the flour and sugar first and then add in the remaining ingredients.
- Vanilla: Vanilla extract enhances the flavors of the dough.
Chocolate Filling
- Butter: I use unsalted butter for this recipe but you can use salted and then just omit the extra salt.
- Sugar: Granulated sugar adds quite a bit of sweetness which balances the chocolate in the filling.
- Cocoa Powder: Any type of cocoa powder will work for this!
- Vanilla Bean Paste: Vanilla extract or vanilla bean paste will work, it enhances the chocolate flavor and sweetness.
- Salt: A little salt actually enhances all of the sweet flavors.
- Nesquik: This is optional but two heaping tablespoons of nesquik makes this filling so delicious!
- Heavy Cream: Not part of the filling, but heavy cream is poured on top just before baking to add moisture and fluff to the dough as well as a golden brown finish on the roll.
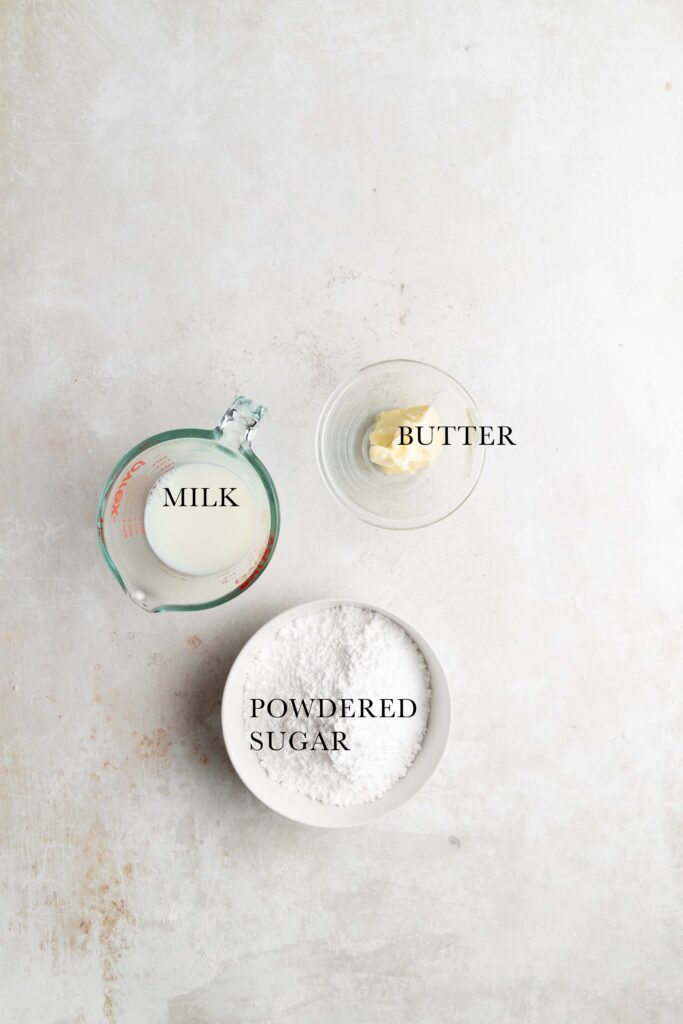
Glaze
- Powdered sugar: Powdered sugar is the base of most glazes. If yours is very clumped together I recommend sifting if before making the icing.
- Melted Butter: The butter should be melted but not bubbling.
- Milk: Any milk can be used for the glaze, it should be slightly warmed as to not shock the warm melted butter.

How to make a Chocolate Cinnamon Roll
Make the Yeasted Dough
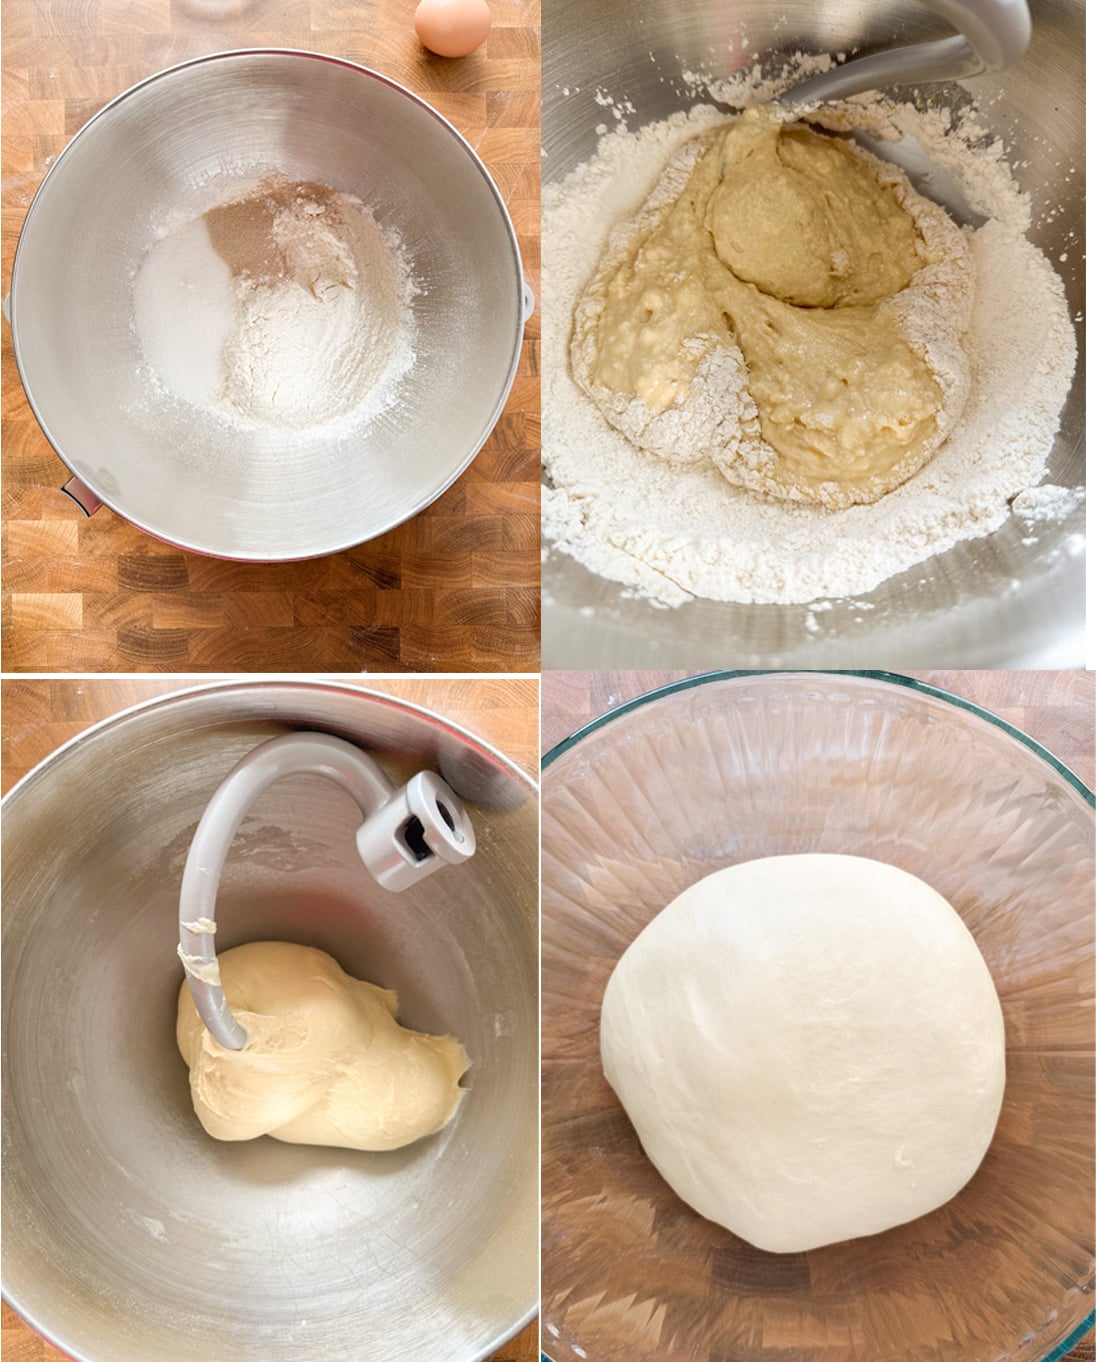
- In the bowl of a stand mixer whisk together the flour, sugar, and yeast..
- Pour in the warm milk, egg, melted butter, vanilla, and salt.
- Use a dough hook to knead everything together on medium low speed for 10-15 minutes until the dough has smooth edges and the bowl is clean.
- Shape the dough into a ball and place in a lightly greased bowl that is at least twice the size of the dough.
- Cover the bowl with plastic wrap or a towel and place somewhere warm to rise for 1 hour. The dough should grow but might not double in size.
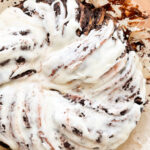
Make the chocolate filling
- In a medium, microwave safe bowl, melt the butter. Pour in the sugar, cocoa, salt, vanilla, and nesquik.
- Stir to combine and set aside.
Shape the Roll
- Once the dough has puffed and grown, briefly knead it to knock the air out. Roll it out on a lightly floured surface, until it is 30 cm x 45 cm.
- Spread the chocolate filling over the surface of the dough leaving a 1/2″ border on one long edge. If needed, microwave the filling again for 15-20 seconds until soft and spreadable.
- Roll the dough up, starting with the one long side that has no border. Once fully rolled, place it seam side down, and use a long sharp knife to cut it in half lengthwise.
- Twist the two halves together with the filling face up. Start by crossing the two over each other to make an X shape, then twist towards both ends. Pinch the ends together so that you have one long twist.
- Start at one end and roll it up like a snail. I tuck the starting end under the twist so that it doesn’t pop out. When you get to the end, tuck the end under the roll as well.
- Press a sheet of parchment paper into a 9″ round metal pan. It should be big enough to go up the sides of the pan but don’t worry if it’s a little messy with all the folds that happen when you press it in.
- Carefully lift the roll and place it in a springform pan.
- Cover the pan with plastic or a damp towel and set aside for at least 45 minutes to proof while the oven preheats. It should become twice the size and puffy!
- Preheat the oven to 375 F and place a rack in the center of the oven.

Bake the Roll
- Once the oven is heated up, pour the heavy cream over the top and along the sides of the roll. Use a brush or a spoon to coat all of the roll with the cream (add more if you need). Place the wreath in the pan onto the center rack in the oven. Set a timer for 25 minutes.
- After 25 minutes have passed, turn the heat down to 350 F, rotate the pan and bake for another 20-25 minutes until golden brown.
- Once baked, remove from the oven and place on a wire rack to cool slightly.
- While it cools, make the icing.
Make the Icing
- In a medium bowl, whisk the powdered sugar, melted butter and 2 tablespoons of warm milk together. If it seems to thick slowly add more milk.
- If it is too thin, add more powdered sugar.
- Carefully remove the baked wreath from the pan and place on the plate or dish you plan to serve it from. Drizzle/pour the icing over the wreath, then use a pastry brush or the back of a spoon to spread it out.
Chocolate Cinnamon Roll
Equipment
- Stand Mixer
Ingredients
Dough
- 325 grams all purpose flour
- 70 grams granulated sugar
- 10 grams instant yeast
- 150 milliliters milk lukewarm
- 1 egg large, room temperature
- 40 grams butter softened
- 1 teaspoon vanilla extract
- 1/2 teaspoon fine sea salt
Chocolate Filling
- 100 grams butter melted
- 200 grams granulated sugar
- 45 grams cocoa powder
- 1/4 teaspoon fine sea salt
- 1 teaspoon vanilla extract
- 18 grams nesquik
Heavy Cream Pour Over
- 100 milliliters heavy cream more if y'a need
Icing
- 125 grams powdered sugar
- 25 grams butter melted
- 2 tablespoons milk warmed
Instructions
Yeasted Dough
- In the bowl of a stand mixer whisk together the flour, sugar, and yeast.
- Pour in the warm milk, egg, melted butter, vanilla, and salt.
- Use a dough hook to knead everything together on medium low speed for 10-15 minutes until the dough has smooth edges and the bowl is clean.
- Shape the dough into a ball and place in a lightly greased bowl that is at least twice the size of the dough.
- Cover the bowl with plastic wrap or a towel and place somewhere warm to rise for 1 hour. The dough should grow but might not double in size.
Chocolate Filling
- In a medium, microwave safe bowl, melt the butter. Pour in the sugar, cocoa, salt, vanilla, and nesquik.
- Stir to combine and set aside.
Shape the Roll
- Once the dough has puffed and grown, briefly knead it to knock the air out. Roll it out on a lightly floured surface, until it is 30 cm x 45 cm.
- Spread the chocolate filling over the surface of the dough leaving a 1/2" border on one long edge. If needed, microwave the filling again for 15-20 seconds until soft and spreadable.
- Roll the dough up, starting with the one long side that has no border. Once fully rolled, place it seam side down, and use a long sharp knife to cut it in half lengthwise.
- Twist the two halves together with the filling face up. Start by crossing the two over each other to make an X shape, then twist towards both ends. Pinch the ends together so that you have one long twist.
- Start at one end and roll it up like a snail. I tuck the starting end under the twist so that it doesn't pop out. When you get to the end, tuck the end under the roll as well.
- Press a sheet of parchment paper into a 9" round metal pan. It should be big enough to go up the sides of the pan but don't worry if it's a little messy with all the folds that happen when you press it in.
- Carefully lift the roll and place it in a springform pan.
- Cover the pan with plastic or a damp towel and set aside for at least 45 minutes to proof while the oven preheats. It should become twice the size and puffy!
- Preheat the oven to 375 F and place a rack in the center of the oven.
Bake
- Once the oven is heated up, pour the heavy cream over the top and along the sides of the roll. Use a brush or a spoon to coat all of the roll with the cream (add more if you need). Place the wreath in the pan onto the center rack in the oven. Set a timer for 25 minutes.
- After 25 minutes have passed, turn the heat down to 350 F, rotate the pan and bake for another 20-25 minutes until golden brown.
- Once baked, remove from the oven and place on a wire rack to cool slightly.
- While it cools, make the icing.
Icing
- In a medium bowl, whisk the powdered sugar, melted butter and 2 tablespoons of warm milk together. If it seems to thick slowly add more milk.
- If it is too thin, add more powdered sugar.
- Carefully remove the baked wreath from the pan and place on the plate or dish you plan to serve it from. Drizzle/pour the icing over the wreath, then use a pastry brush or the back of a spoon to spread it out.
Notes
- When making yeasted dough, ensure that you allow your mixer to fully knead the dough, until it forms a smooth ball and the sides of the bowl are cleaned.
- The butter for the filling should be very soft but not melted. If it is too firm, microwave it on 5 second intervals – stirring in between.
- When rolling out the dough, try to make it as rectangular as possible. This will help when it comes shaping and cutting the roll.
- The icing is made from powdered sugar, milk, and melted butter. However, if you ad cold milk to the melted butter, it will clump so be sure to warm the milk before whisking it in. I usually melt the butter and milk together to make this easier.
- It’s winter as I’m writing this and it’s important to note that when it’s cold, dough takes MUCH longer to rise. To help it along, make sure your eggs, milk, and butter are room temperature (or a little warmer!) the milk should be actually warm just not hot. Additionally, I like to put the dough in a thicker bowl and heat it up first so I usually microwave a big glass mixing bowl and then put the dough in there. Finally, place it somewhere warm, like on your stove as you’re preheating the oven, by your radiator, or on top of your dryer!
- If you want to make this for breakfast, I recommend making and assembling it the night before. Then cover the pan with plastic and place in the fridge overnight. In the morning, take it out, then preheat the oven and then pour on the heavy cream before baking.
Nutrition
This page may contain affiliate links. This means that if you click on one of the product links above and complete a purchase, I’ll receive a small commission at no extra cost to you. I will never place a link nor make a recommendation on a product or service that I don’t love or use personally. Read our privacy policy here. Thank you for supporting Red Currant Bakery.


You mention heavy cream to be poured over the roll before baking. I did not see anywhere where the amount was mentioned. Would hate to pour too much and ruin the end product. Thank you for so many great recipes.
Sorry, I see where the amount of heavy cream is on the recipe ingredients. Thank you.
Could these be baked not frosted and frozen?
Hi Rosemary, they can be but they won’t be as tasty. Yeasted dough is always best fresh when possible!
SO good. Had it without the icing and it was still fantastic. Also looks beautiful!
This is probably the best thing I have ever made. I’ve made a large amount of things, this one is soooo good. Don’t skip the Nesquik it makes it taste so good. I could eat the filling by the spoonful (I wouldn’t though, the stomach ache would be awful).
Ahh this made my day Anna! I’m so glad you enjoyed this one, it’s definitely one of my favorites too!
This recipe was delicious! Perfect for a sweet morning treat or a mid-day goûter. Not too difficult to make either. Instead of Nesquick I used another hot chocolate mix that worked well. Not only all this but it looked beautiful!
Aww yay I’m so glad you enjoyed it Isabela!
I’ve made this multiple times and my family looooooves it. It’s so gooey and just perfect
Ahh I love that, thank you so much Khadija!
Super easy to put together and was so impressive looking! I wanted to eat the chocolate filling by the spoonful.
Yay thank you Samantha!!!
Hiya. Can I skip the heavy cream? Will it make a massive difference?
Hi! Not a massive difference, just a little less soft and fluffy <3
Can the dough be made the day before and the baked off the next morning? If so would I need to let it rise before hand?
I made this last year and it was the best thing ever! ❤️
Thank you!
Hi! Yes, just cover it and put it in the fridge overnight and it will rise just more slowly in the fridge, you can then take it out as you’re preheating the oven.
beautiful, tasty, crowd favourite! although, i reccomend making sure your pan is sealed well as some cream leaked and created a very smoky kitchen.