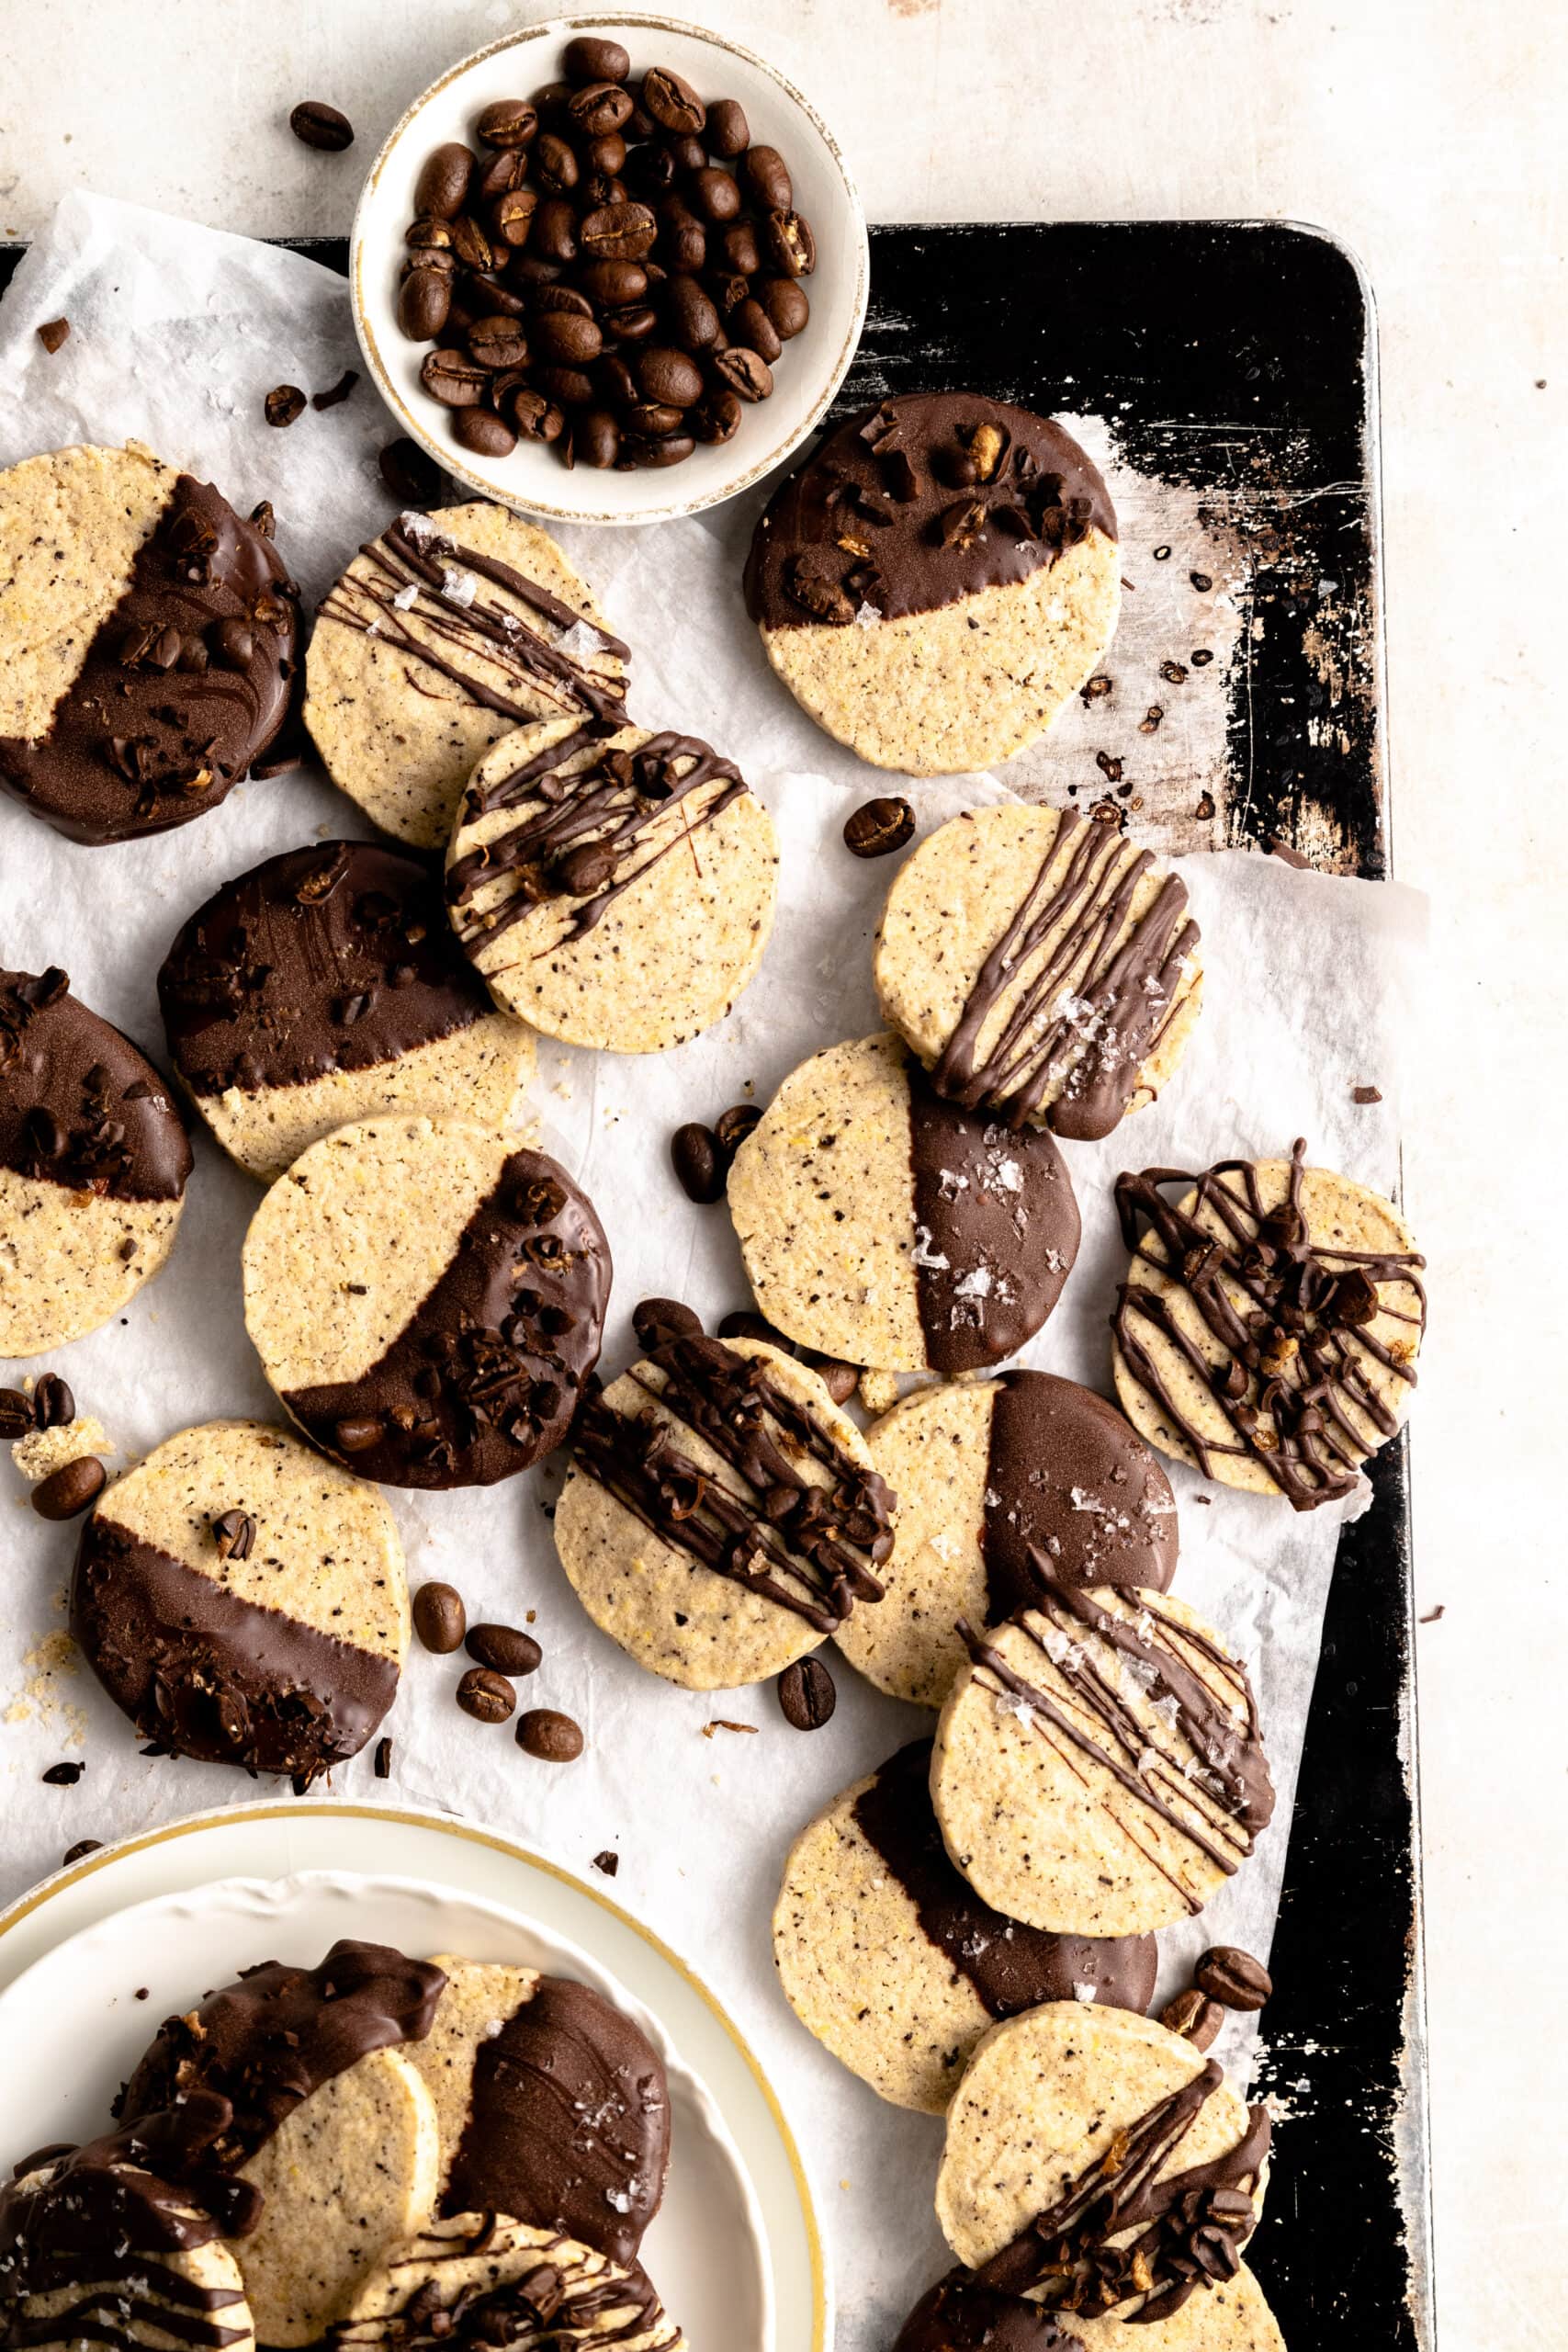
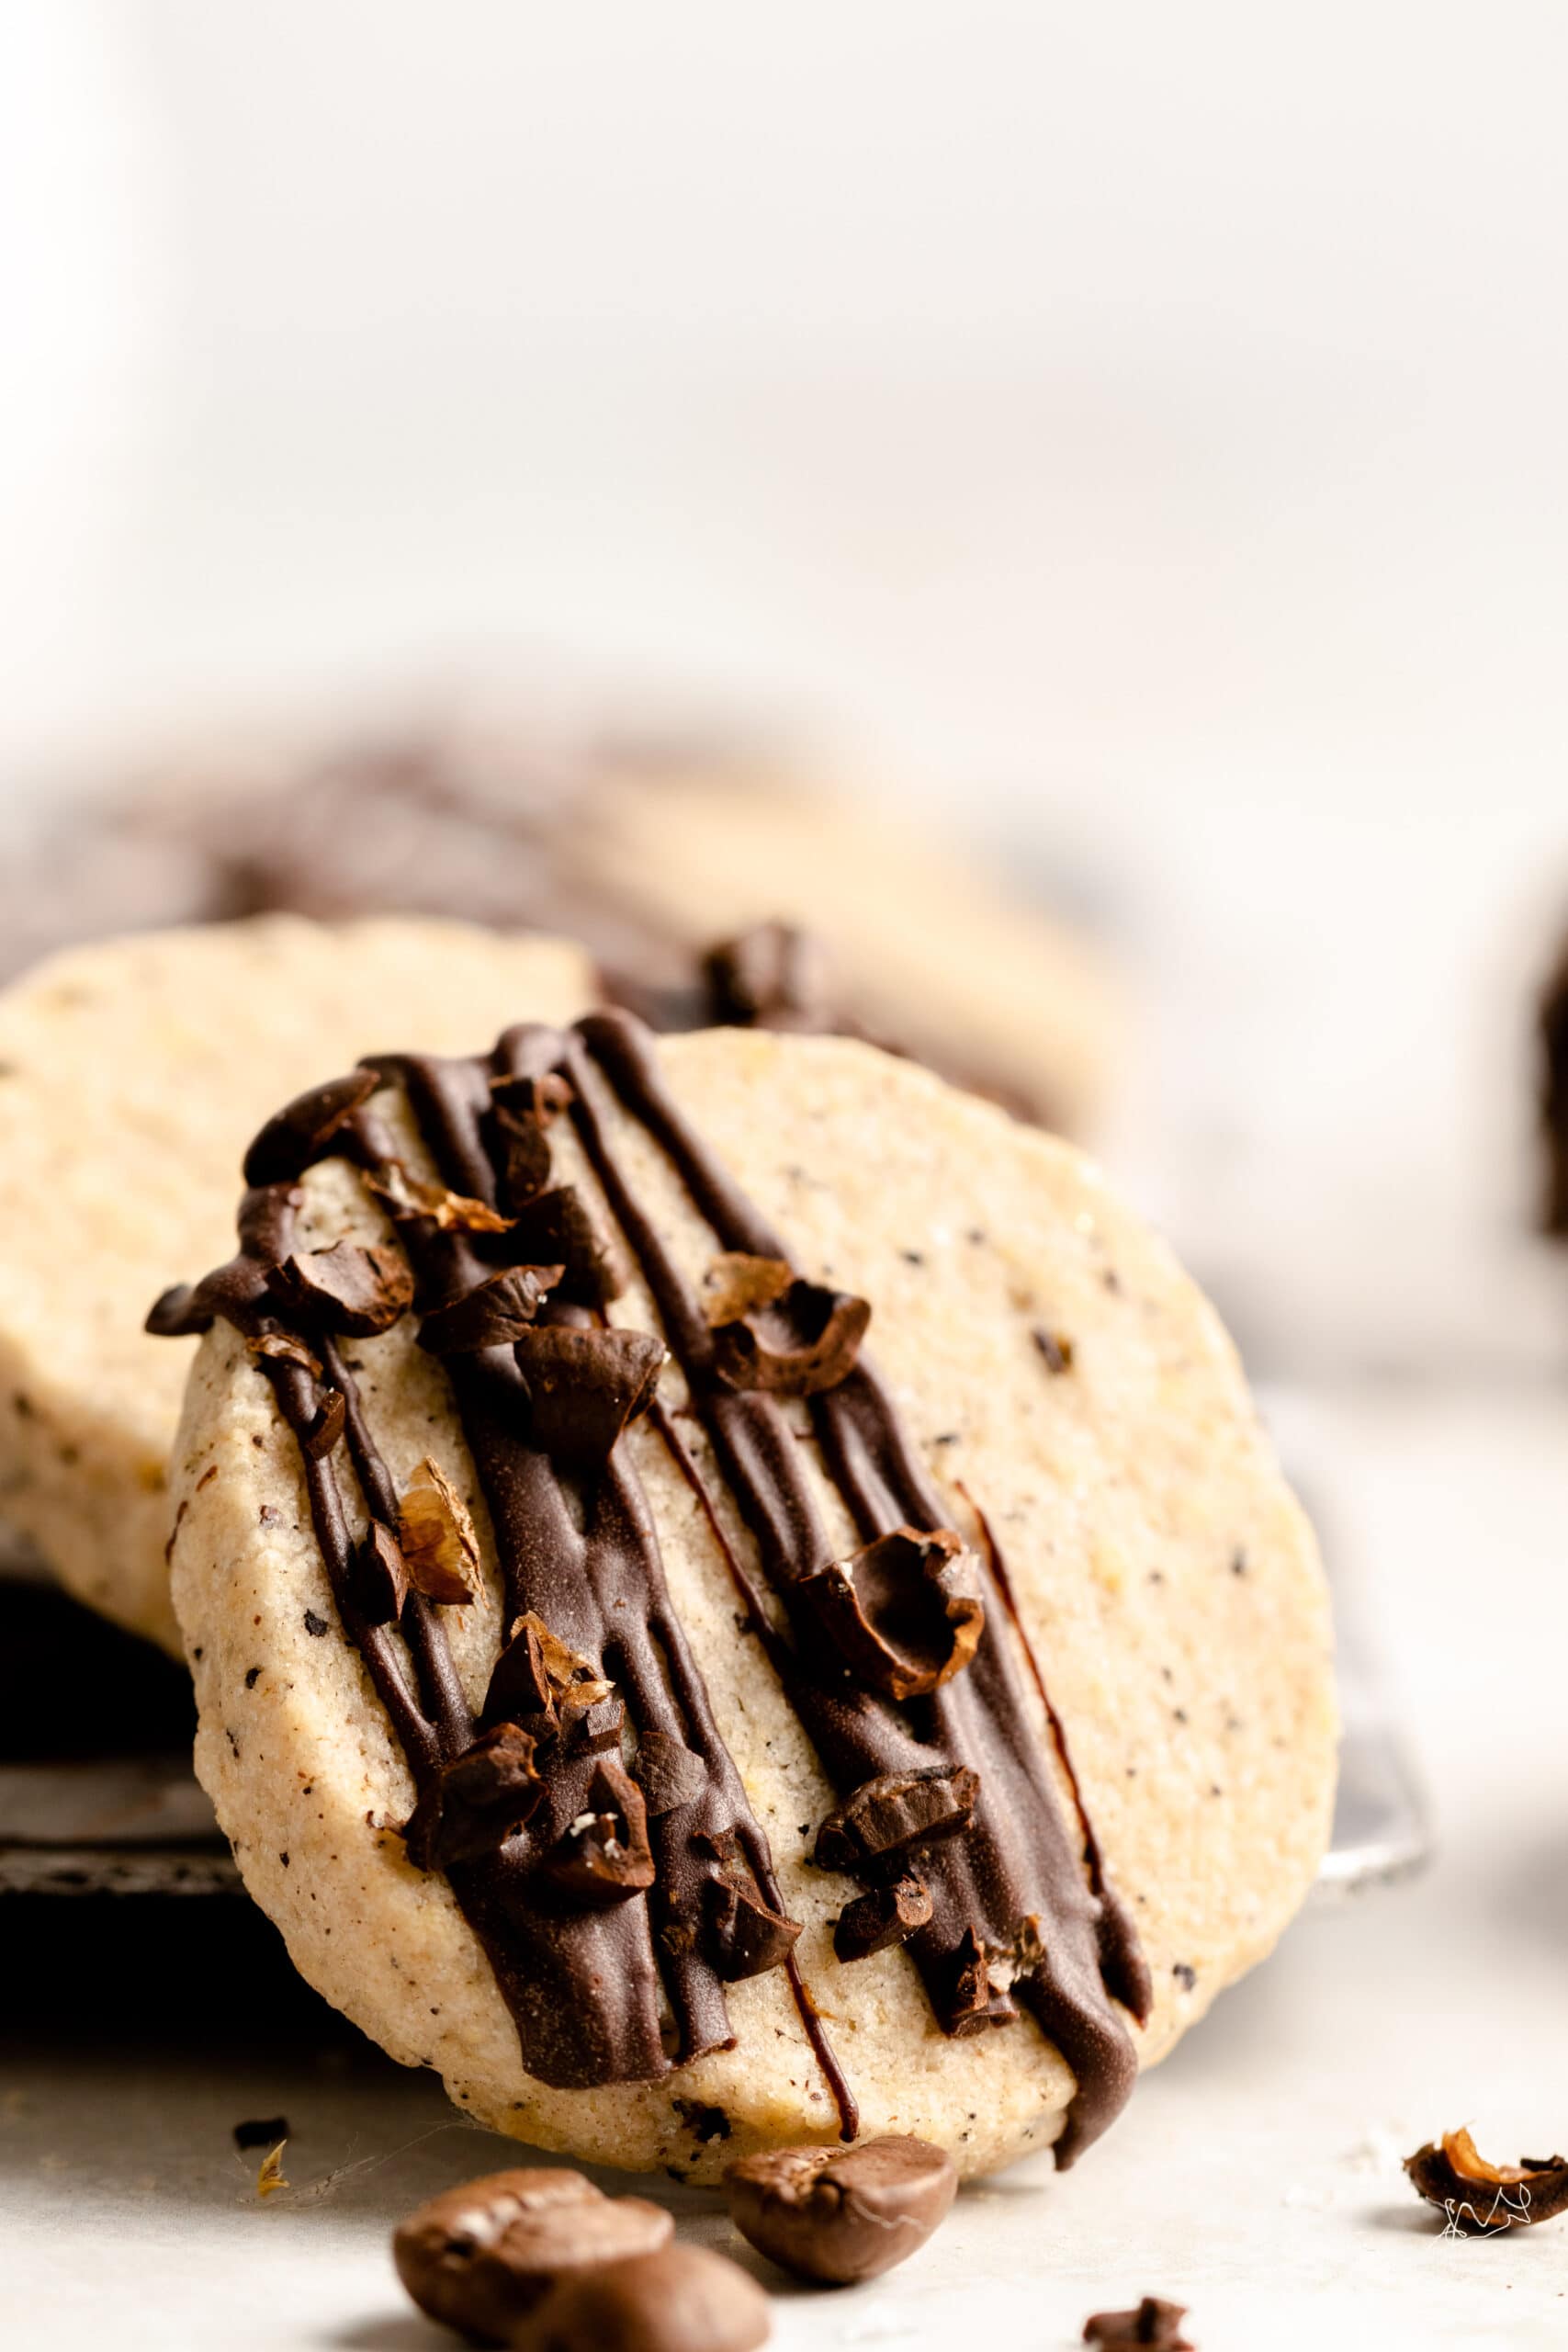
Soft and buttery, with the strong flavor of espresso, these slice and bake espresso cookies are simple but delicious and the perfect addition to any holiday cookie box.
What’s the difference between icebox cookies and slice and bake cookies?
Icebox cookies and slice and bake cookies are basically the same. The idea behind both is that the dough is formed into a log and then chilled so it holds it shape, the dough is then sliced into thin slices and baked.
Which espresso/ coffee should I use?
Technically espresso and coffee are made from the same bean they are just ground differently. Therefore for these cookies can be made with any ground coffee. I wouldn’t use instant coffee unless that is all that you have.
Can these be made in advance?
Yes! One of the best things about these cookies is that they will keep for a couple of weeks as long as they are stored in an airtight container.
You may also like…
Tips for making Slice and Bake Cookies
- Make sure the butter is soft – this will allow the dough to come together faster without developing gluten and causing the cookies to be tough.
- When mixing the dough, be careful not to over mix it. However, it should be a smooth cohesive ball of dough rather than still crumbly. If you use a hand mixer it may still look crumbly, just bring it together into a cohesive ball of dough by hand.
- Don’t skip the cooling – it is important that the dough has had a chance to cool and firm up so that it can be easily sliced.
- If you plan to dip them in chocolate, be sure to allow the cookies to cool fully before adding the chocolate.
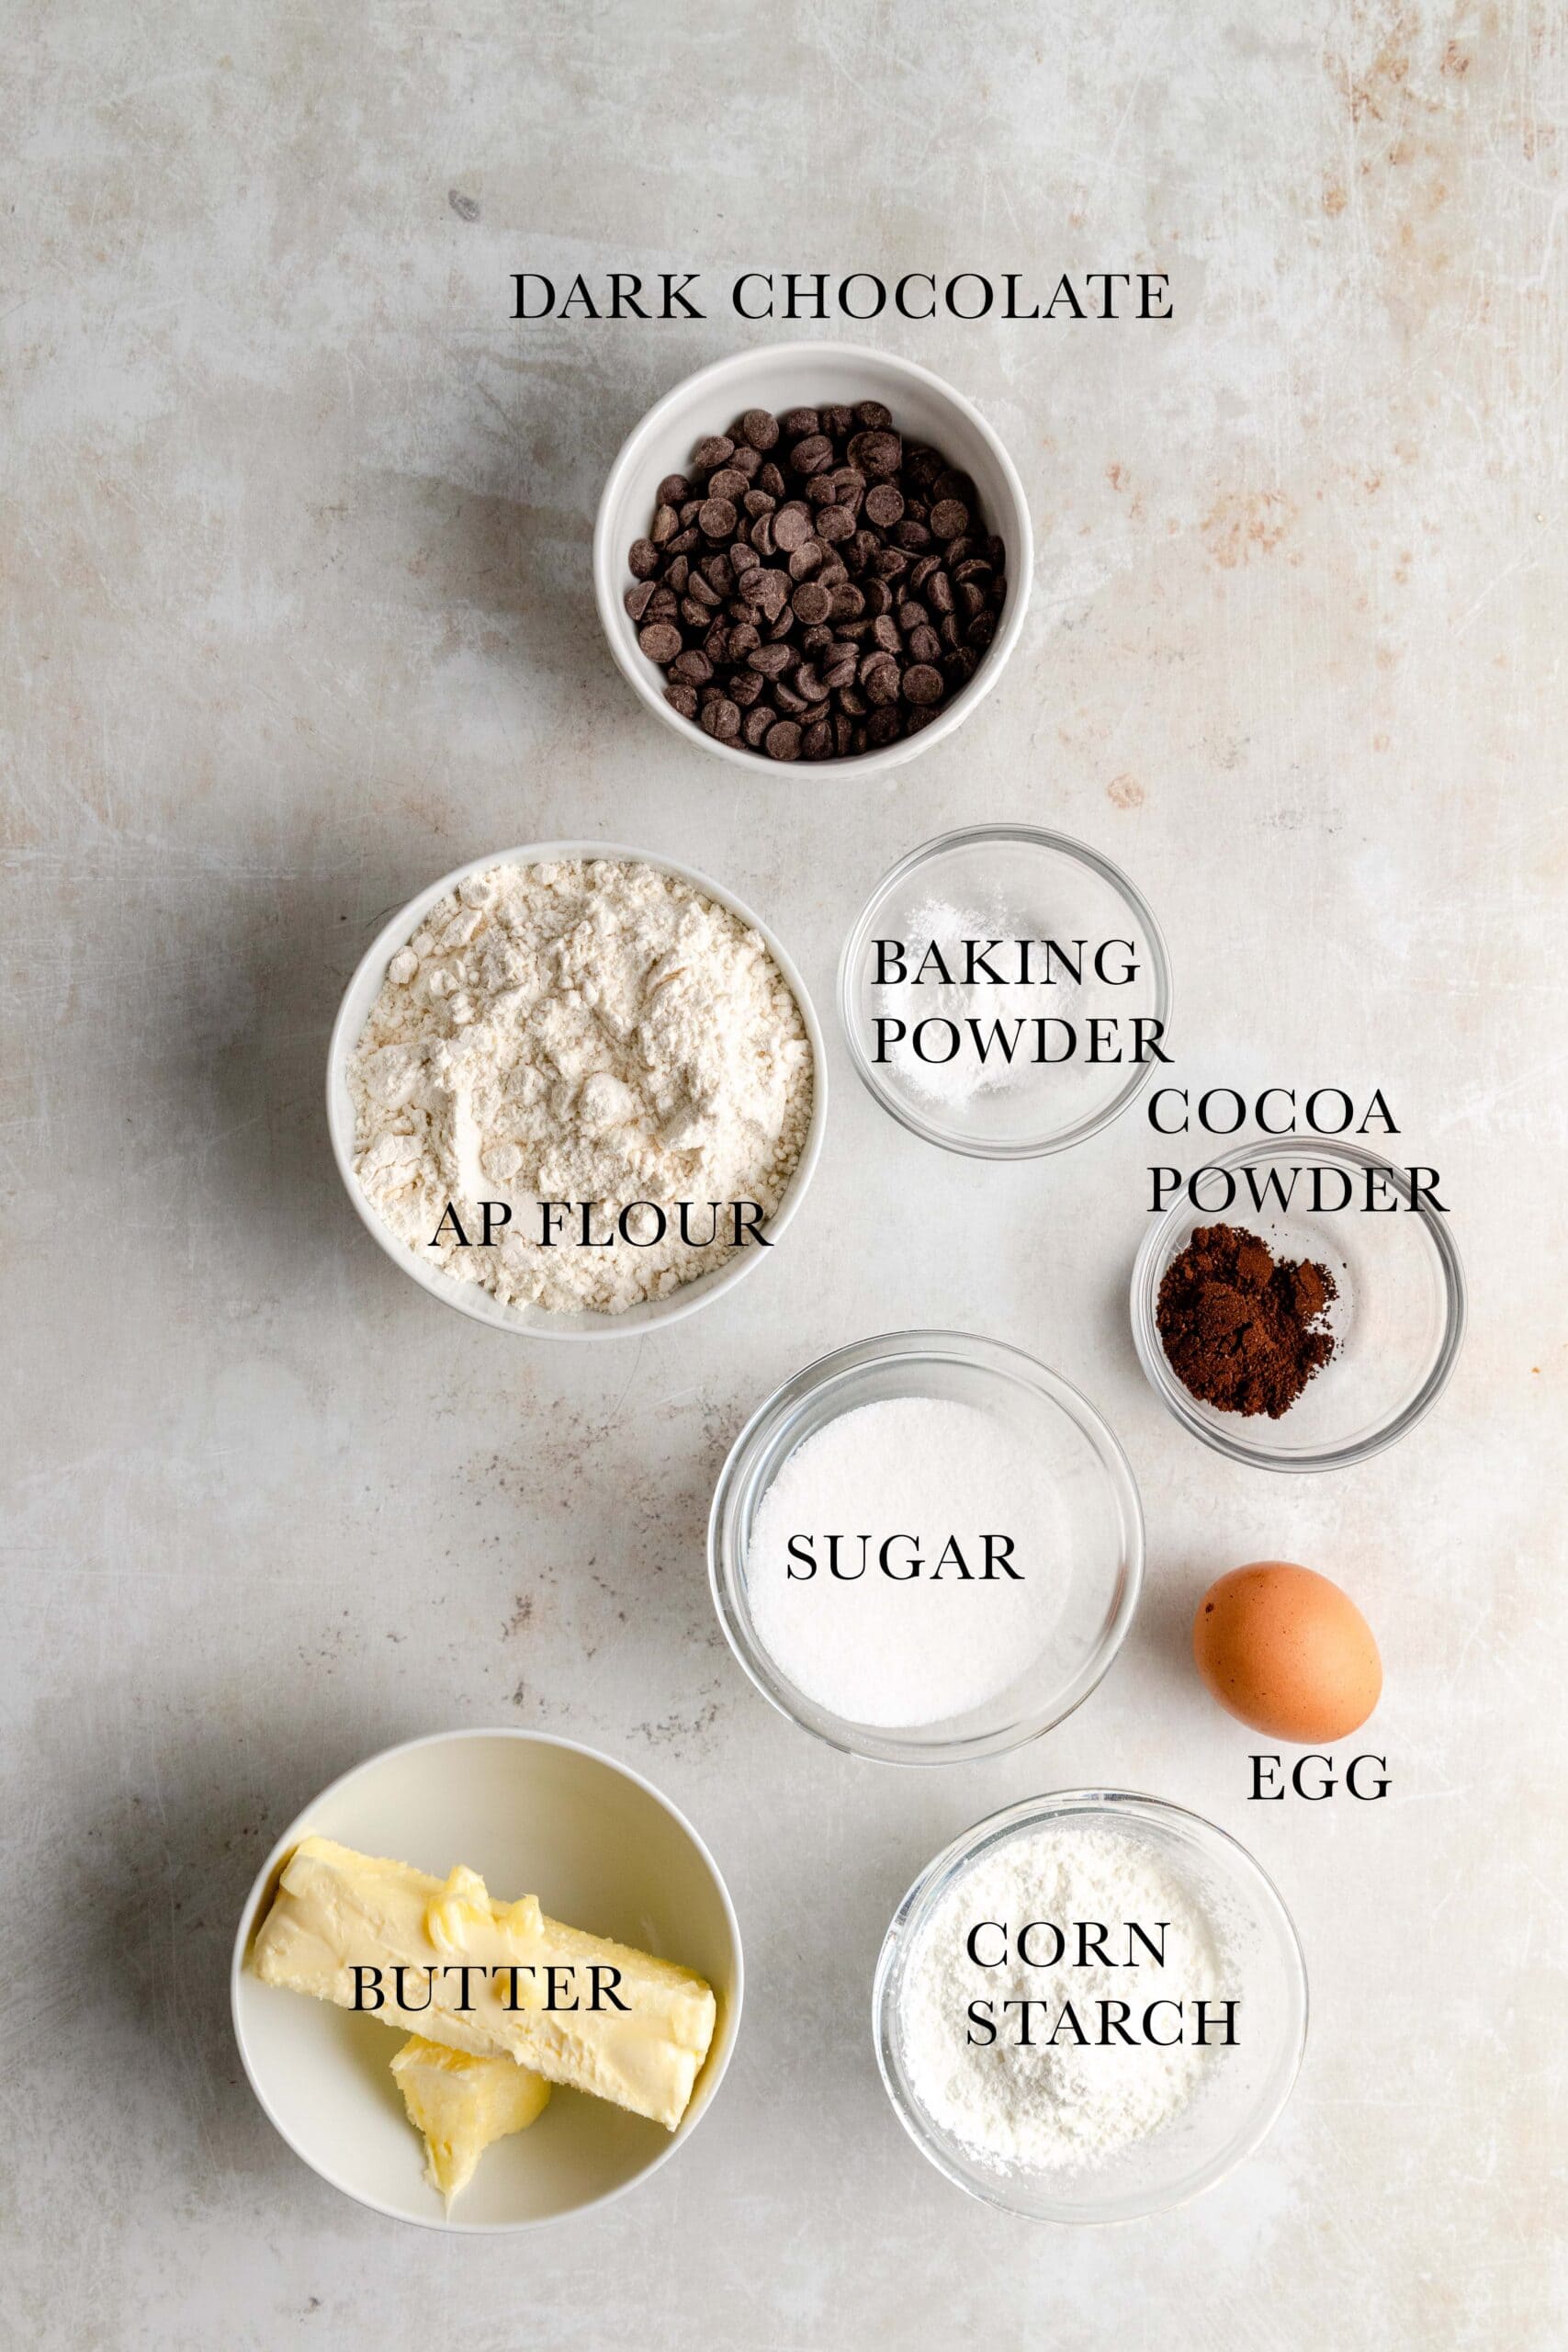
Ingredients
- All Purpose Flour: Any all purpose flour should work for these slice and bake espresso cookies I have not yet tried any other flours with this recipe.
- Corn Starch: Corn starch helps keep the cookies crumbly and soft. You can also replace it 1:1 with arrow root starch.
- Baking Powder: Baking powder makes the cookies a little lighter and more tender.
- White Sugar: These cookies use granulated sugar for sweetness.
- Ground Espresso/Coffee: Any coffee/ espresso will work for this, if it isn’t already ground, grind it to a course grind so that you can see the flecks of espresso in the cookies.
- Butter: Butter adds moisture to the cookies and gives them their soft crumbly texture.
- Egg: I use standard large eggs from the store, make sure the egg is at room temperature before adding it into the dough.
- Dark Chocolate: If you can, find dark chocolate couverture because it will be easier to temper but any dark chocolate will work, just make sure the chocolate hasn’t bloomed (this will be visible as a white chalky look on the chocolate).
How to make Espresso Butter Cookies
Make the Dough
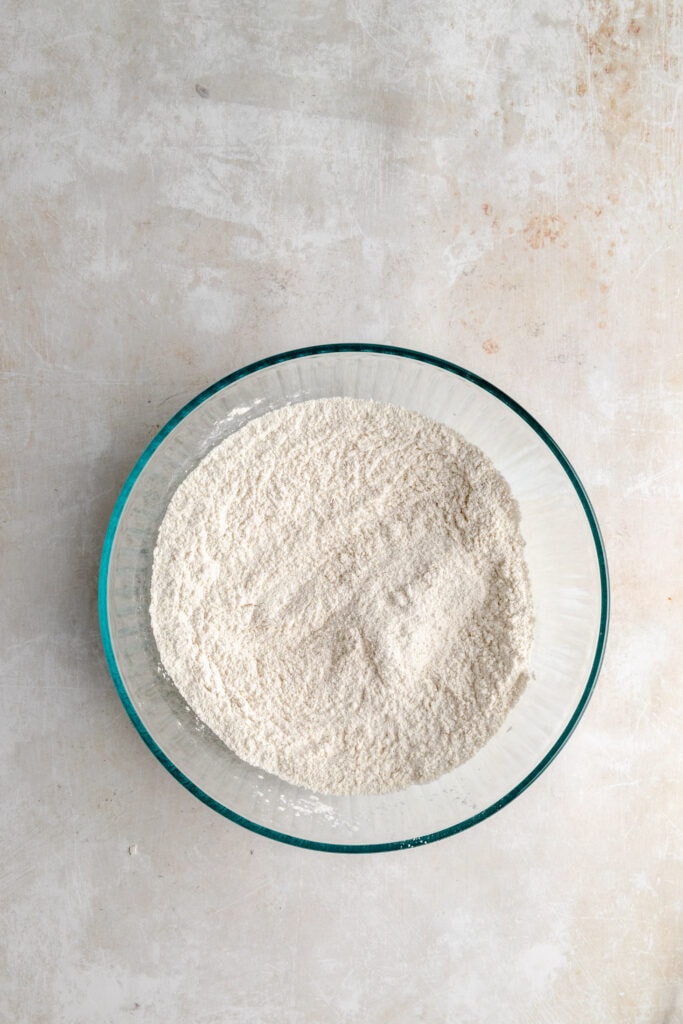
- In a large mixing bowl, whisk together the flour, cornstarch, baking powder, sugar, and ground coffee.
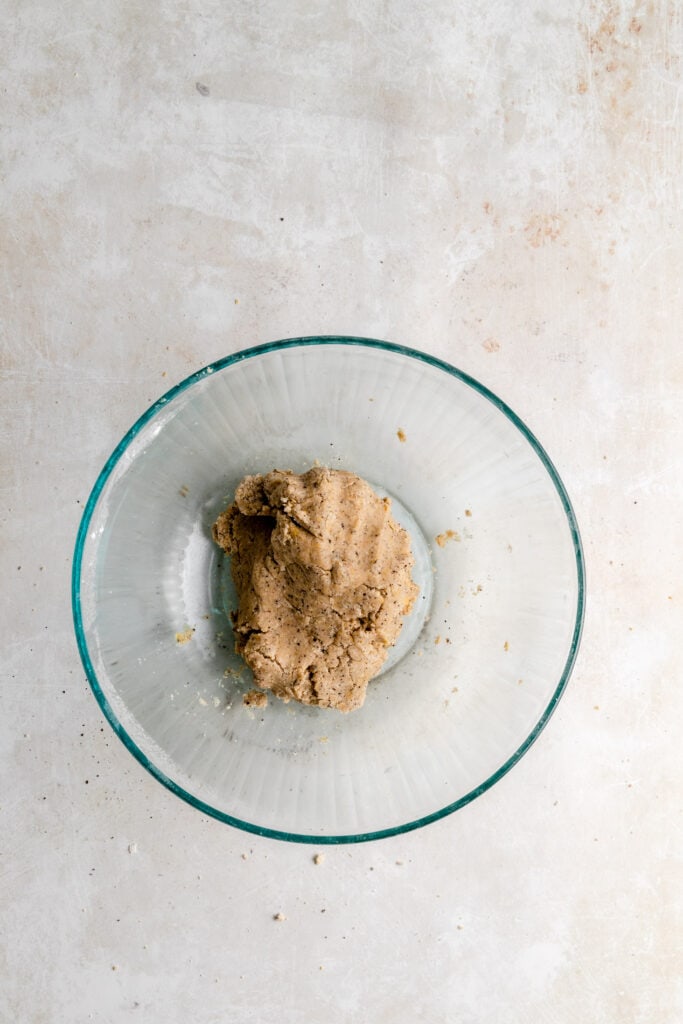
- Add in the butter and egg. Use the paddle attachment on a stand mixer or an electric hand mixer to mix the dough into a smooth, cohesive dough.
- If the dough stays crumbly, gently bring the dough together by hand.
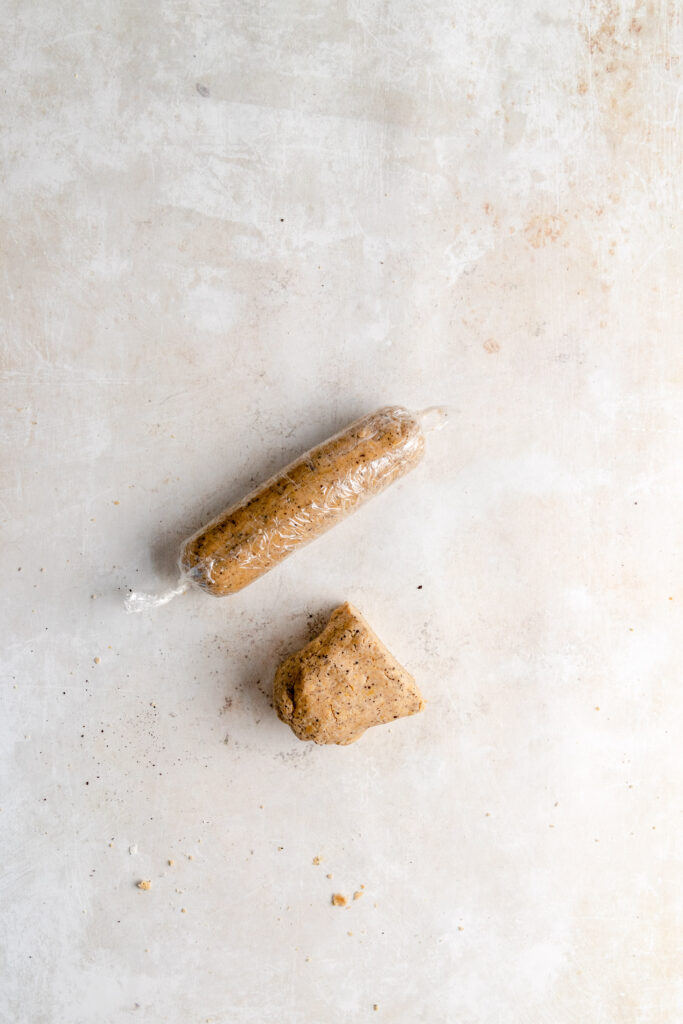
- Divide the dough into two portions and gently form each one into a log.
- Tear off a sheet of plastic wrap and place one portion of dough onto the sheet. Tightly roll the plastic around the dough to create an even and smooth log of dough. Twist both ends of the plastic to close up the ends.
- Repeat the wrapping for the second portion of dough. Place both dough rolls into the fridge for 2 hours.
- 30 minutes before the dough is finished chilling, preheat the oven to 350 F. Arrange two baking sheets in the oven so that they divide the oven into thirds.
Slice and Bake the Cookies
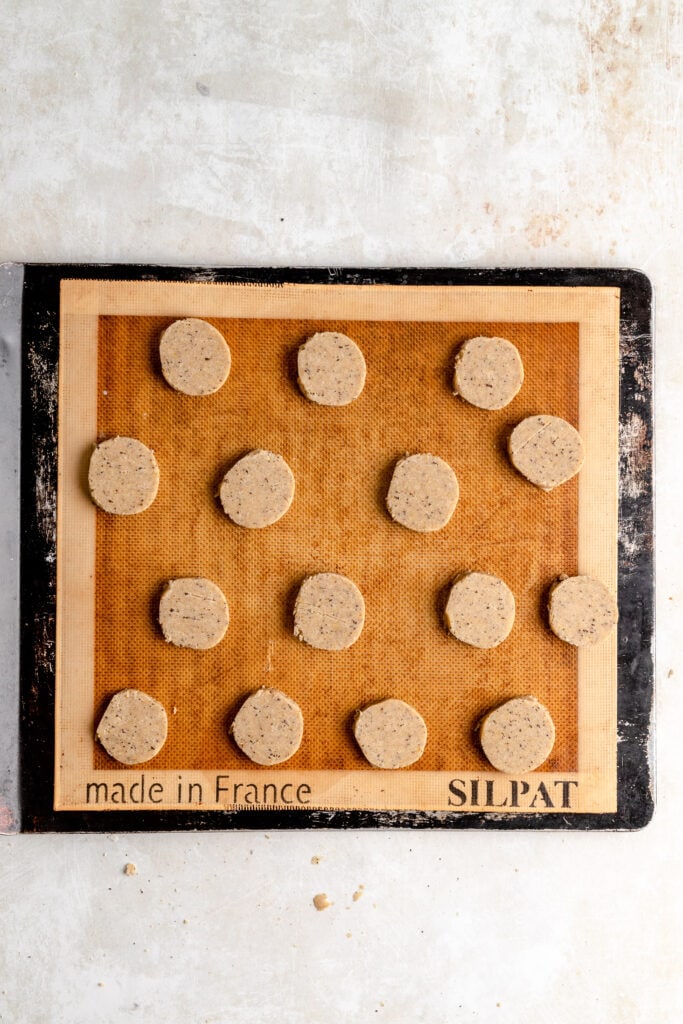
- Line two baking sheets with parchment paper or silicone baking mats.
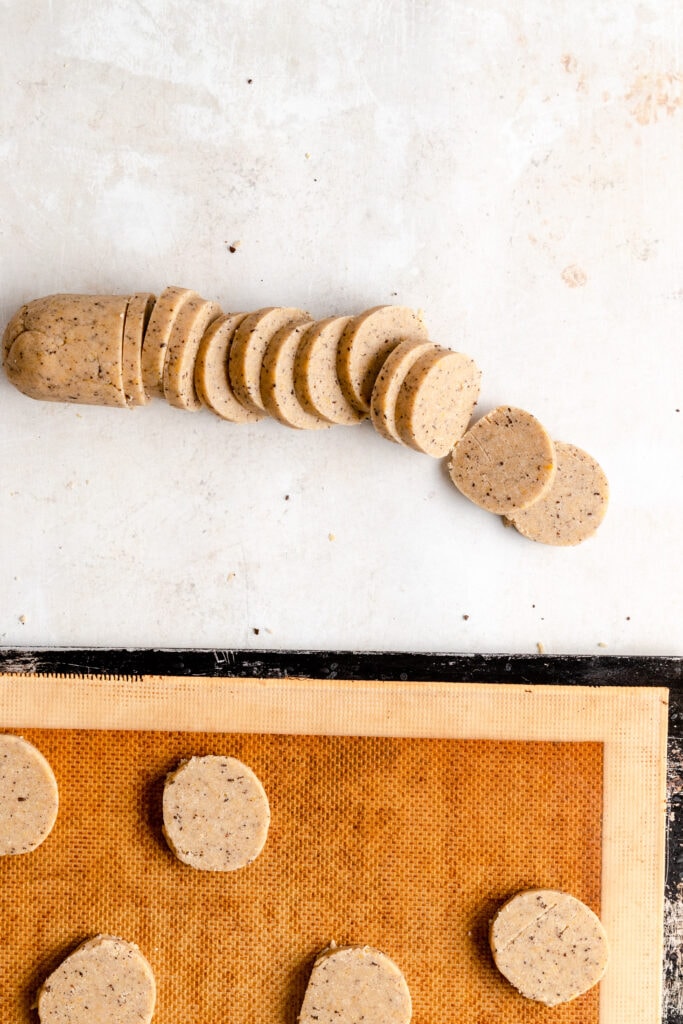
- Unroll both portions of dough. Slice off the end of one roll to create a clean cut. Then cut the roll into 1/2 cm slices. Place the slices onto the prepared baking sheets with at least 1/2″ of space between each cookie.
- Bake both sheets of cookies for 10 minutes, rotating and swapping the baking sheets after 5 minutes.
Finishing Touches
- Once baked, remove the baking sheets from the oven and place onto wire racks until they are fully cooled.
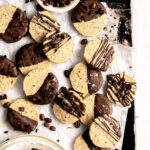
- If you want to add chocolate, I recommend tempering the chocolate – this will make it set quickly and harden and won’t require these to be stored somewhere cold. However, you can also just melt the chocolate and then keep the cookies somewhere cold.
- Here is a Guide to Tempering Chocolate by King Arthur.
- Dip the cookies in the melted chocolate or drizzle it over the cookies. Sprinkle the chocolate with chopped espresso beans or flaky sea salt. Leave to set and then store in an airtight container.


Slice and Bake Espresso Cookies
Ingredients
Dough
- 200 grams ap flour
- 60 grams corn starch
- 1 tsp baking powder
- 100 grams granulated sugar
- 1 tbsp ground coffee
- 125 grams butter softened
- 1 egg
Finishing Touches
- 130 grams dark chocolate
- 1 tbsp sea salt (flaky) optional
- 2 tbsp coffee beans (chopped) optional
Instructions
Make the Dough
- In a large mixing bowl, whisk together the flour, cornstarch, baking powder, sugar, and ground coffee.
- Add in the butter and egg.
- Use an electric mixer to mix the dough until smooth.
- Divide the dough into two portions.
- Briefly shape each portion into a log. Tightly wrap each log with plastic wrap, twist the ends of plastic closed to create a tight roll of dough.
- Place both rolls into the fridge for 2 hours.
- 30 minutes before the dough is finished cooling, preheat the oven to 350 F. Arrange two racks to divide the oven into thirds.
Slice and Bake the Cookies
- Line two baking sheets with parchment paper or silicone baking mats.
- Unroll the dough and cut off one end to create a clean slice.
- Cut the rolls into 1/2 cm slices and place them onto the baking sheets. Leave at least 1/2" of space between the cookies on the baking sheets.
- Bake the sheets of cookies for 10 minutes in the preheated oven, rotating and swapping the pans after 5 minutes.
- Once baked, remove the baking sheets and place on wire racks to cool fully.
Finishing Touches
- Melt or temper the chocolate and dip or drizzle the cookies with the chocolate.
- Top with the chopped espresso beans or flaky sea salt and let the chocolate set before storing in an airtight container.
Notes
Nutrition
This page may contain affiliate links. This means that if you click on one of the product links above and complete a purchase, I’ll receive a small commission at no extra cost to you. I will never place a link nor make a recommendation on a product or service that I don’t love or use personally. Read our privacy policy here. Thank you for supporting Red Currant Bakery.


Made these for my office as little Christmas gifts. I’m an amateur baker, but this recipe was super easy to follow and I got SO many compliments on the cookies! Best of all, I got to share the extras with my family AND they go perfectly with my tea and coffee in the morning! Would make these again and again!
Thank you so much Annette! I’m so happy to hear that they were a success!
I think I made my dough rolls a bit too small and cut them a bit too thin, so they turned out a little dry for me, but that just means i get to eat 4 every time I want a cookie! I wasn’t sure how I liked them at first, but once I added the chocolate salt and espresso on top, they really came together and they’re so nice! just sweet enough, and will definitely go nicely with our tea. 🙂