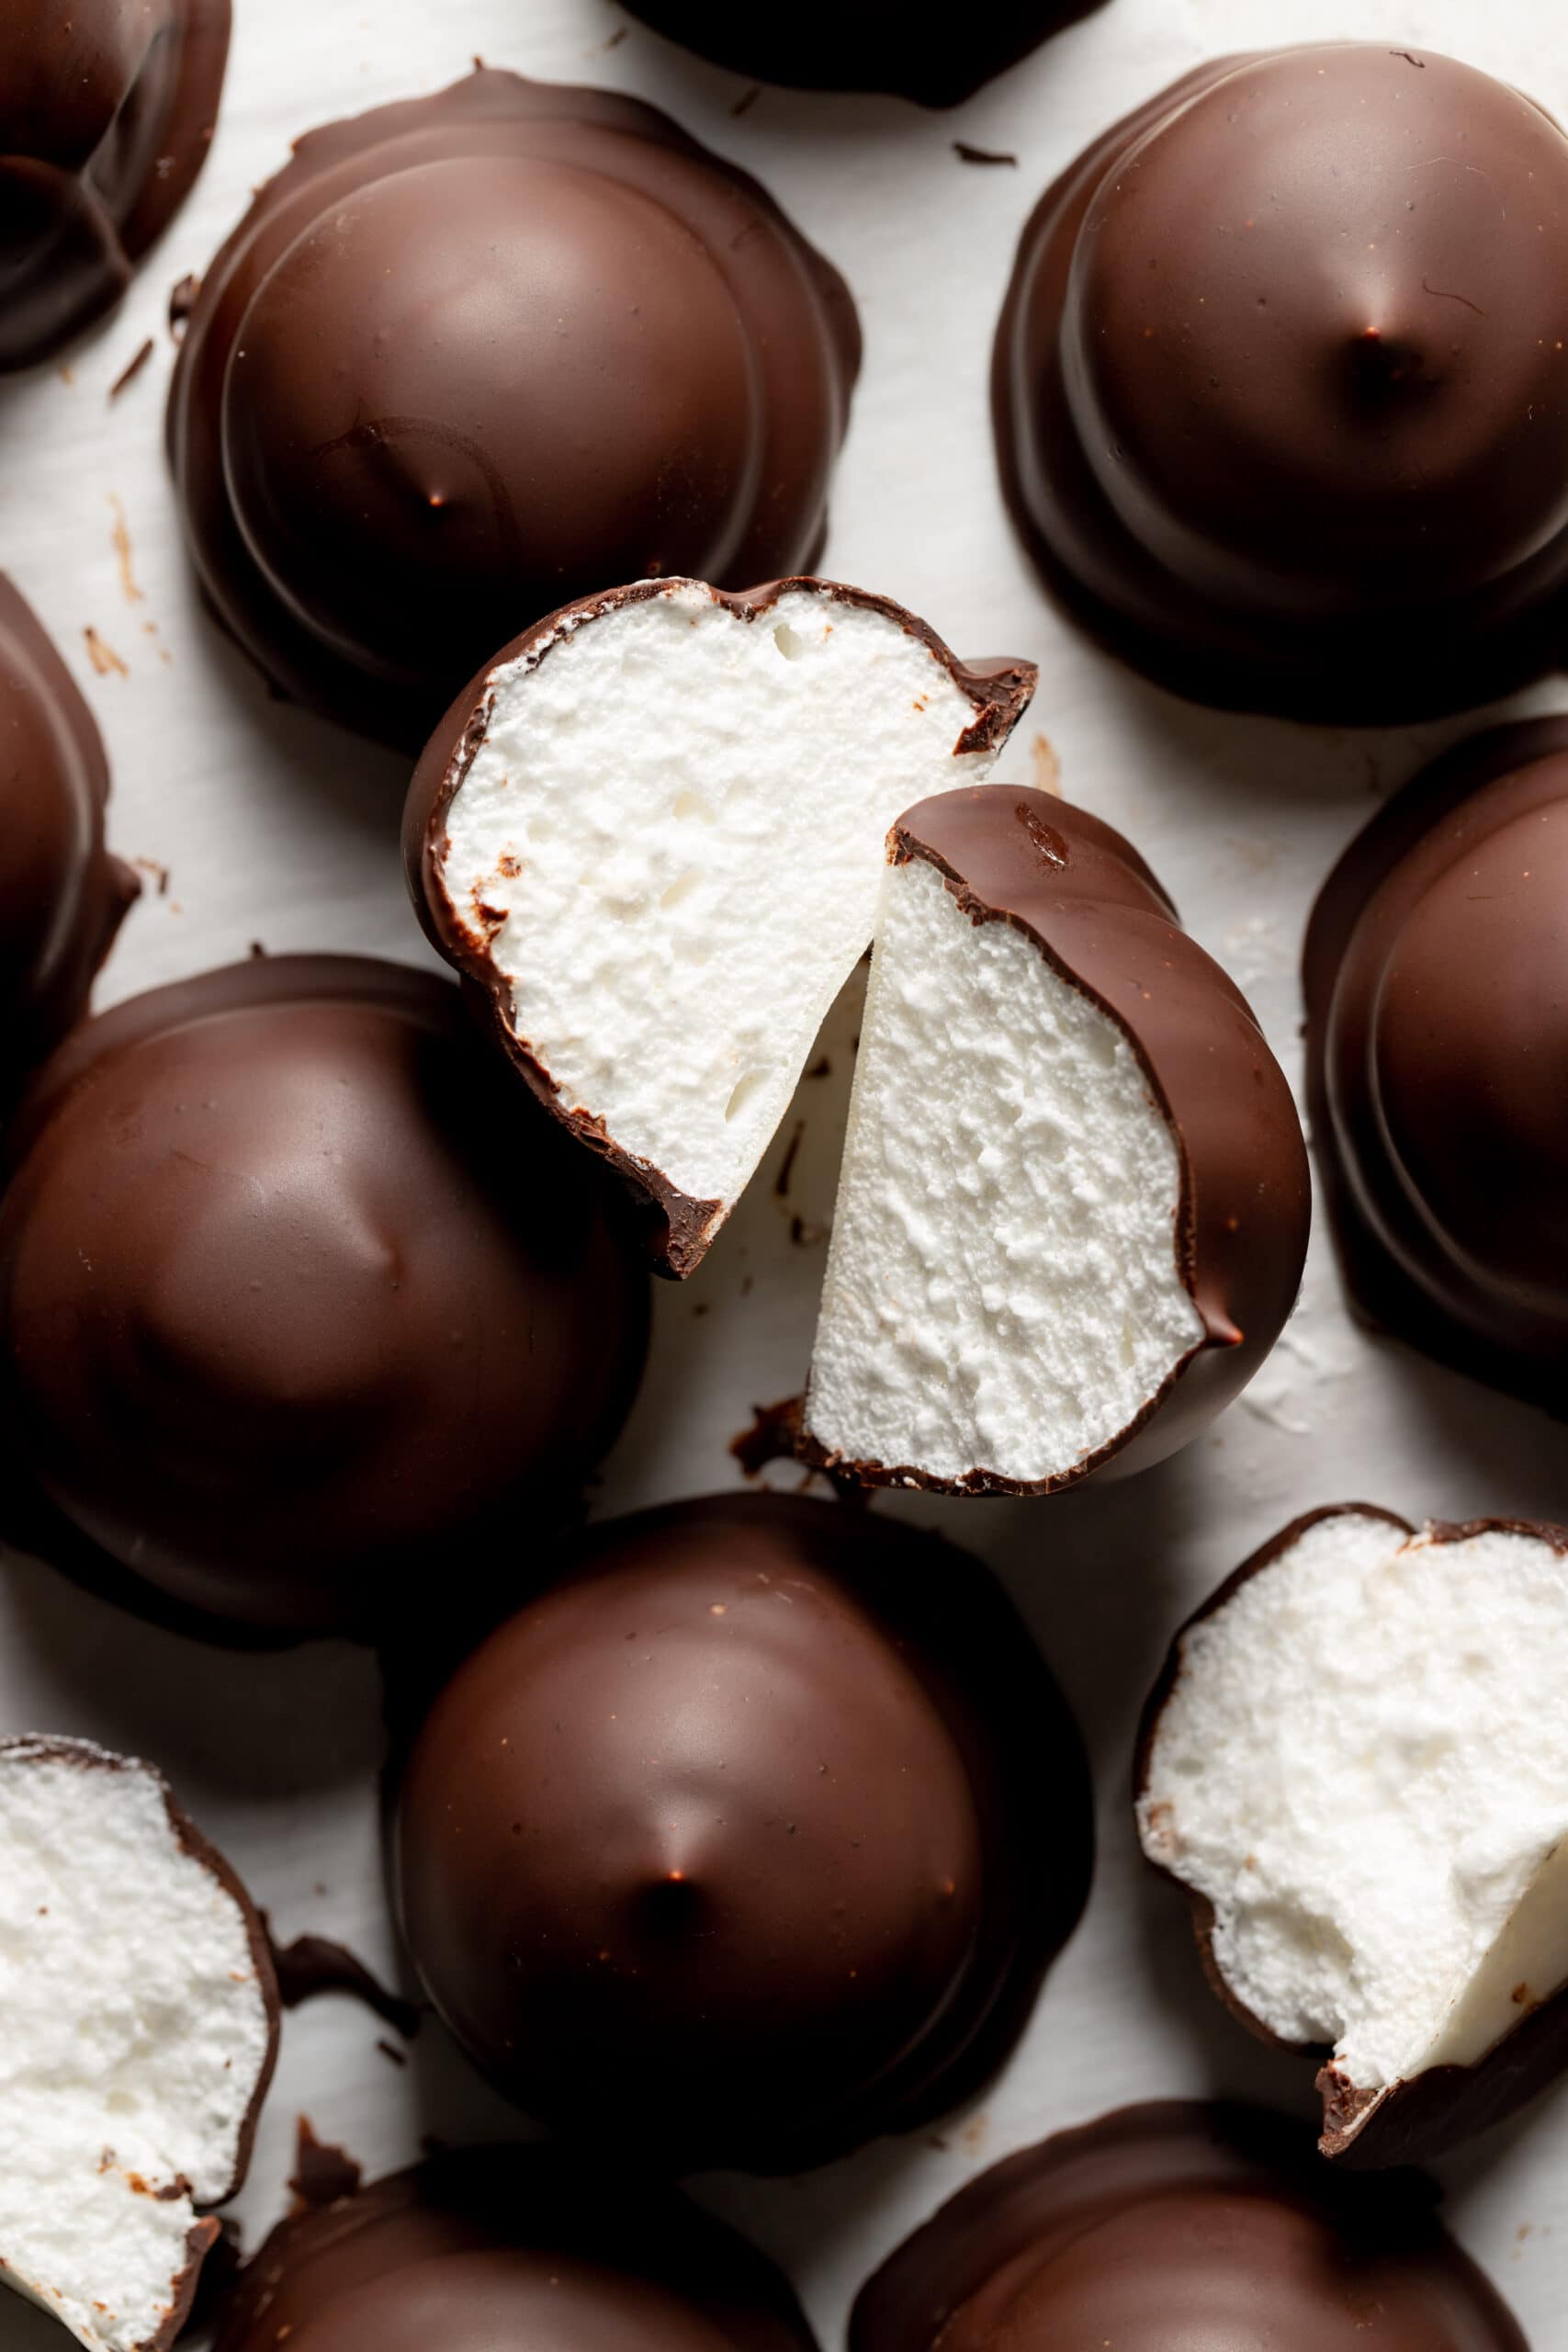
Marshmallowy meringue on a thin, wafer like cookie, and coated in dark chocolate, these schokokuss are a fun German treat!
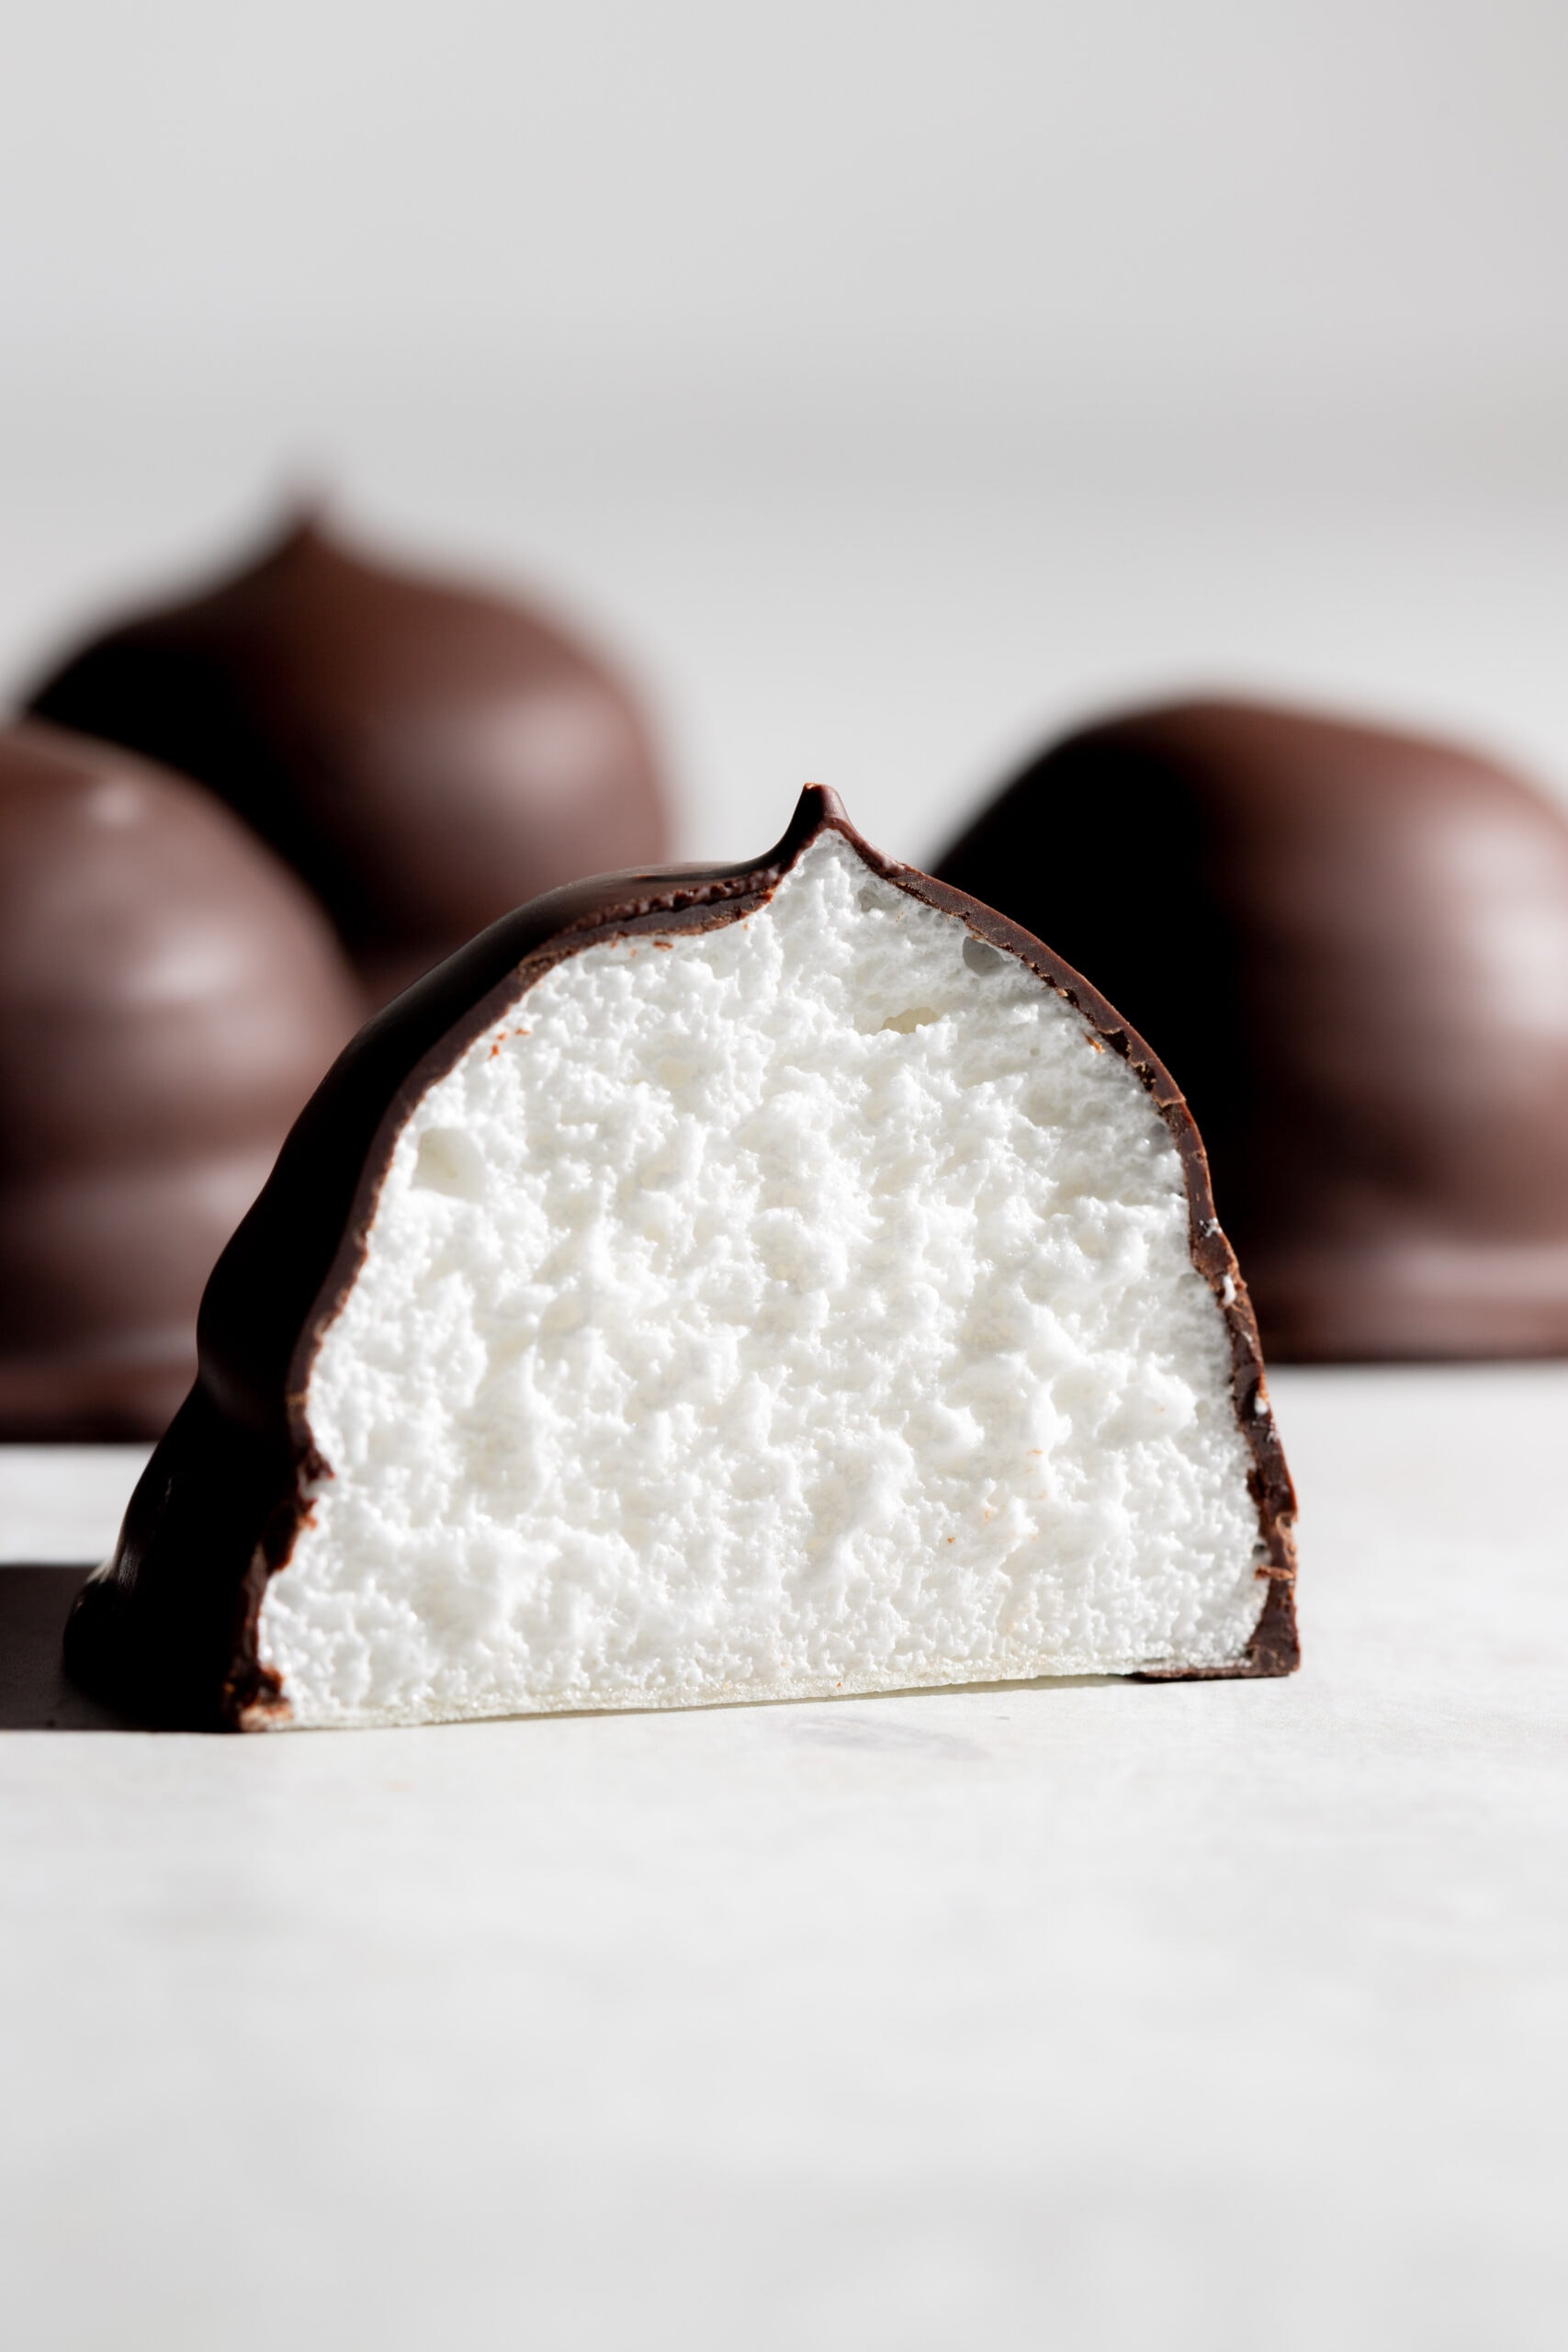
What are Schokokuss?
Schokokuss or as they are known in English, chocolate foam kisses, are classically a thin wafer cookie topped with a mound of marshmallow (not as thick and chewy as American marshmallows) and coated with milk chocolate, but of course I had to do dark chocolate.
Do I have to use wafer cookies?
Nope! One of my favorite things about these is that they taste great on top of any cookie. Including but not limited to: oreos, leibniz, any butter or wafer cookie, spekulatius.
Can these be made in advance?
Yes! They are best if made the day before you want them because it allows the meringue to set. However, I would not recommend saving them for more than 3 or 4 days because the egg whites aren’t baked.
Tips for making Schokokuss
- Be patient when making meringue. Slow and steady is best to prevent big pockets of air.
- Pay attention to timing, the egg whites should be almost stiff when you pour the boiling hot sugar syrup in. When pouring the syrup into the egg whites, keep the mixer running but pour the syrup down the side of the mixer so that it doesn’t hit the whisk attachment, which will cause the syrup to fly around the sides of the bowl rather than mix in with the egg whites.
- Once the gelatin is bloomed, heat it up so that it can incorporate more easily into the egg whites. To do so, pop it int the microwave for no more than 10 or 15 seconds as it heats very quickly.
- It is easiest to use a piping bag to create the shape but if you don’t have one, simply use a large resealable bag.
- Be sure to let them set before coating with chocolate otherwise you will end up with a sloppy mess.
- The easiest and most effective way I have found to coat them in chocolate is to hold them one at a time with a fork or mini spatula, then pour the melted chocolate out of a measuring cup with a spout, over the top, and collect the excess chocolate in a bowl beneath.
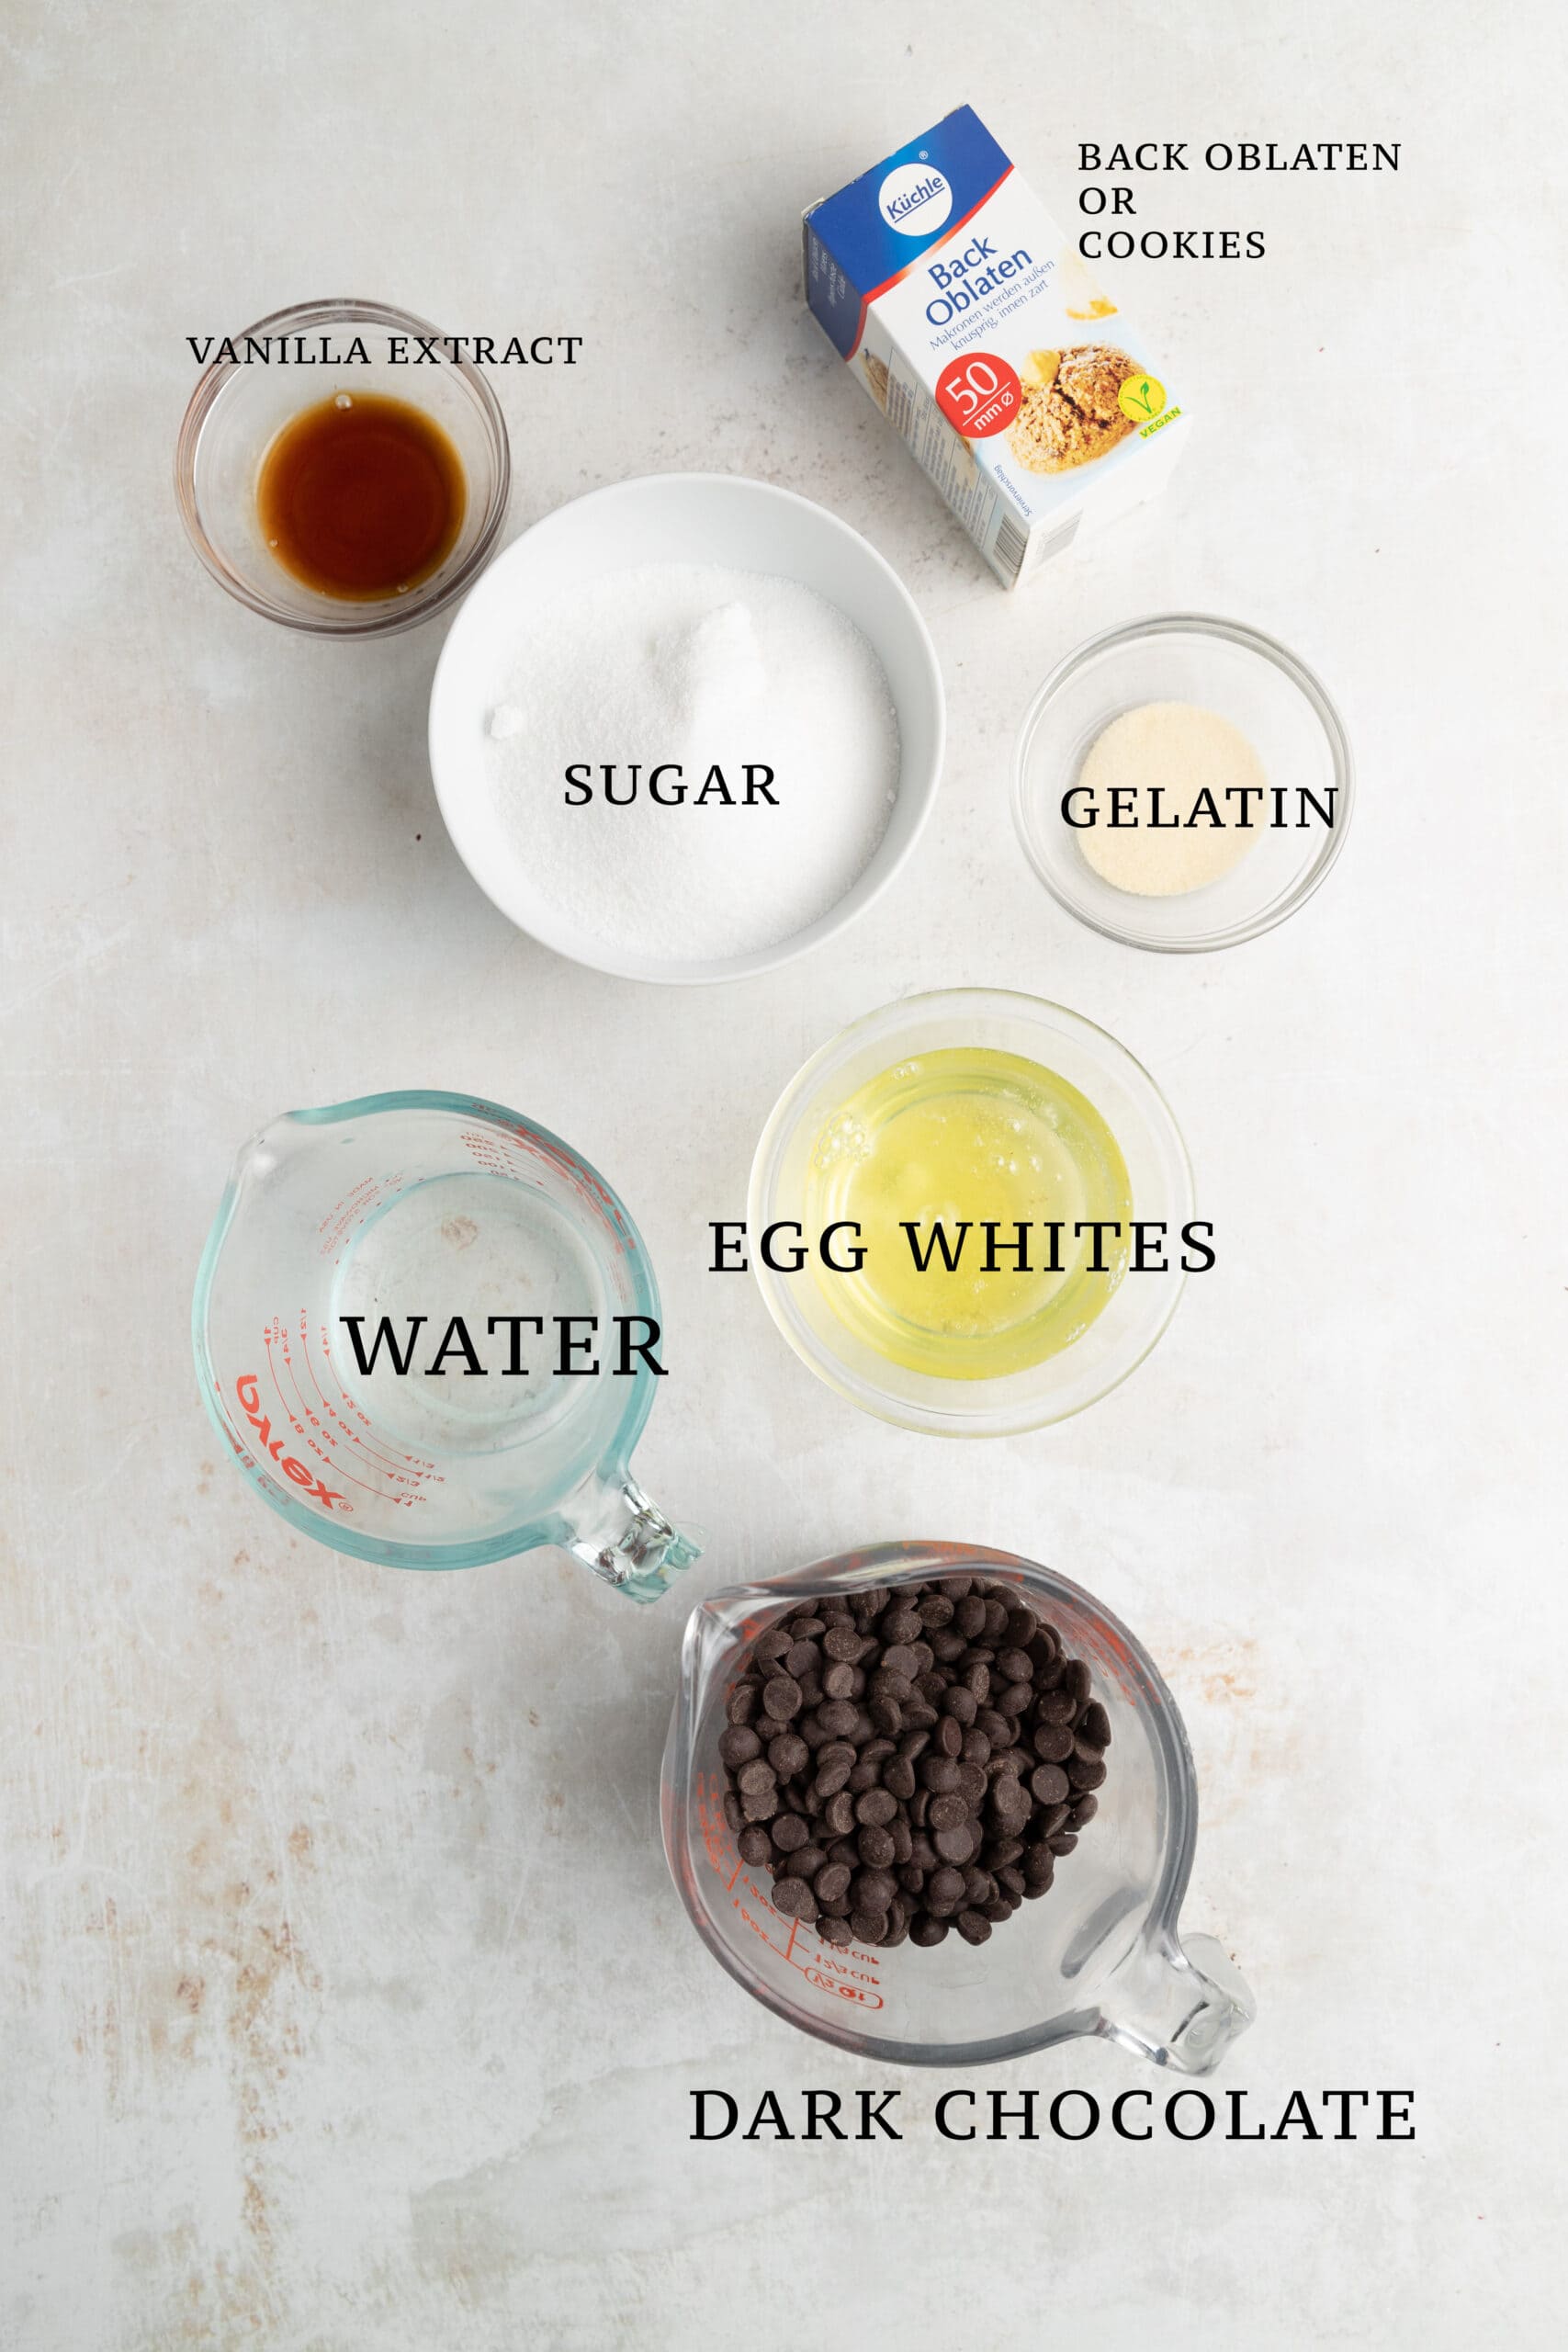
Ingredients
- Gelatin: This recipe uses powdered gelatin which can be purchased in packet form. Don’t leave this out because then the schokokuss won’t have the right texture.
- Water: Water is needed both for the sugar syrup and to bloom the gelatin.
- Sugar: Granulated sugar is used to make the sugar syrup for the meringue/marshmallow filling.
- Egg Whites: I recommend using pasteurized egg whites because they aren’t baked (they aren’t raw either because of the hot syrup). They will also whip up the best if they are at room temperature – that being said it is easiest to separate eggs when they are cold.
- Vanilla: Vanilla extract is optional but it adds the only real flavor to the meringue.
- Dark Chocolate: Dark or milk chocolate will work for the coating but I prefer dark chocolate to balance out the sweetness of the meringue.
How to make Schokokuss?
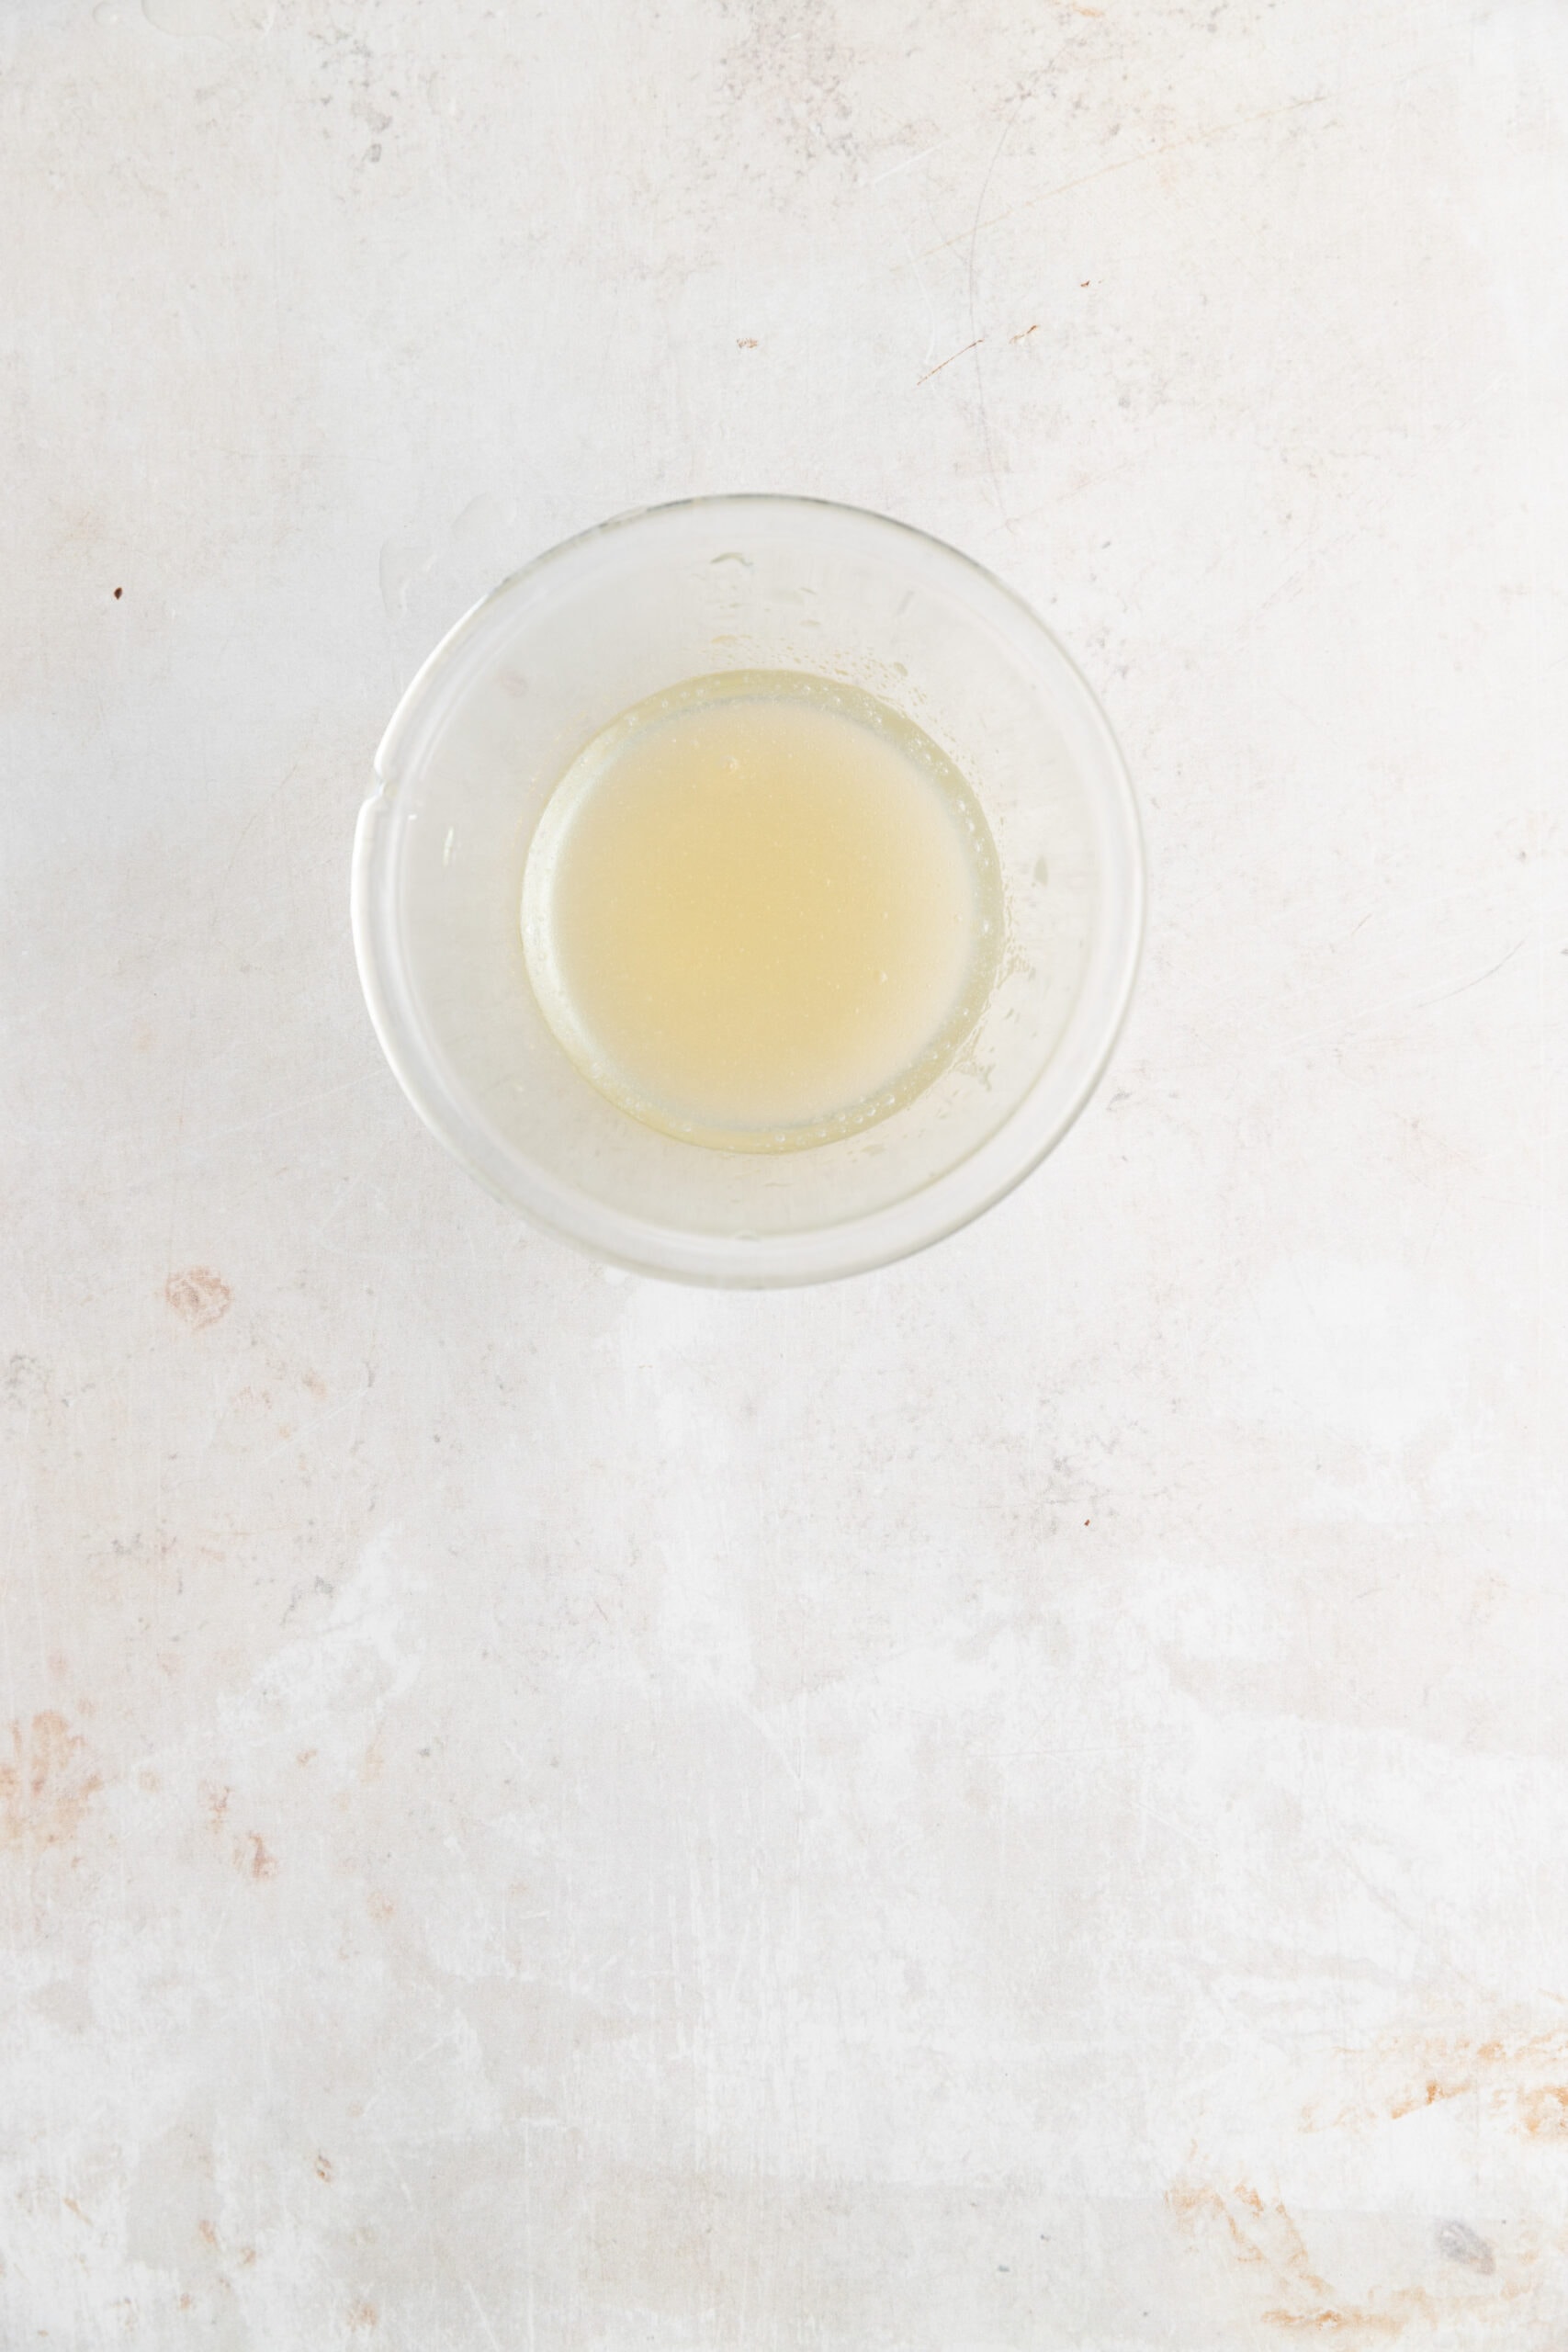
Bloom the Gelatin
- In a small bowl, pour in 3 tablespoons of water and sprinkle the gelatin over the top. Stir together and set aside.
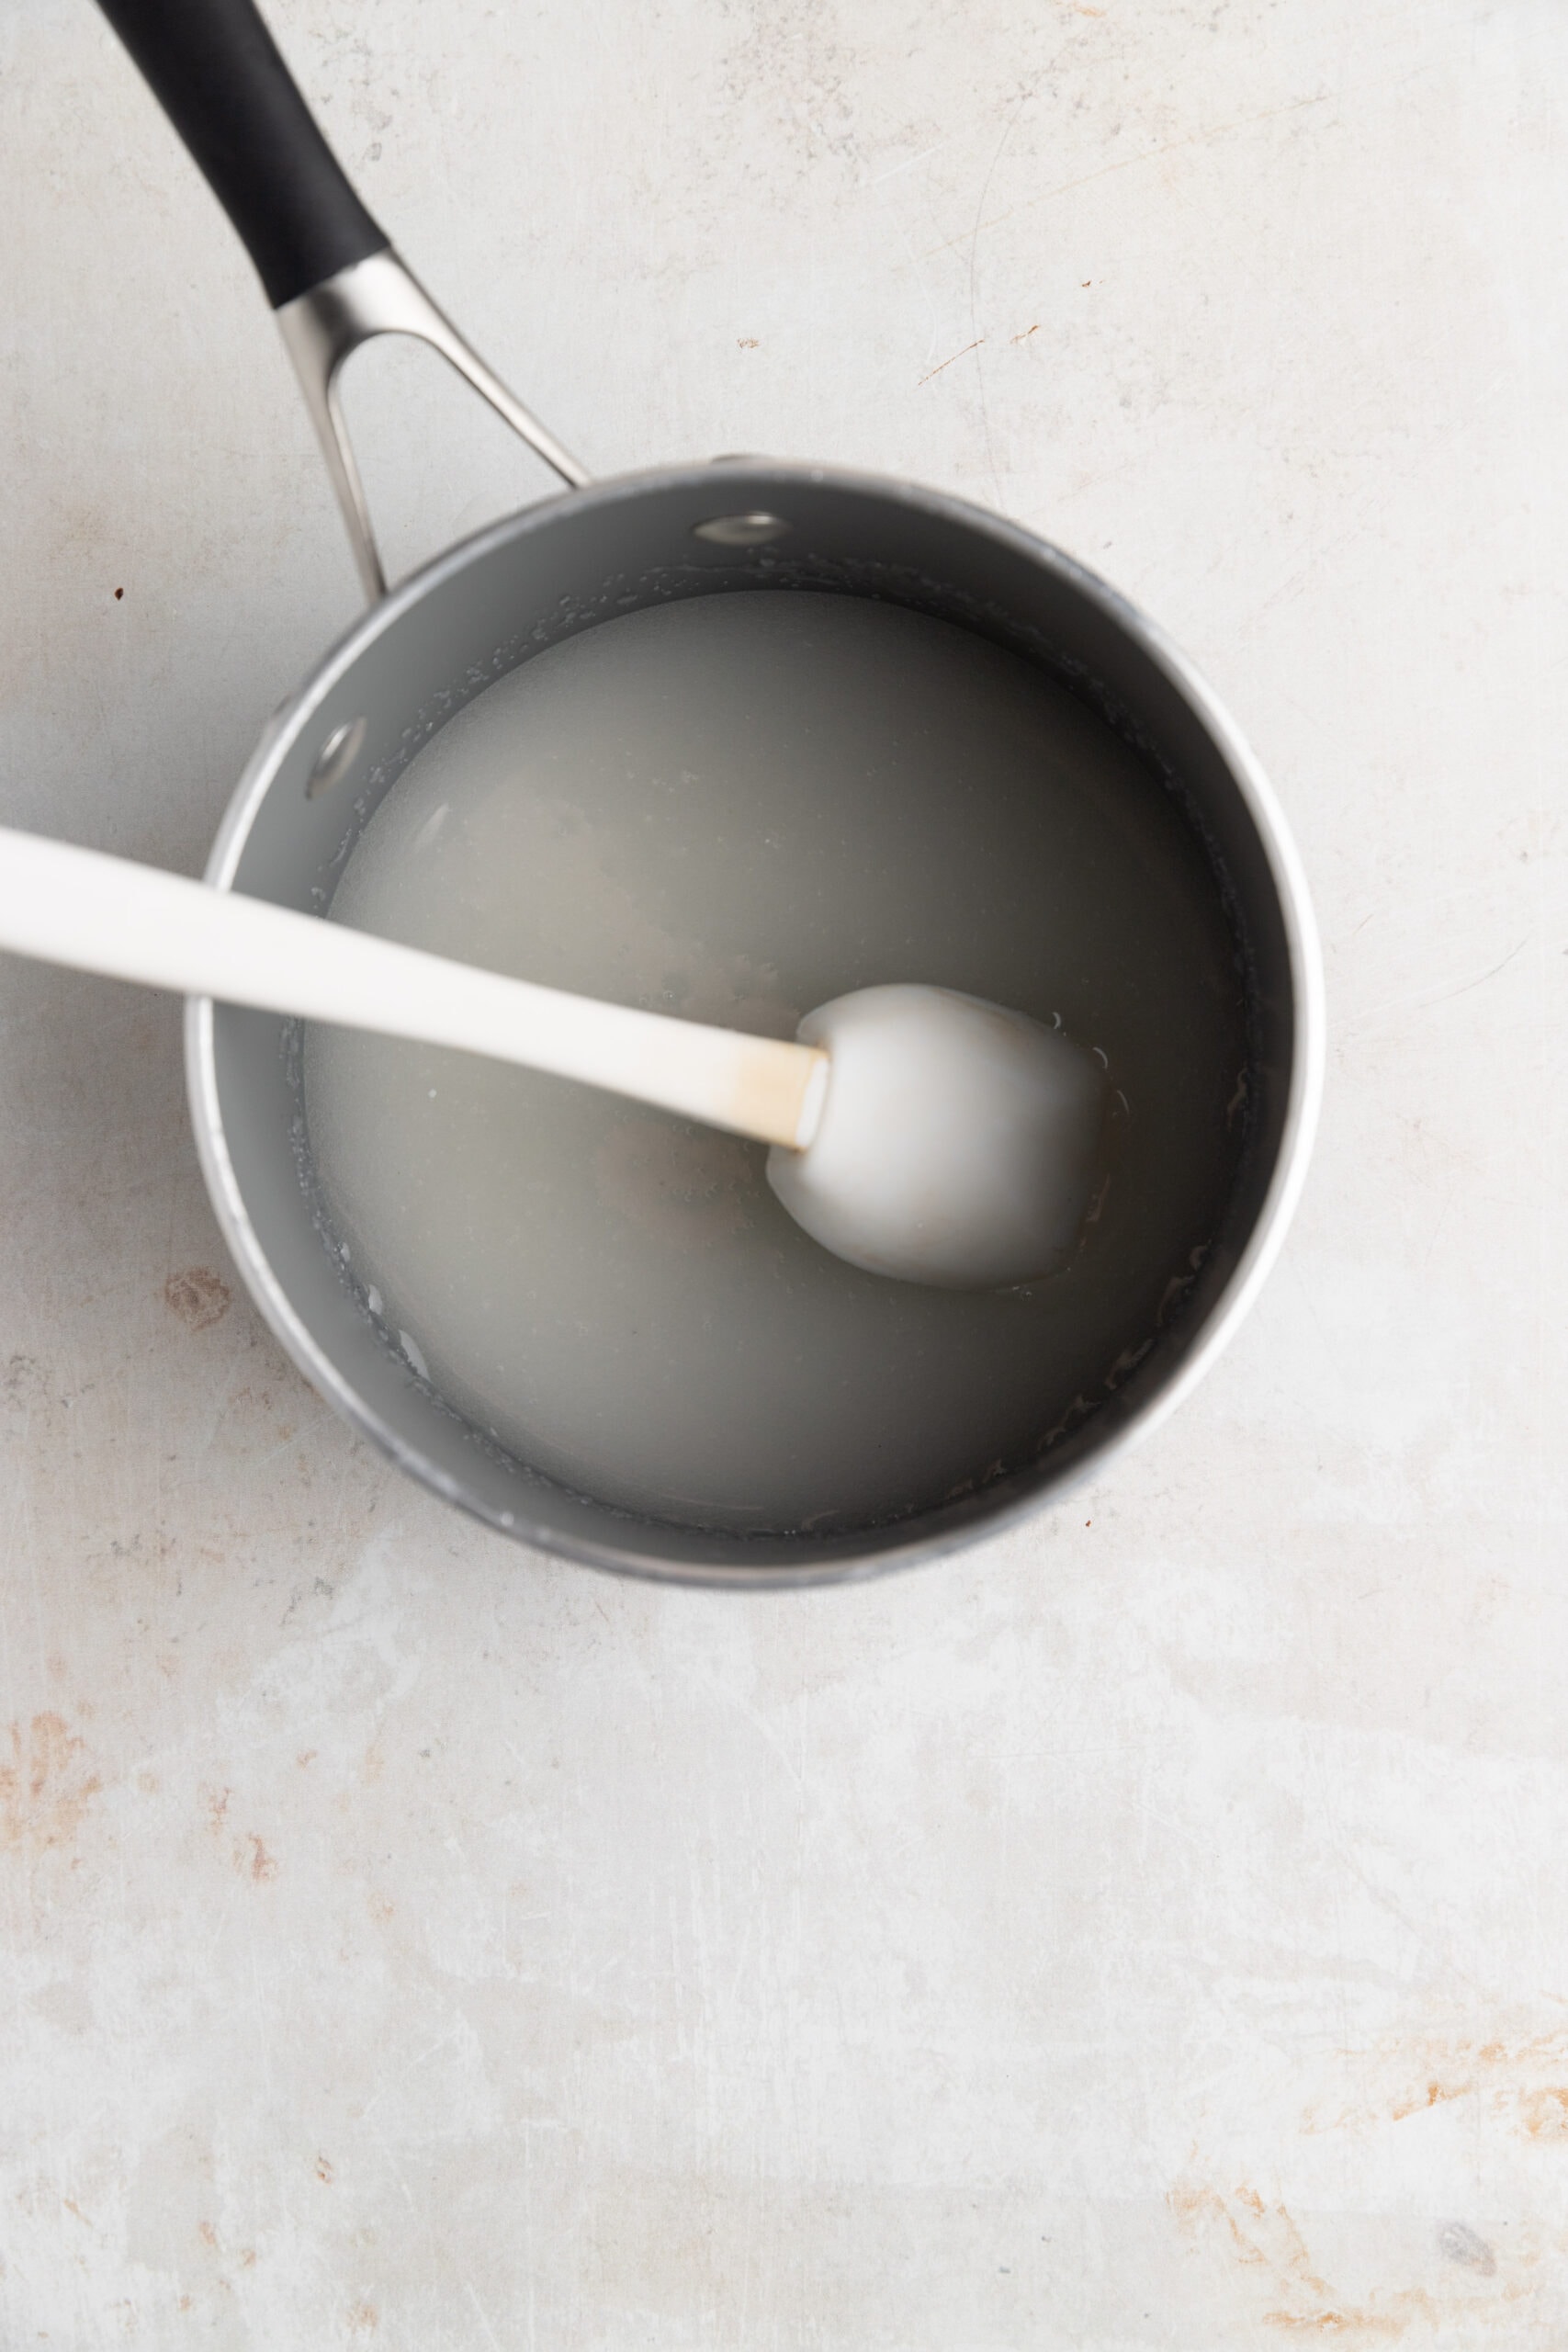
Sugar Syrup
- In a small sauce pot combine the sugar and water and stir together gently with a rubber spatula.
- Place over medium high heat and stir gently but regularly so that the sugar begins to dissolve and the mixture begins to boil.
- While the syrup is heating up start with the meringue.
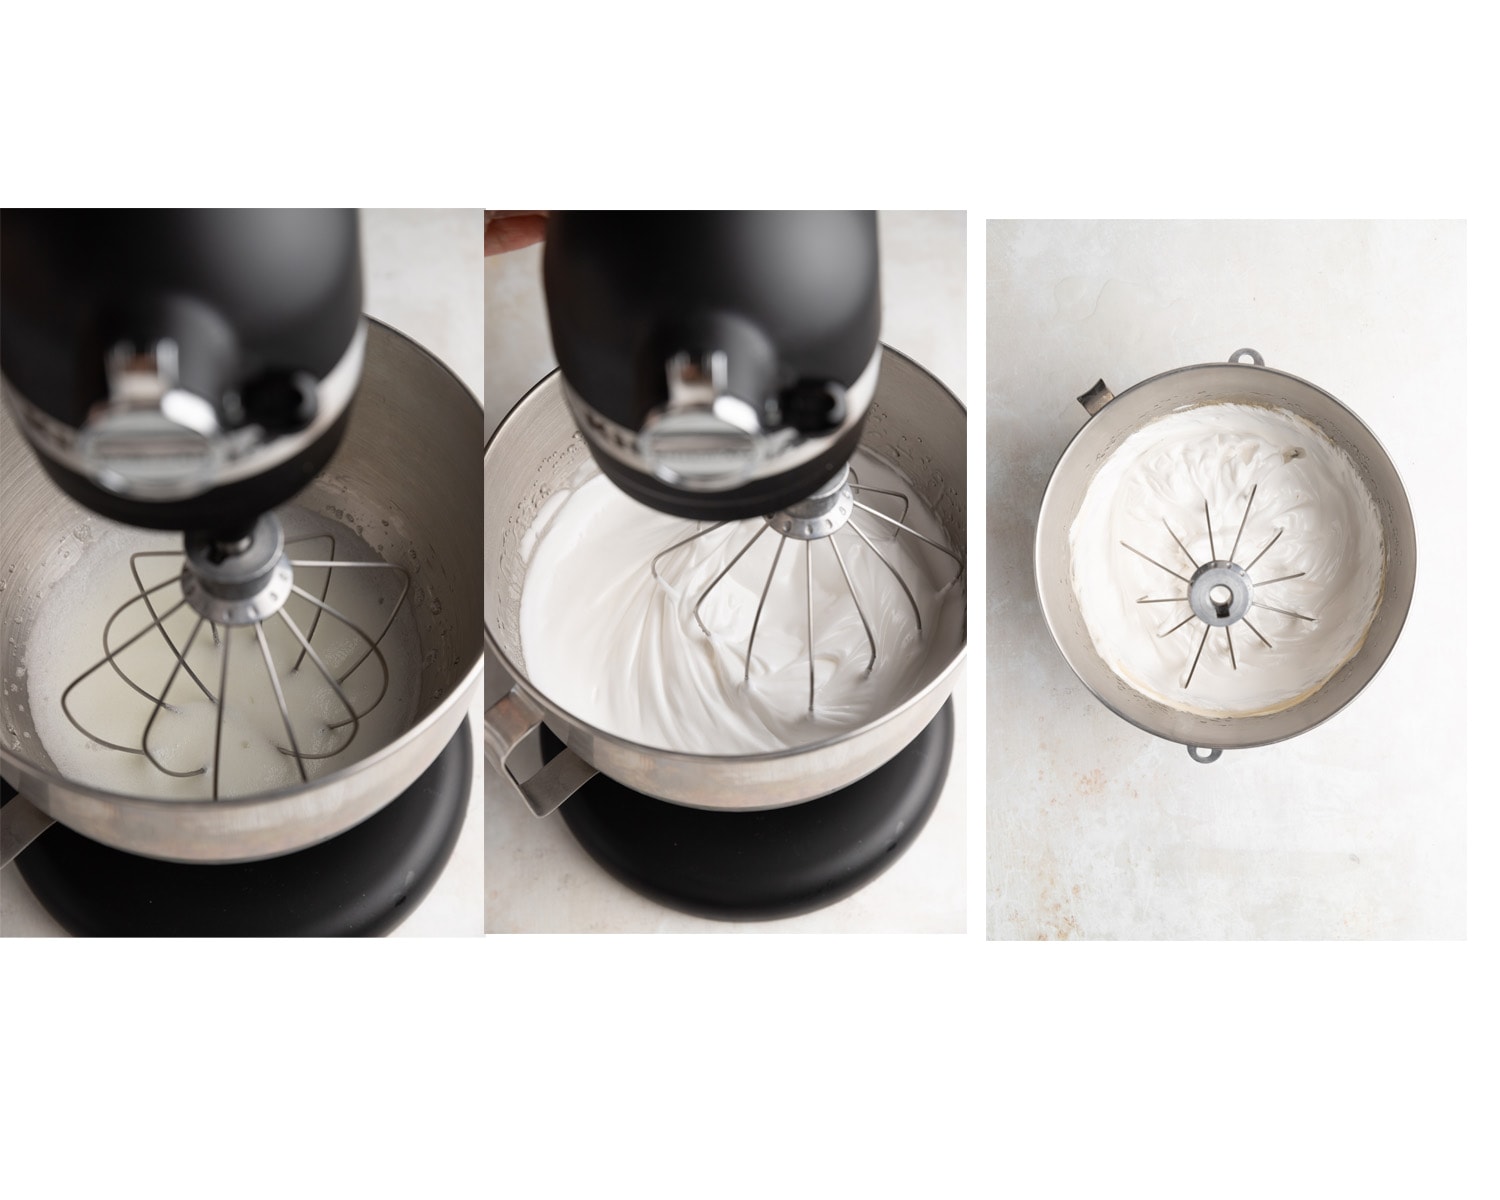
Meringue
- While the sugar syrup heats, pour the egg whites into the bowl of a stand mixer.
- Use the whisk attachment to whisk the eggs first on medium until they become light and frothy.
- Increase the speed to medium high while the sugar syrup comes to a boil.
- Once the sugar syrup is bubbling and boiling, and the egg whites have reached stiff medium stiff peaks, its time to combine the two.
- Leave the mixer running on medium high speed, slowly pour the very hot syrup down the side of the bowl, being careful not to hit the whisk as it goes around the bowl.
- Once all of the sugar syrup has been added, leave the mixer running.
- Briefly microwave the bloomed gelatin from the earlier step for 10-15 seconds until it is loose and flowing.
- With the mixer still running, pour the gelatin down the side of the bowl.
- Keep the mixer running until the bowl has cooled to room temperature. While the mixer is running pour in the vanilla extract.
Assemble
- While the meringue is whisking in the mixer, line a baking sheet with parchment paper and lay out your choice of cookies on the surface. Be sure to give them a little space so they don’t stick to one another.
- Once the meringue has cooled and is nice a fluffy, place a large round piping tip into a piping bag or a large plastic bag.
- Fill the bag with the meringue about 1/2 or 3/4 of the way full.
- Holding the piping bag straight up and down, pipe the meringue onto each cookie, lifting up slightly as you go to create the desired shape. If you want more of a domed top, stop lifting up near the top, but continue to squeeze out. a little more meringue.
- Then stop squeezing but lift the bag to stop piping.
- Once they are all piped, place the tray in the fridge for 2-3 hours to set.
- Melt the chocolate in a glass measuring cup – best if it has a spout. Once the meringue have set, carefully lift them one at a time with a fork or small spatula.
- Hold over a bowl, and pour the chocolate over top of the meringue until it is fully coated.
- Tap the fork or spatula on the side of the bowl to get rid of any excess chocolate.
- Place back onto the parchment paper and place back in the fridge to harden.


Schokokuss
Equipment
- Stand Mixer
Ingredients
Gelatin
- 3 tablespoons water cool
- 2 teaspoons gelatin powdered
Meringue
- 200 grams granulated sugar
- 70 mililiters water
- 3 egg whites room temperature
Additional
- 300 grams dark chocolate
- 30 wafer cookies
Instructions
Gelatin
- In a small bowl, pour in 3 tablespoons of water and sprinkle the gelatin over the top. Stir together and set aside.
Sugar Syrup
- In a small sauce pot combine the sugar and water and stir together gently with a rubber spatula.
- Place over medium high heat and stir gently but regularly so that the sugar begins to dissolve and the mixture begins to boil.
- While the syrup is heating up start with the meringue.
Meringue
- While the sugar syrup heats, pour the egg whites into the bowl of a stand mixer.
- Use the whisk attachment to whisk the eggs first on medium until they become light and frothy.
- Increase the speed to medium high while the sugar syrup comes to a boil.
- Once the sugar syrup is bubbling and boiling, and the egg whites have reached stiff medium stiff peaks, its time to combine the two.
- Leave the mixer running on medium high speed, slowly pour the very hot syrup down the side of the bowl, being careful not to hit the whisk as it goes around the bowl.
- Once all of the sugar syrup has been added, leave the mixer running.
- Briefly microwave the bloomed gelatin from the earlier step for 10-15 seconds until it is loose and flowing.
- With the mixer still running, pour the gelatin down the side of the bowl.
- Keep the mixer running until the bowl has cooled to room temperature. While the mixer is running pour in the vanilla extract.
Assemble
- While the meringue is whisking in the mixer, line a baking sheet with parchment paper and lay out your choice of cookies on the surface.
- Be sure to give them a little space so they don't stick to one another.
- Once the meringue has cooled and is nice a fluffy, place a large round piping tip into a piping bag or a large plastic bag.
- Fill the bag with the meringue about 1/2 or 3/4 of the way full.
- Holding the piping bag straight up and down, pipe the meringue onto each cookie, lifting up slightly as you go to create the desired shape.
- Then stop squeezing but lift the bag to stop piping.
- Once they are all piped, place the tray in the fridge for 2-3 hours to set.
- Melt the chocolate in a glass measuring cup – best if it has a spout. Once the meringue have set, carefully lift them one at a time with a fork or small spatula.
- Hold over a bowl, and pour the chocolate over top of the meringue until it is fully coated.
- Tap the fork or spatula on the side of the bowl to get rid of any excess chocolate.
- Place back onto the parchment paper and place back in the fridge to harden.
Notes
Nutrition
This page may contain affiliate links. This means that if you click on one of the product links above and complete a purchase, I’ll receive a small commission at no extra cost to you. I will never place a link nor make a recommendation on a product or service that I don’t love or use personally. Read our privacy policy here. Thank you for supporting Red Currant Bakery.


I wish your ingredients were in regular numbers,cups and tablespoons.
Hi Josephine, I completely understand. I use a scale to improve the accuracy of baking and it leads to less mess! If possible for you I highly recommend purchasing a scale.
Hi, I’m sooo grateful you’ve provided metric measurements. I’m not American. I find imperial measurements very frustrating. These are my husband’s favourite childhood treats. He’ll be so surprised. Of course he remembers them by their less desirable, racially based name.
Hi Nikki! I’m so so happy to hear that – I hope you and your husband enjoy them!!!