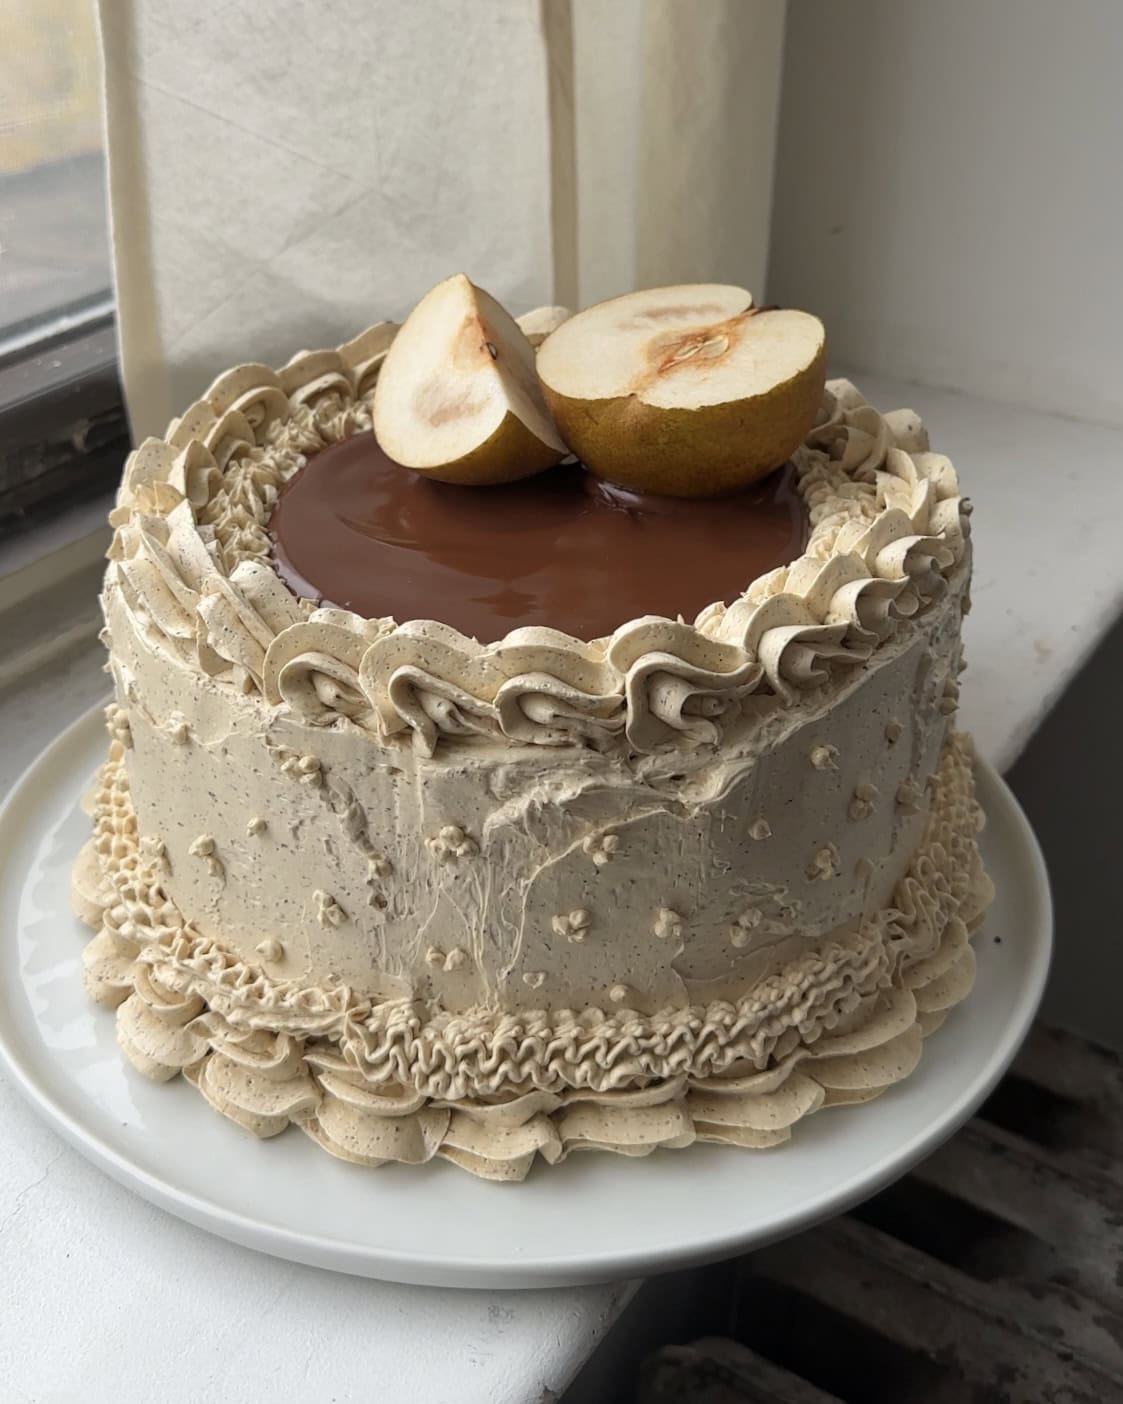
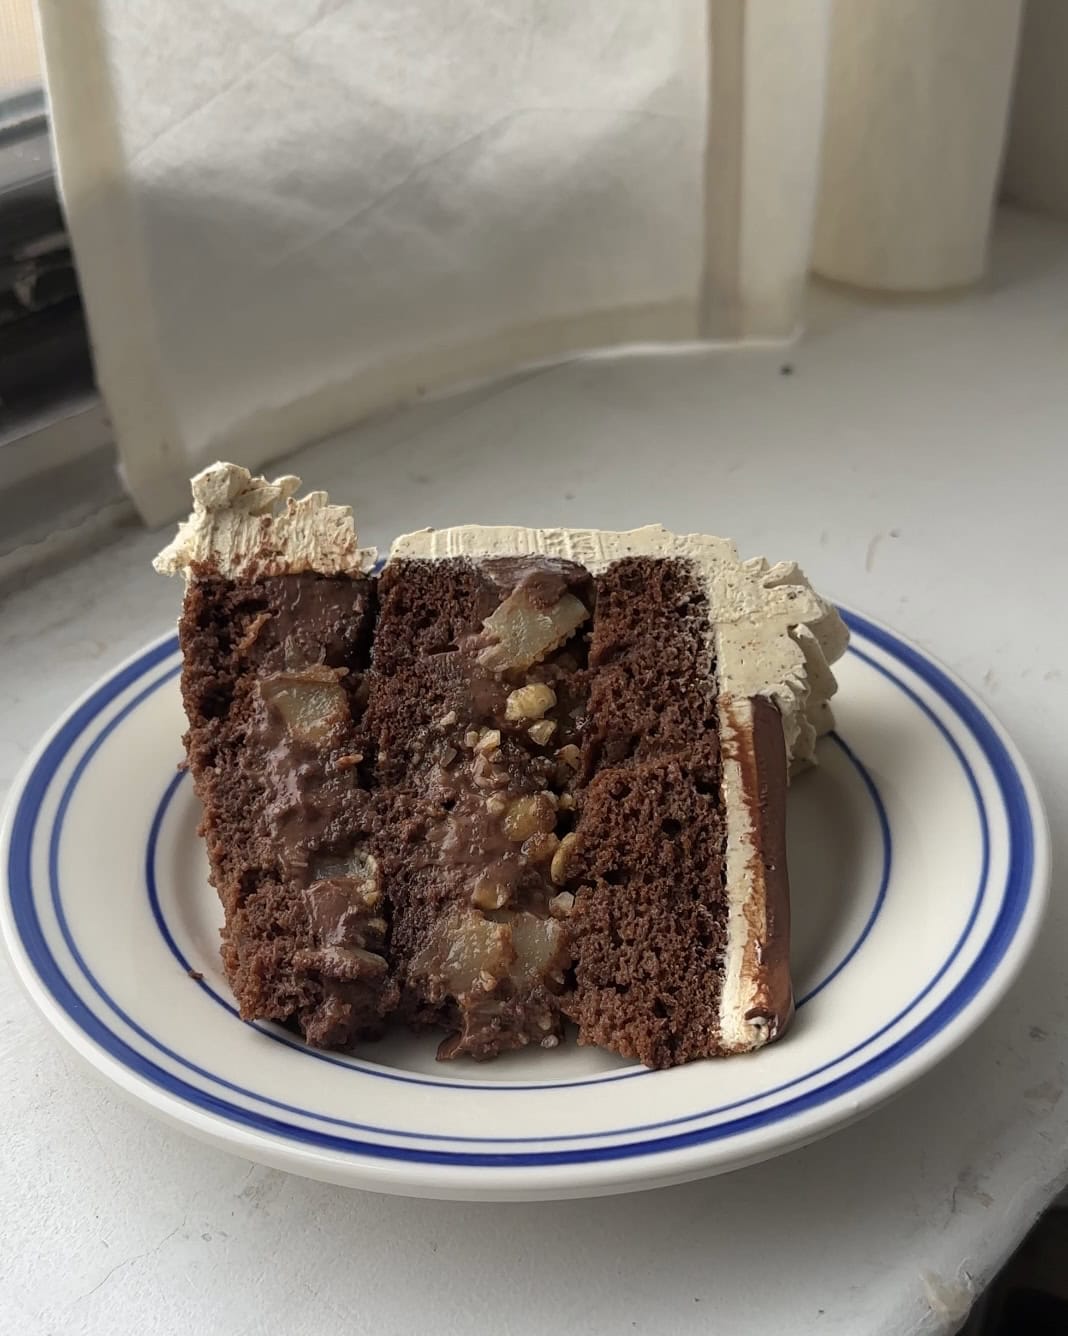
Soft chocolate cake layers, dark chocolate pastry cream, baked pears, and a hazelnut praline crunch, this Chocolate, Pear, & Hazelnut Cake is perfect for a November Birthday!
Why do you soak a cake?
Layer cakes are often “soaked” with a simple syrup to keep them moist or save a dry cake. In this case I wanted to make sure the cake didn’t dry out once assembled so I soaked it with milk to add moisture and flavor without adding sweetness. In this case it’s best if you can use a high quality full fat milk so that you aren’t just soaking your cake in water.
What if I’m allergic to hazelnuts?
You can absolutely leave the hazelnut crunch out of this! It will make a beautifully smooth, luscious cake!
How to make a moist chocolate cake?
This is my go-to, all time favorite chocolate cake recipe because it’s moist, doesn’t dry out, is soft and yet holds up to a lot of fillings! Don’t be scared by the reverse mixing method, there is so much butter and sour cream that it prevents the cake from getting over mixed and tough.
Tips for making a Chocolate, Pear & hazelnut layer cake.
- Make sure all the the butter and eggs for the cake are at room temperature – this will help get a smooth and fluffy cake batter.
- If you don’t have an espresso machine, strongly brewed coffee will work or you can grab a double shot at a local coffee shop!
- Usually if I’m using USA pans, I don’t worry about my cake sticking but this chocolate cake has a tendency to stick. I recommend using a baking spray with flour in it on the bottom of the cake pan.
- Don’t store the freshly baked cakes in the fridge, it will dry them out. Leave the freshly baked cakes, wrapped in plastic at room temperature until you assemble.
- The pastry cream is basically the easiest way to make a custard and when you sieve it don’t be worried if there’s a few bits – you didn’t split it, it’s just any egg white that made it in when you were separating the eggs which we don’t want anyway.
- Make sure no egg yolk mixes with the egg whites for the frosting and that the bowl and whisk are completely clean!
- While I love the crunch of the hazelnuts in the cake, it will also work and be delicious if you leave them out!
- If you don’t have a kitchen torch, don’t stress the frosting will also be delicious without torching. If you want to buy one this is what I have!
- If you don’t want to decorate the cake and just want to give it a base layer of frosting, you can do about 2/3 of the frosting recipe and you should have enough to coat the cake.
- To assemble this cake you’ll have the best success with a sheet of acetate and a cake collar. I love this cake ring from ikea but any ring or even a springform pan will work to create the stability to stack the cake. For crisp edges you’ll also want to use a sheet of acetate, this is more optional but it will give you a cleaner finish.
- This cake needs the frosting to help keep it stable and I promise it’s delicious so don’t skip it!
Additional Cake Recipes to try!
Chocolate, Pear, & Hazelnut Cake Ingredients
- All Purpose Flour: Any all purpose flour will work for this cake!
- Baking Soda & Baking Powder: These both help make the cake rise – make sure to check the expiration date!
- Cocoa Powder: Both dutch processed and natural cocoa powder will work here.
- Salt: A little bit of salt enhances the flavors and balances out the sweetness.
- Vanilla Extract: Vanilla extract and vanilla bean paste add flavor and enhances the chocolate and coffee flavors.
- Eggs: I use standard large eggs from the store. There are whole eggs in the batter, egg yolks in the pudding, and whites in the buttercream.
- Sugar: This chocolate cake uses granulated sugar in the cake batter, pastry cream, candied hazelnuts, and buttercream. Brown sugar is also used for the candied hazelnuts.
- Sour Cream: Sour cream adds moisture and richness to the cake – full fat greek yogurt will work too in a pinch!
- Butter: Butter adds moisture and richness to this cake, just make sure it is at room temperature. Salted butter is also used for the buttercream.
- Espresso: A double shot of espresso or 35 grams of strongly brewed coffee will work for the cake. Instant espresso powder is also used for the swiss meringue buttercream.
- Starch: Starch helps to thicken the chocolate pastry cream, I recommend using corn starch!
- Milk: Whole milk is the base of both the pastry cream and the milk soak.
- Chocolate: 60% semi sweet chocolate is used in the pastry cream.
- Pears: I’ve tested quite a few pears for this recipe and I recommend using ripe, Bartlett pears if possible!
- Hazelnuts: Hazelnuts are used for the hazelnut praline crunch, they should be peeled before using!
- Cinnamon: A touch of cinnamon warms the flavor of the candied hazelnuts and adds a bit of depth to the filling.
How to make a Chocolate, Pear, & Hazelnut Cake?
- Preheat the oven to 350 F and place a rack in the middle of the oven.
Chocolate cake batter
- In a medium mixing bowl add in the flour, sugar, salt, baking soda, baking powder, and cocoa. Whisk to combine.
- Then in the center of the bowl add in the soft butter, eggs, vanilla, sour cream and espresso.
- Beat until smooth on medium high speed, starting on low and then increasing. Make sure to scrape the bottom and sides of the bowl.
- If you have three 8″ pans you can bake 1/3 of the batter in each one at the same time. If you only have one, bake 1/3 of the batter and keep the other 2/3 covered in the fridge. Bake the next two after the first cake is done.
- Spray your cake pan (or pans) with a nonstick baking spray and pour in the cake batter. Smooth out the top, then bake in the hot oven for 10 minutes.
- After 10 minutes, rotate the cake 180 degrees and bake for another 5-10 minutes until a toothpick inserted in the center comes out clean. If baking all at the same time it may take a little longer to bake.
- Leave to cool for 10 minutes before flipping the cake(s) out. Let it cool and then wrap it up and store at room temperature until ready to assemble the cake.
Baked Pears
- Peel your pears. Then cut them in half lengthwise and remove the core and stem with a spoon.
- Line a baking dish big enough for all 6 halves with parchment paper. Lay the prepared pears cut side down into the dish.
- Bake at 350 F for 30-45 minutes until fork tender. They shouldn’t brown much. The amount of time they need will depend on how ripe the pears are.
- Once baked, leave the pears to cool and store in an airtight container until ready to use. If you make them in advance, store them in the fridge until ready to use.
- When ready to use, dice the pears into 1/2″ chunks! *If you watched my video you’ll want to chop them a bit smaller than I did.
Chocolate Pastry Cream Filling
- In a heat safe mixing bowl, add in the chopped up chocolate and place a fine metal sieve on top.
- In a medium sauce pot whisk together the sugar, salt, and starch. Pour in the milk, vanilla, and egg yolks and whisk to combine.
- Place the pot over medium low heat and whisk while cooking until softly bubbling and thick. Continue to cook for about 1 minute once it has started bubbling.
- Turn off the heat and pour the mixture through the sieve into the bowl with the chocolate.
- Let it sit for 1 minute, then whisk the chocolate into the pastry cream until fully melted and smooth.
- Cover the surface with a sheet of plastic wrap and leave it to cool completely to room temp. If making in advance, store it in the fridge!
Candied Hazelnuts
- Line a baking sheet with a piece of parchment paper and set aside.
- In a large shallow pan, add in approximately half of the white sugar, all of the brown sugar, and the cinnamon. Stir together with a wooden spoon.
- Add in the water and stir again. Place over medium high heat and bring to a gentle boil.
- Once it starts to bubble all over, add in the hazelnuts and stir to coat. Reduce the heat slightly – it should still be bubbling.
- Continue stirring and cooking until all of the liquid has cooked out. It will look as though the sugar is dry and crumbly.
- Slightly reduce the heat again – depending on your stove it should now be around medium or just below.
- The sugar will start to caramelize and liquify as it heats and you continue to stir. Once about half of the sugar has turned into caramel, sprinkle the remaining sugar over the hazelnuts and stir together. Cook for about 30 seconds until the new sugar is mixed in but not caramelized.
- Immediately pour the candied hazelnuts onto the parchment lined baking sheet. Separate the hazelnuts with two utensils and leave to cool fully.
- Once cooled, finely chop the candied hazelnuts and set aside until ready to assemble.
Assemble
- Level off the top of all three cakes.
- Place the layers on a baking sheet and brush each with 1/3 of the milk.
- Lay a sheet of parchment paper on a large flat plate or tray that the cake will fit on.
- Place the bottom layer of cake onto the parchment paper, cut side up.
- Loosely set the metal cake ring around it. Cut a piece of acetate that is the length of one full circumference of the cake plus another half the cake. Wrap the bottom layer of cake with the acetate inside of the metal ring, allowing the acetate to overlap.
- Tighten the metal cake ring so that the acetate and cake ring are snug around the cake.
- Scoop half of the chocolate pastry cream over the cake and use the back of a spoon to level it out. Then evenly spread out half of the chopped baked pears over the top of the pastry cream.
- Sprinkle half of the candied hazelnuts over the pears and top with the middle layer of chocolate cake. Repeat with the remaining amounts of filling and top with the last layer of cake. Press down gently.
- Cover the top with a sheet of plastic and place it in the fridge to set overnight.
Frost
- In the bowl of a stand mixer (I think a hand mixer will work too, it will just take ages but I’ve never tried it), add in the egg whites, sugar, and salt. Whisk to combine.
- Place a medium sauce pot half way full with water onto the stove. Bring the water to a simmer.
- Set the mixing bowl with the egg whites and sugar over the bowl of simmering water and turn the heat to low. The water shouldn’t touch the bottom of the mixing bowl.
- Whisk the egg whites and sugar constantly until the sugar has fully dissolved into the egg whites. To check and see if the sugar has dissolved, pinch and rub some of the mixture in between your fingers and feel if you still feel any of the sugar granules, if not you’re good to go. If you do just keep cooking a bit longer.
- Once the sugar has dissolved, turn off the heat and remove the bowl from the water. Leave it to cool off for about 10 minutes.
- Using your mixer, whip the egg white mixture first on medium and then on high speed until fluffy, shiny and stiff.
- Turn off the mixer and if you have it, use a kitchen blow torch to completely torch the surface of the meringue.
- Whip again until completely mixed, then repeat the torching 3 more times.
- The bottom of the bowl should have cooled off at this point but if not, place the bowl in the fridge for 5 minutes.
- Once cool to the touch, turn the mixer to medium high speed and add in 1″ blocks of butter at a time whipping until all of the butter has mixed in. It will deflate a little bit at the beginning, that’s ok! Also it may start to look split or runny at some point, don’t stress just put the bowl back in the fridge to cool down for a bit and then keep whipping and adding in the butter.
- When almost all of the butter has been added, the mixture is going to look funny, just keep whipping and it will smooth out.
- Once all of the butter has been added, take the bowl from the mixer and scrape down the edges. Pour in the espresso powder and vanilla bean paste and whip again on medium high until just combined. While the mixer is running slowly pour in the cold heavy cream and whip until combined.
- Take the chilled cake out of the fridge, remove the cake collar and acetate ring. Frost the cake however you want! I piped the cake with the extra frosting and topped it with a simple chocolate ganache and cut pears.
- Serve immediately or within the hour. Otherwise place the cake back in the fridge until 30 minutes before you plan to serve.


Chocolate, Pear, & Hazelnut Cake
Equipment
- 8" round metal cake pan
- Stand Mixer for the meringue buttercream
Ingredients
Chocolate Cake
- 225 grams all purpose flour
- 250 grams granulated sugar
- 1/4 teaspoon fine sea salt
- 3/4 teaspoon baking soda
- 3/4 teaspoon baking powder
- 50 grams cocoa powder natural
- 3 eggs standard large
- 190 grams salted butter soft
- 150 grams sour cream
- 1 teaspoon vanilla extract
- 35 grams espresso a double shot, or strongly brewed coffee
Pears
- 3 bartlett pears
Chocolate Pastry Cream
- 160 grams 60% chocolate
- 100 grams granulated sugar
- 20 grams cornstarch
- 1/4 teaspoon fine sea salt
- 400 grams whole milk
- 1 teaspoon vanilla bean paste vanilla extract will work too!
- 2 egg yolks standard large
Candied Hazelnuts
- 100 grams hazelnuts toasted and peeled
- 50 grams granulated sugar
- 50 grams dark brown sugar
- 1 teaspoon cinnamon
- 50 milliliters water
Toasted Espresso Swiss Meringue buttercream
- 180 grams egg whites
- 300 grams granulated sugar
- 1/4 teaspoon fine sea salt
- 450 grams salted butter cool room temperature
- 2 teaspoons instant espresso powder 3 if you want a stronger coffee flavor!
- 1 teaspoon vanilla bean paste or 2 teaspoons vanilla extract
- 50 grams heavy cream cold
Milk Soak
- 180 grams whole milk
Instructions
- Preheat the oven to 350 F and place a rack in the middle of the oven.
Chocolate Cakes
- In a medium mixing bowl add in the flour, sugar, salt, baking soda, baking powder, and cocoa. Whisk to combine.
- Then in the center of the bowl add in the soft butter, eggs, vanilla, sour cream and espresso.
- Beat until smooth on medium high speed, starting on low and then increasing. Make sure to scrape the bottom and sides of the bowl.
- If you have three 8" pans you can bake 1/3 of the batter in each one at the same time. If you only have one, bake 1/3 of the batter and keep the other 2/3 covered in the fridge. Bake the next two after the first cake is done.
- Spray your cake pan (or pans) with a nonstick baking spray and pour in the cake batter. Smooth out the top, then bake in the hot oven for 10 minutes.
- After 10 minutes, rotate the cake 180 degrees and bake for another 5-10 minutes until a toothpick inserted in the center comes out clean. If baking all at the same time it may take a little longer to bake.
- Leave to cool for 10 minutes before flipping the cake(s) out. Let it cool and then wrap it up and store at room temperature until ready to assemble the cake.
Baked Pears
- Peel your pears. Then cut them in half lengthwise and remove the core and stem with a spoon.
- Line a baking dish big enough for all 6 halves with parchment paper. Lay the prepared pears cut side down into the dish.
- Bake at 350 F for 30-45 minutes until fork tender. They shouldn't brown much. The amount of time they need will depend on how ripe the pears are.
- Once baked, leave the pears to cool and store in an airtight container until ready to use. If you make them in advance, store them in the fridge until ready to use.
- When ready to use, dice the pears into 1/2" chunks! *If you watched my video you'll want to chop them a bit smaller than I did.
Chocolate Pastry Cream
- In a heat safe mixing bowl, add in the chopped up chocolate and place a fine metal sieve on top.
- In a medium sauce pot whisk together the sugar, salt, and starch. Pour in the milk, vanilla, and egg yolks and whisk to combine.
- Place the pot over medium low heat and whisk while cooking until softly bubbling and thick. Continue to cook for about 1 minute once it has started bubbling.
- Turn off the heat and pour the mixture through the sieve into the bowl with the chocolate.
- Let it sit for 1 minute, then whisk the chocolate into the pastry cream until fully melted and smooth.
- Cover the surface with a sheet of plastic wrap and leave it to cool completely to room temp. If making in advance, store it in the fridge!
Candied Hazelnuts
- Line a baking sheet with a piece of parchment paper and set aside.
- In a large shallow pan, add in approximately half of the white sugar, all of the brown sugar, and the cinnamon. Stir together with a wooden spoon.
- Add in the water and stir again. Place over medium high heat and bring to a gentle boil.
- Once it starts to bubble all over, add in the hazelnuts and stir to coat. Reduce the heat slightly – it should still be bubbling.
- Continue stirring and cooking until all of the liquid has cooked out. It will look as though the sugar is dry and crumbly.
- Slightly reduce the heat again – depending on your stove it should now be around medium or just below.
- The sugar will start to caramelize and liquify as it heats and you continue to stir. Once about half of the sugar has turned into caramel, sprinkle the remaining sugar over the hazelnuts and stir together. Cook for about 30 seconds until the new sugar is mixed in but not caramelized.
- Immediately pour the candied hazelnuts onto the parchment lined baking sheet. Separate the hazelnuts with two utensils and leave to cool fully.
- Once cooled, finely chop the candied hazelnuts and set aside until ready to assemble.
Assemble
- Level off the top of all three cakes.
- Place the layers on a baking sheet and brush each with 1/3 of the milk.
- Lay a sheet of parchment paper on a large flat plate or tray that the cake will fit on.
- Place the bottom layer of cake onto the parchment paper, cut side up.
- Loosely set the metal cake ring around it. Cut a piece of acetate that is the length of one full circumference of the cake plus another half the cake. Wrap the bottom layer of cake with the acetate inside of the metal ring, allowing the acetate to overlap.
- Tighten the metal cake ring so that the acetate and cake ring are snug around the cake.
- Scoop half of the chocolate pastry cream over the cake and use the back of a spoon to level it out. Then evenly spread out half of the chopped baked pears over the top of the pastry cream.
- Sprinkle half of the candied hazelnuts over the pears and top with the middle layer of chocolate cake. Repeat with the remaining amounts of filling and top with the last layer of cake. Press down gently.
- Cover the top with a sheet of plastic and place it in the fridge to set overnight.
Frost
- In the bowl of a stand mixer (I think a hand mixer will work too, it will just take ages but I've never tried it), add in the egg whites, sugar, and salt. Whisk to combine.
- Place a medium sauce pot half way full with water onto the stove. Bring the water to a simmer.
- Set the mixing bowl with the egg whites and sugar over the bowl of simmering water and turn the heat to low. The water shouldn’t touch the bottom of the mixing bowl.
- Whisk the egg whites and sugar constantly until the sugar has fully dissolved into the egg whites. To check and see if the sugar has dissolved, pinch and rub some of the mixture in between your fingers and feel if you still feel any of the sugar granules, if not you’re good to go. If you do just keep cooking a bit longer.
- Once the sugar has dissolved, turn off the heat and remove the bowl from the water. Leave it to cool off for about 10 minutes.Using your mixer, whip the egg white mixture first on medium and then on high speed until fluffy, shiny and stiff.
- Turn off the mixer and if you have it, use a kitchen blow torch to completely torch the surface of the meringue.
- Whip again until completely mixed, then repeat the torching 3 more times.
- The bottom of the bowl should have cooled off at this point but if not, place the bowl in the fridge for 5 minutes.
- Once cool to the touch, turn the mixer to medium high speed and add in 1″ blocks of butter at a time whipping until all of the butter has mixed in. It will deflate a little bit at the beginning, that’s ok! Also it may start to look split or runny at some point, don’t stress just put the bowl back in the fridge to cool down for a bit and then keep whipping and adding in the butter.
- When almost all of the butter has been added, the mixture is going to look funny, just keep whipping and it will smooth out.
- Once all of the butter has been added, take the bowl from the mixer and scrape down the edges. Pour in the espresso powder and vanilla bean paste and whip again on medium high until just combined. While the mixer is running slowly pour in the cold heavy cream and whip until combined.
- Take the chilled cake out of the fridge, remove the cake collar and acetate ring. Frost the cake however you want! I piped the cake with the extra frosting and topped it with a simple chocolate ganache and cut pears.
- Serve immediately or within the hour. Otherwise place the cake back in the fridge until 30 minutes before you plan to serve.
Notes
- Make sure all the butter and eggs for the cake are at room temperature – this will help get a smooth and fluffy cake batter.
- If you don’t have an espresso machine, strongly brewed coffee will work or you can grab a double shot at a local coffee shop!
- Usually if I’m using USA pans, I don’t worry about my cake sticking but this chocolate cake has a tendency to stick. I recommend using a baking spray with flour in it on the bottom of the cake pan.
- Don’t store the freshly baked cakes in the fridge, it will dry them out. Leave the freshly baked cakes, wrapped in plastic at room temperature until you assemble.
- The pastry cream is basically the easiest way to make a custard and when you sieve it don’t be worried if there’s a few bits – you didn’t split it, it’s just any egg white that made it in when you were separating the eggs which we don’t want anyway.
- Make sure no egg yolk mixes with the egg whites for the frosting and that the bowl and whisk are completely clean!
- While I love the crunch of the hazelnuts in the cake, it will also work and be delicious if you leave them out!
- If you don’t have a kitchen torch, don’t stress the frosting will also be delicious without torching. If you want to buy one this is what I have!
- If you don’t want to decorate the cake and just want to give it a base layer of frosting, you can do about 2/3 of the frosting recipe and you should have enough to coat the cake.
- To assemble this cake you’ll have the best success with a sheet of acetate and a cake collar. I love this cake ring from ikea but any ring or even a springform pan will work to create the stability to stack the cake. For crisp edges you’ll also want to use a sheet of acetate, this is more optional but it will give you a cleaner finish.
Nutrition
This page may contain affiliate links. This means that if you click on one of the product links above and complete a purchase, I’ll receive a small commission at no extra cost to you. I will never place a link nor make a recommendation on a product or service that I don’t love or use personally. Read our privacy policy here. Thank you for supporting Red Currant Bakery.


so excited to make this cake! just wanted to ask if I can replace it with gluten free flour?
Hi! I think a 1:1 replacement should work but I can’t say for sure as I’ve never tested it!
Made this minus the swiss meringue (not that brave yet) for a friend’s birthday and it was delightful! I love how the chocolate sponge is subtly different in each of your recipes.
Only halfway finished with making this but already loving it! The candied hazlenut instructions were really easy to follow.
One thing though, I only had about 1050g of batter/enough for 350g per cake pan instead of the 500g per cake pan the recipe said I should have. Am I missing something? Did anyone else have this problem?
Hi Ivy! That’s totally my fault, a typo from a previous recipe, you’re correct!
Really delicious! First time making a cake with this many elements, so I followed everything to the T. Only thing I’d change is creaming the butter and sugar together and blooming the cocoa powder in the espresso before mixing into the cake! In any case, tis still yummy 😋