Rich chocolate ice cream made from a base almost identical to a chocolate cream pie, folded with crushed oreos, this Chocolate Cream Pie Ice Cream is the best of both worlds.
Can you leave out the cookies?
Yes! This recipe can totally be kept as a simple chocolate ice cream and there’s no need to add the crushed up cookies!
How to make ice cream at home?
There’s two ways to make ice cream at home. The first way to make ice cream at home is a no churn ice cream meaning you don’t need an ice cream maker. No churn ice cream is great and delicious but can be a little limiting. The second way to make ice cream at home is with an ice cream maker or with this ice cream maker bowl attachment. I use this attachment on my stand mixer and love it because it’s less expensive and takes up much less space!
Does ice cream have eggs in it?
Ice cream can have a custard base or just a milk base. This recipe is made with a custard base which means there are egg yolks in it as well as milk and cream. I love a custard base because it adds a rich smooth mouth feel that pairs so well with the chocolate.
Additional Recipes to try!
Tips for making Homemade Ice Cream
- High quality milk such as Maple Hill or Ronny Brook will make a huge difference for the base flavor of the ice cream!
- Similarly, high quality chocolate bars are key for a smooth chocolate base. Don’t use chocolate chips for melting into the base as they won’t melt properly.
- Make sure the ice cream machine bowl has frozen for the full amount of time listed in the instructions. The ice cream base also needs to be FULLY chilled. If either element isn’t the correct temperature, it won’t churn properly.
- I haven’t tested this as a no churn ice cream so for now you will need an ice cream maker but this stand mixer attachment makes it super easy!
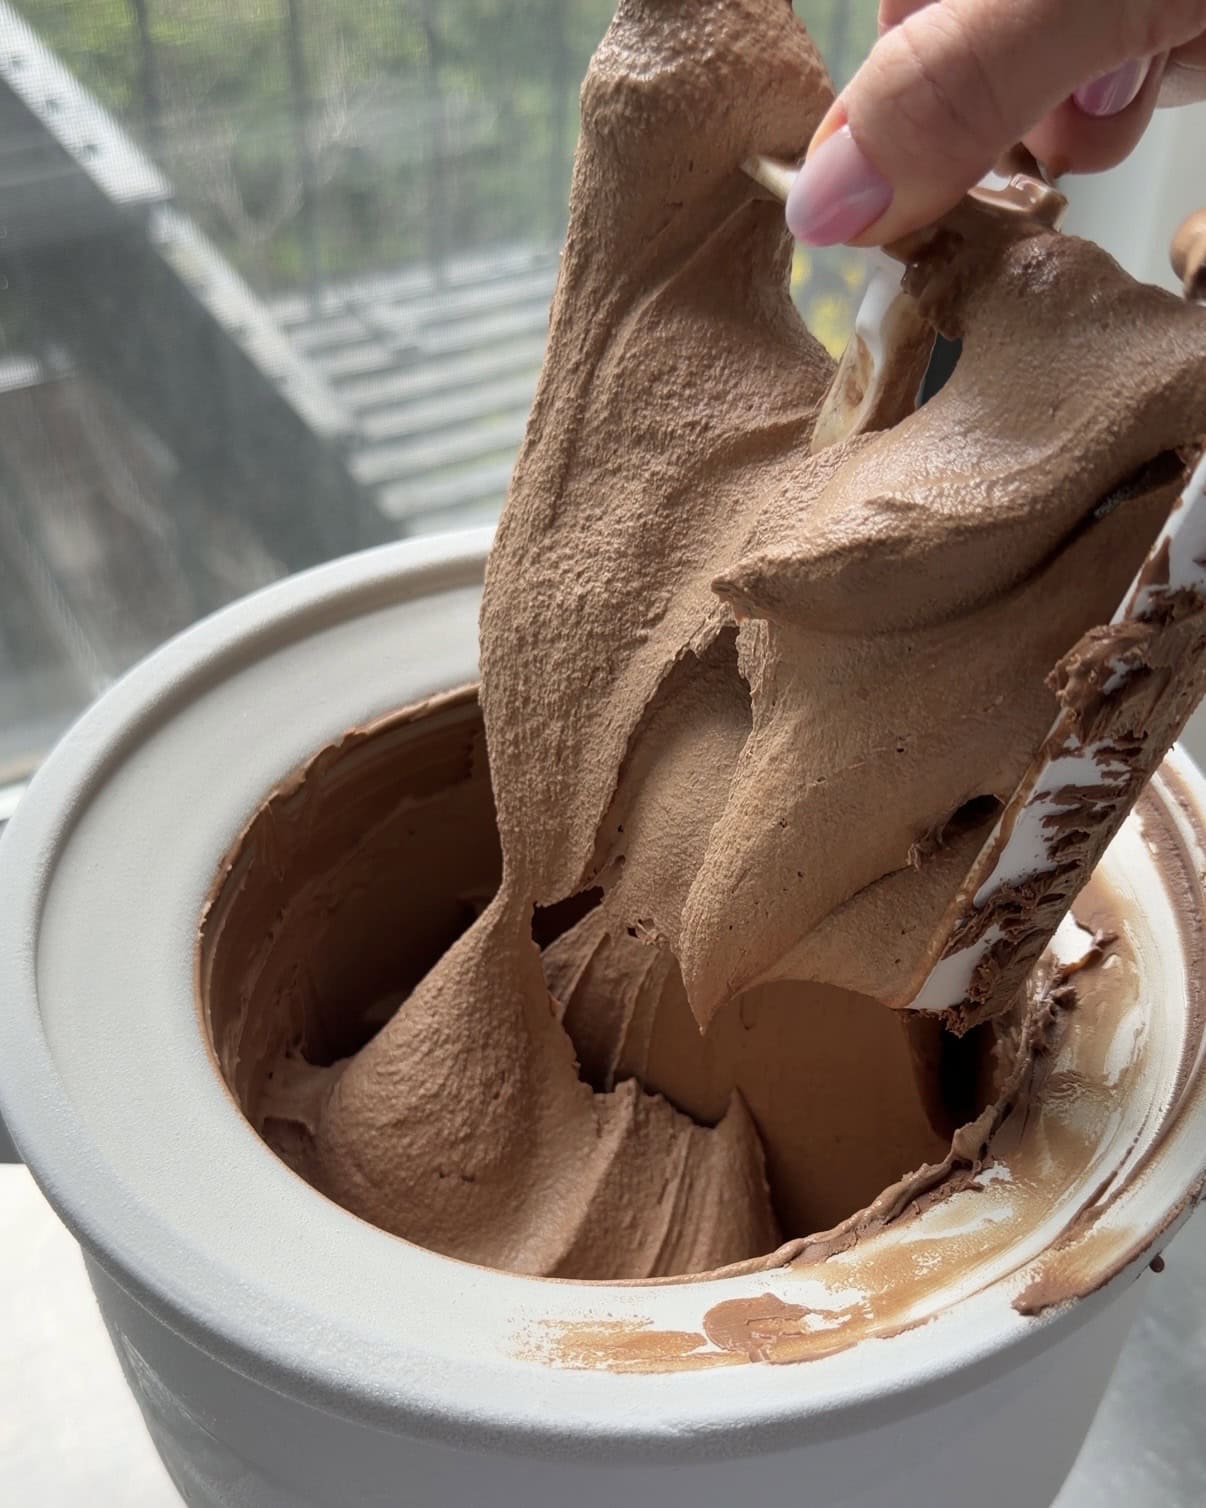
- Don’t over churn the ice cream. The mixture should look like a very soft, soft serve. If you let it go too long, the ice cream won’t be nice and smooth.
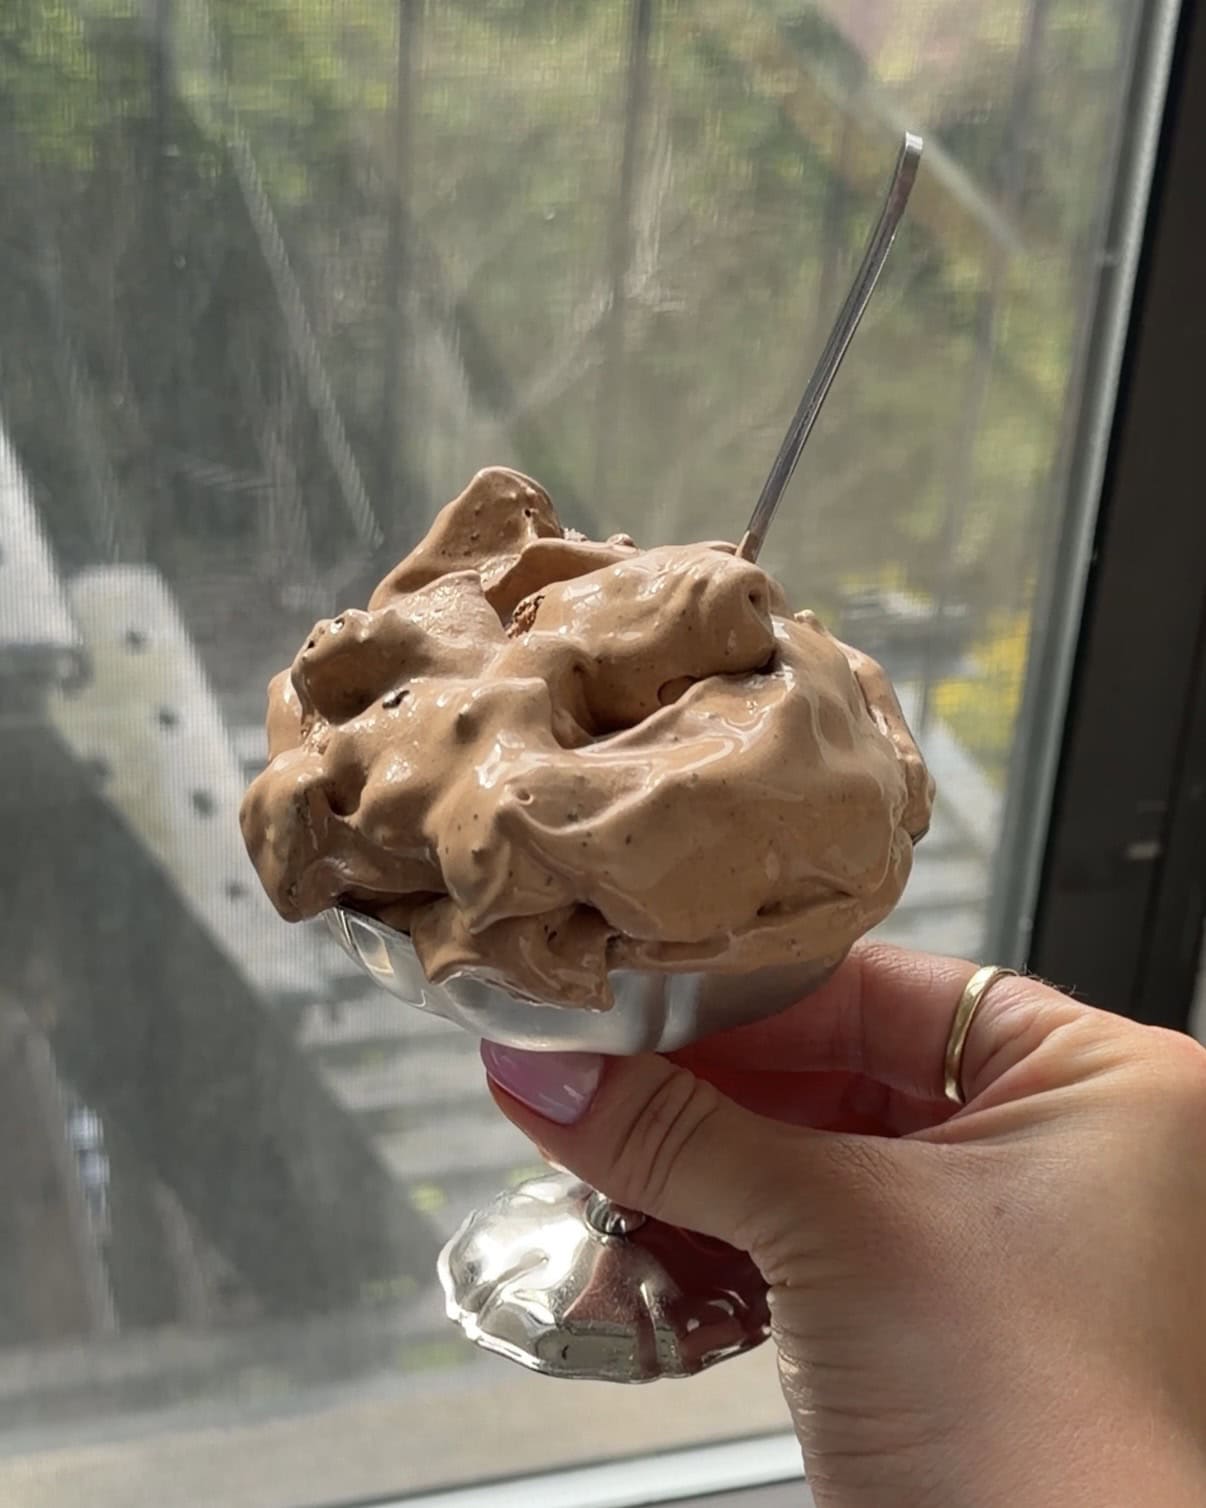
- Ideally leave the ice cream to freeze overnight but if you’re in a pinch you can always serve it as soft serve in a bowl on the same day.
Ingredients
- Milk: I prefer to use whole milk for ice cream but skim or 2% will work in a pinch. The milk will affect the taste so this is a great time to buy high quality milk!
- Egg yolks: Egg yolks are a key part of this custard ice cream base – don’t leave them out!
- Sugar: White granulated sugar is important for not only the flavor but also the texture. I do not recommend decreasing the sugar volume in this recipe as it will directly impact the texture of the ice cream.
- Corn Starch: Starch creates a creamier, smoother ice cream base!
- Heavy Cream: Heavy cream or heavy whipping cream will work for this!
- Vanilla Extract: A little vanilla adds a little flavor and enhances the sweetness of the ice cream.
- Salt: Salt balances out the sweetness and enhances the flavors in the ice cream.
- Cocoa Powder: 100% natural cocoa powder is best for this recipe!
- Chocolate: It’s important to use a high quality chocolate bar such as ghirardelli or tony’s chocolonely for the base of the ice cream. I like to use anything between 60%-75%.
- Chocolate Sandwich Cookies: Any brand of chocolate sandwich cookies work for this ice cream. Feel free to use gluten free if you want the recipe to be gluten free!
How to make Chocolate Cream Pie Ice Cream
*Check the instructions for your ice cream maker and make sure to freeze any elements that need to be frozen the day before making this ice cream!
Chocolate Ice Cream Base
- Chop up the chocolate bar and place it in a large heat safe bowl. Place a fine mesh sieve over top of the bowl and set aside.
- In another medium mixing bowl, add in the egg yolks and starch and whisk until smooth. Set on top of a damp rag on your work surface so it won’t slide around.
- In large pot add in all of the milk, sugar, heavy cream, salt, cocoa powder, and vanilla. Heat over medium low heat on the stove, whisking frequently, until just beginning to simmer. The cocoa powder and sugar should have dissolved!
- Once just beginning to bubble, remove the pot from the heat. While continuously whisking the egg yolks, slowly pour in the hot chocolate milk. Once it’s all been added, pour it back into the pot and heat over low heat (medium low if an electric stove). The mixture will already have started to thicken but you’ll just want to cook it for about 5 minutes over low heat ensuring the cornstarch has been cooked out.
- Remove the pot from the heat again and pour it through the fine mesh sieve into the large bowl with the chocolate.
- Remove the sieve and whisk to combine until smooth. Lay a piece of plastic wrap over the surface and let it come to room temperature.
- Once cooled, transfer it to the fridge to cool completely overnight.
Churning & Freezing
- Set up your ice cream maker according to the instructions.
- Turn the ice cream machine on and pour in the chocolate cream base. Leave the machine running until it looks like soft serve. This will take about 10-15 minutes depending on the machine.
- While the ice cream is churning, smash the cookies in a medium mixing bowl with a wooden spoon.
- Once the ice cream is churned and ready, stop the machine and pour in the crushed cookies. Fold to combine.
- Pour the mixed and churned ice cream into whichever container or dish you want to store it in.
- Place in the freezer for a minimum of 6 hours or up to overnight to firm up. If you’re in a pinch or just feeling impatient, you can totally serve it immediately as more of a soft serve situation.
- Store in the freezer and take out as needed. Allow it to sit for 5-10 minutes at room temperature before scooping.


Chocolate Cream Pie Ice Cream
Equipment
Ingredients
Chocolate Ice Cream Base
- 114 grams 60% chocolate
- 6 egg yolks
- 10 grams corn starch
- 450 grams whole milk
- 450 grams heavy cream
- 250 grams granulated sugar
- 1 teaspoon fine sea salt
- 2 teaspoons vanilla extract
- 35 grams cocoa powder natural
Add Ins
- 250 grams chocolate sandwich cookies
Instructions
- *Check the instructions for your ice cream maker and make sure to freeze any elements that need to be frozen the day before making this ice cream!
Chocolate Ice Cream Base
- Chop up the chocolate bar and place it in a large heat safe bowl. Place a fine mesh sieve over top of the bowl and set aside.
- In another medium mixing bowl, add in the egg yolks and starch and whisk until smooth. Set on top of a damp rag on your work surface so it won't slide around.
- In large pot add in all of the milk, sugar, heavy cream, salt, cocoa powder, and vanilla. Heat over medium low heat on the stove, whisking frequently, until just beginning to simmer. The cocoa powder and sugar should have dissolved!
- Once just beginning to bubble, remove the pot from the heat. While continuously whisking the egg yolks, slowly pour in the hot chocolate milk.
- Once it's all been added, pour it back into the pot and heat over low heat (medium low if an electric stove). The mixture will already have started to thicken but you'll just want to cook it for about 5 minutes over low heat ensuring the cornstarch has been cooked out.
- Remove the pot from the heat again and pour it through the fine mesh sieve into the large bowl with the chocolate.
- Remove the sieve and whisk to combine until smooth. Lay a piece of plastic wrap over the surface and let it come to room temperature.
- Once cooled, transfer it to the fridge to cool completely overnight.
Churning & Freezing
- Set up your ice cream maker according to the instructions.
- Turn the ice cream machine on and pour in the chocolate cream base. Leave the machine running until it looks like soft serve. This will take about 10-15 minutes depending on the machine.
- While the ice cream is churning, smash the cookies in a medium mixing bowl with a wooden spoon.
- Once the ice cream is churned and ready, stop the machine and pour in the crushed cookies. Fold to combine.
- Pour the mixed and churned ice cream into whichever container or dish you want to store it in.
- Place in the freezer for a minimum of 6 hours or up to overnight to firm up. If you're in a pinch or just feeling impatient, you can totally serve it immediately as more of a soft serve situation.
- Store in the freezer and take out as needed. Allow it to sit for 5-10 minutes at room temperature before scooping.
Notes
- High quality milk such as Maple Hill or Ronny Brook will make a huge difference for the base flavor of the ice cream!
- Similarly, high quality chocolate bars are key for a smooth chocolate base. Don’t use chocolate chips for melting into the base as they won’t melt properly.
- Make sure the ice cream machine bowl has frozen for the full amount of time listed in the instructions. The ice cream base also needs to be FULLY chilled. If either element isn’t the correct temperature, it won’t churn properly.
- I haven’t tested this as a no churn ice cream so for now you will need an ice cream maker but this stand mixer attachment makes it super easy!
- Don’t over churn the ice cream. The mixture should look like a very soft, soft serve. If you let it go too long, the ice cream won’t be nice and smooth.
- Ideally leave the ice cream to freeze overnight but if you’re in a pinch you can always serve it as soft serve in a bowl on the same day.
This page may contain affiliate links. This means that if you click on one of the product links above and complete a purchase, I’ll receive a small commission at no extra cost to you. I will never place a link nor make a recommendation on a product or service that I don’t love or use personally. Read our privacy policy here. Thank you for supporting Red Currant Bakery.